


18 files
-
A tool with a built-in mod manager that checks your LML folder for any conflicting mods that edit the same files. Now with an auto-merge tool!
Now there is no need to manually search through your mod folders to check for conflicts! This simple tool will iterate through the mods in your LML folder and check for any duplicate file names. It will then list the files that are conflicting, the mods they are being edited by, and where they currently are in the load order.
Version 1.4.0 out now with an ASI mod manager, a merge tool (BETA) and other major improvements! Please read the guide here before using the merge tool. I have released it in Beta as it is impossible for me to test merges across every single game file, so your feedback is always appreciated!
There are two download options for LMCCT:
LMCCT - Installer
The tool must be installed before you can run it. LMCCT - Portable
Download and run, no need for installation. You only need to download one or the other.
I made the decision to move away from a single standalone .exe file due to issues with false positives on VirusTotal and older versions of Windows Defender, which is typically the case with standalone Python .exe files. The only difference is that LMCCT.exe must remain within the 'LML Mod Conflict Checker Tool' folder (where the lib and share folders are), just like a typical portable program. Alternatively you can just use the installer, which can also create Start Menu and Desktop shortcuts for you.
If you find any bugs, be sure to report them to me. I have many more features planned for the future.
- 4,538 Downloads
- 23153 Views
- 37.31 MB File Size
- 2 Comments
 Updated
 -
 Updated 10/28/2024
This tutorial contains basic explanations, examples, a (mostly) translated version of physicstasks.ymt, a (mostly) translated version of weapons.ymt, templates for Euphoria messages and parameters, all messages as Notepad++ snippets and a mod template for LML!
Everything you need to know to create your own Euphoria mod for RDR2 and GTA5!
Simply download the .zip file, open it, and click on installation.pdf to get started!
-
 This is my first time making a reshade preset and i wanted to share it.
If You Dont Like It Do Not Download It.
this reshade preset builds on something that is already great. starting off i did'nt know what i want to improve since so much already was with https://www.razedmods.com Visual Redemption Graphical Mod. So i went with color, i wanted to kinda build off of it so i went with black since i play with my brightness to the max i felt that the blackness is the game was a little to light and not dark enough to i wanted to change that. hope anyone who read/downloads this likes it. thank you.
i recommend playing 1440p
and turning you brightness up
also using a few https://www.nexusmods.com/reddeadredemption2/users/5534143?tab=us wickedhorseman's upscaled mods.
My Specs
GPU: RTX 3070
CPU: I7 10700F
RAM: 32GB
MONITOR: 32 INCH CURVED 240Hz (Also using G-Sync/FreeSync)
install
just drag and drop in you root folder
- 6,538 Downloads
- 58874 Views
- 5.4 kB File Size
 ZinqBypass in ToolsUpdated
 -
 This is a tool for making NPCs say speech lines (usually needed when looking for certain lines for NPCs to speak).
Installation
Download and install a Script Hook and an Asi Loader of your choice. Drag and drop the files into your game directory (SpeechLinesTester.asi, SpeechLinesTester.ini, SpeechLines.txt). Start your game.
What does this mod do?
This mod reads the speech line names from the file "SpeechLines.txt" and forces NPCs around the player to play the first line.
Via hotkeys you can iterate through the lines in the file (hotkeys and other settings can be changed in the "SpeechLinesTester.ini" file).
There is also an on screen display of the currently played line name.
You can find speech line names here: https://www.rdr2mods.com/wiki/speechlines/
Why?
I needed this when making PDO and finally found the time to clean it up a little. Maybe someone else can make use of it as well.
Source: https://github.com/HJHughJanus/SpeechLinesTester/
-
 PhotoDeputy is a highly useful program that converts Rockstar's file format for Red Dead Redemption 2 into a usable image format, without any need to go through Rockstars' social club, it is also completely open source if you don't feel comfortable running the compiled executable, you can see the source here , github will always have latest version even if this page does not.
See Video Example Here
Features
- Browse image files in a selected folder
- Preview images with options to view in full size
- Convert images to different formats (JPEG, PNG)
- Automatic naming of files using there meta information [ex: Heartlands_2023-08-06-03-42-13.jpg] [version 1.1.0]
- View `meta` information [version 1.1.0]
Usage
- Launch the application.
- Use the "File" menu to select a folder containing images.
- They are usually found at `\Documents\Rockstar Games\Red Dead Redemption 2\Profiles\[YourProfileName]`
- Browse and preview images in the list box
- Click save button to convert individual photos can be saved as jpeg or png.
- Convert images in bulk using the "Convert Folder" option in the "File" menu.
- Right-click on file in the list to view its `meta` information [version 1.1.0]
You must first select a folder via the select folder option in the file menu then select convert folder
- 368 Downloads
- 9463 Views
- 71.02 MB File Size
 Updated
 -
 NOTE: THIS ADD-ON IS A WORK IN PROGRESS. DESCRIPTIONS OF FEATURES ON THIS PAGE REFLECT PLANNED FUNCTIONALITY. SEE THE "CURRENT CAPABILITIES" SECTION BELOW FOR WHAT THE ADD-ON CAN DO RIGHT NOW.
NOTE 2: ONLY BLENDER 3.2 IS SUPPORTED AT THIS TIME! This is due to Python versioning issues. It will be resolved in the future, but for now ONLY Blender 3.2 is supported.
RedDeadBlend2 is an add-on for Blender that allows the user to import, modify, and export drawable (YDR) and drawable dictionary (YDD) model files from the PC version of Red Dead Redemption 2.
Fragment (YFT) model file support is eventually planned, but it is not currently a priority.
Main repository: https://github.com/Sage-of-Mirrors/RedDeadBlend2
Installation
In Blender, go to Edit -> Preferences. Click the button the left-hand side that says "Add-ons." Click the button in the top-right that says "Install..." Select the RedDeadBlend2 ZIP file and press "Install Add-on".
You should now find a sub-menu under File -> Import labelled "Red Dead Redemption 2". Use the options under this menu to load your desired files.
Current Capabilities
Importing YDR: Geometry (vertex & face data) Normals Vertex colors Tex coords Skeleton (joints & vertex skinning) Importing YDD: Most of the YDR features above except skeletons, in some cases; dictionaries are tied closely to fragments
Roadmap
YDR
Basic geometry importing (COMPLETE) Skeleton importing and vertex skin setup (COMPLETE) Shader and shader parameter importing Shader selection and shader parameter editing Basic geometry exporting Skeleton exporting Shader and shader parameter exporting Expression importing Expression exporting
YDD
Expand YDR support (COMPLETE) Importing contained YDRs (COMPLETE) Exporting multiple YDRs
Changelog
Beta 2:
Update YDR loading to include normals, vertex colors, and tex coords. Also implement basic YDD importing. Only works with Blender 3.2 due to Python versioning shenanigans. Beta 1:
Initial release. Includes only geometry and skeleton importing, and may be unstable. Only works with Blender 3.2 due to Python versioning shenanigans. -
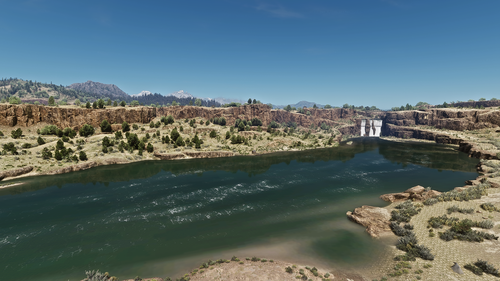
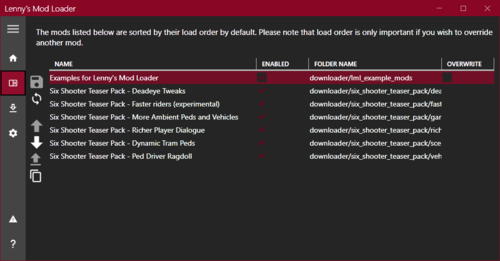 The general idea of Lenny's Mod Loader is to provide an easy way to modify the game. In its current state for RDR 2 it will allow you to replace any file in the game, whether they are streaming files such as models or data files, font files etc. It also includes full UI support akin to the GTA V version.
The three screenshots show replaced assets, replaced font and an altered meta file to change the police response in Valentine to Saint Denis police. These are all provided in an example download, see "Examples" further down below for more information.
Installation
1.) Copy all files from "ModLoader" into your RDR 2 game root folder so that files such as vfs.asi are in the same folder as your RDR2.exe.
2.) The Mod Manager folder can be anywhere and does not need to be inside the game folder.
3.) New mods go into lml folder or use the button "Download with Mod Manager" on the mod website if it is supported (see installation video for an example).
Beta 11 highlights - Data file merge and manifest support
A few new exciting features are part of this update. First, support for overriding files used very early during game load has been improved significantly. While I hope that this does not cause any side-effects, please let me know if mods that worked well previously no longer function correctly. For instance, it was not possible in previous versions to override the skydome textures to change the moon. Thanks to @VideoTech for testing.
Second, data file loading allows you to separate your changes to certain files, such as assets_* or metapeds into individual files so that you no longer have to modify the existing one (effectively merging them). This should make it a lot easier to create mods such as custom peds since you can contain most changes to separate files. Please note that this does not magically work for all games files but only those where the internal game parser supports additions (so no catalog for instance). In addition, custom manifest files for peds and maps are supported now. The ped support has been tested extensively, but map support will only really become useful once CodeX can generate these files for you. An example for these features is provided in the download courtesy of BHmaster.
Beta 9 highlights
Very much a maintenance update, this version hopefully fixes the random DRM integrity crashes. Thanks a lot to @calledme.kev who spent tens of hours testing various builds to find the issue! It also adds a lot of caching for collection calls that rely on read-only data, so LML should be a little less demanding.
Beta 8 highlights
This version adds a few new features such as allowing you to override the _manifest.ymf and _cache.ych files found in RPFs. Support to replace hashed files has also improved and now includes ymaps among other file types. The streaming folder now loads pso files, such as ymap, as text files, too. Most data files that are forced to be loaded as pso by the game have been patched to support being loaded as text files, such as cameras.ymt or the archetype definitions. Due to heavy refactoring to improve startup performance, previous builds are still made available. See changelog for more details.
Ymap & Ytyp support (beta 7)
This version introduces experimental support for ymap and ytyp. Two very simple examples are included that move some of the blue barrels around Valentine (check behind the saloon) via a different ymap and that make the lights inside the Saloon much brighter (ytyp - thanks to Modifiver). For ymap modifications, if you unload the imap via script and modify the file on disk, the changes will be applied on reload so no need to restart the game.
Bk2 support (beta 7)
Bink files were technically already supported in previous versions but caused some problems. In the current version they still behave somewhat differently in that they need to have two '.' in their file name as the extension '.bk2' is part of the actual file name. So name your file "movie.bk2.bk2" to make sure it gets replaced correctly. An example for replace would be "replace\movies_0\movies\filename.bk2.bk2".
Settings file (beta 7)
A settings file has been added that is to be placed in the game's root folder and called lml.ini. It is mostly geared towards developers and allows for more verbose logging output (or less..) making it easier to identify files you want to replace. If you set the log level to 0 you can see most of the game's requests to load files and it should be much easier to correctly identify the path you want to replace. Please note that many files are only loaded via hash and not via their name. You can also choose to disable the streaming and replace folders if you do not use them for added performance.
Ymt support (beta 5)
The biggest new feature in this update is the support for ymt file editing even if the source file contains unknown hashes. In order to replace a file, export the ymt to xml with OpenIV and then either use replacement via install.xml or the replace folder to replace the original file. Since you are replacing the ymt file, make sure that your file also has the ymt extension even though it contains xml. For the replace folder method you also need to match the file name. Now you can edit the file in plaintext and the game will treat it as a ymt with all names fixed up when loading. See the included examples for more information.
If you do end up finding a file where you feel that it is not properly fixed up by LML (for instance when exporting the file directly from OpenIV without any changes breaks the game), please let me know. The only file I know of that will currently cause problems is weapons.ymt, but this is not due to LML but because of an export bug in OpenIV which cuts off certain weapon flags. The High-Roller revolver example has these flags manually restored and hence works fine, but this is not the case when exported directly from OpenIV. I have notified the team and trust that they will fix this export problem in the future. Until then you will have to manually inspect the ymt, gather the flags and restore them manually in the xml for weapons if you plan to use them. Please note that this requires advanced knowledge of game structures.
Ymt Examples
This download comes with extensive examples courtesy of @Modifiver that modify various aspects of the game. Check them out in the included examples folder and copy them to your lml folder to try them out!
Upgrading from earlier LML versions without install.xml support (beta 2 and earlier)
This version of Lenny's Mod Loader introduces install.xml files to instruct LML on how to load your mods. Thus, mods can be separated in folders and no longer require nested folder structures. This is a proven concept from our GTA V version and has now been ported over. You can still use the replace and stream folder under your lml folder. Please note, however, that the Mod Manager UI will only pick up mods that use the new install.xml system so it is recommended to convert your mods to the new system. Only mods using install.xml support Download with Mod Manager. Consult the examples below to learn how to use the new system.
Examples
You can find more examples by @Modifiver here:
https://www.rdr2mods.com/downloads/rdr2/mods/80-modifivers-six-shooter-teaser-pack/
More examples with detailed documentation on the new install.xml system can be found here:
https://www.rdr2mods.com/downloads/rdr2/mods/77-examples-for-lennys-mod-loader/
Verify your file got replaced
If you feel that your file is not being replaced properly, have a look at the log file and see if you can find any entry related to it. Perhaps the path was not correct and hence it did not work. Search for "replaced" for files in replace and "adding" for files in stream.
Support
Since this is the first release for RDR I expect there to be quite a few problems and certain files might not work as expected. If you have trouble replacing specific files, please do not hesitate to comment here or reach out and include your modified file and file structure so I can have a look.
Installation Video
Please find a detailed installation video including a guide through our examples here (thanks to @Gan Ceann)
Detailed explanation of stream vs replace (older versions)
In the lml folder you can find two subfolders, one called "replace" and one called "stream". Both can be used for the same thing but replace is ultimately more powerful, but also more advanced. The stream folder you might recognize from Map Editor or Rampage Trainer and just loads streaming files directly.
Stream
As mentioned, similar to other tools available this merely loads streaming files into the game when the game is loading. For instance, model or texture files would go in there and will replace the existing assets in the game. If you do not know the name of an asset, but only its hash, simply name it 0xhash.ext (e.g. 0x9E54B506.ytd for w_melee_machete01+hi.ytd) and it will still be recognized and replace the asset correctly.
This is the most convenient way to quickly replace streaming files as you do not have to worry about where in the game files they are located but only their name.
Replace
This folder creates a virtual mapping of the entire game file structure and hence allows you to replace any game file, granted you know its full location. This is similar to the paths you can see in OpenIV when navigating RPFs, but not exactly the same. If you want to change the dispatch.meta file for instance, you will need to modify it in update.rpf, as the one in common.rpf is superseded by that. To do that, you would create the following structure: "replace\update\common\data\dispatch.meta". This is exactly the path you would use in OpenIV (without the .rpf ending for update). Now, whenever the game wants to access this file, it will load yours instead. It is that simple!
If you want to replace the font file font_lib_efigs.gfx in scaleform_frontend.rpf for instance, you would create the following structure: "replace\update\x64\patch\data\cdimages\scaleform_frontend\font_lib_efigs.gfx".
Word of caution: File paths do not always match their RPF names unfortunately, hence this is a bit more advanced but also allows greater control. Say you want to replace player_zero_coat_001_open.ydd which is present in both packs_1.rpf (original) and dlc.rpf (from patchpack001, an update to the file). Files DLCs follow a slightly different pathing scheme. The full path to this file would be "replace\dlc_patchPack001\x64\packs\base\models\component_models\player_zero_coat_001_open.ydd". As you can see, it does not match the file path directly, which is also why for many files using the stream folder is just simpler. This is because the game maps some files differently and when you open the dlc.rpf (in patchpack001) and its setup2.xml you will see why: the device name is dlc_patchPack001 which is the "root" of all files inside this archive. Thus the path starts at "dlc_patchPack001" and then follows the RPF structure until you arrive at "replace\dlc_patchPack001\x64\packs\base\models\component_models\player_zero_coat_001_open.ydd". Not that complicated, but certainly not as easy as the streaming folder and something to look out for.
Acknowledgements
Thanks to NTA for his work on fwEvents, hooking, fiDevice and sysAllocator
Thanks to listener for his work on fiDevice and advice over the years (hope you are well!)
Thanks to the OpenIV team for OpenIV
Thanks to dexyfex for CodeWalker
Thanks to Gan Ceann, Will and GameRoll for testing as well as Jewels, GuiCORLEONEx794, jack.sharif and Modifiver for providing example assets
-
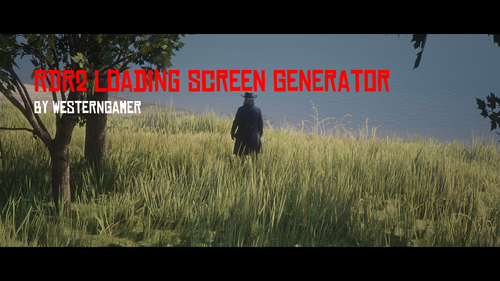 This tool allows you to create custom loading screens and configure settings for each slide.
How to Create a Custom Loading Screen Mod
1. Open the app from the .exe file. For computers that have common file extensions disabled, it would be called RDR2LoadingScreenGenerator (without the .exe at the end).
2. Enter the name, the author, the version (Default is 1.0.0), an optional link to the mod page, and optional metadata.
3. Import images by clicking on Edit at the top left, then click Import. The program only supports PNG and JPEG image files. You can import multiple images at the same time by selecting multiple image files.
4. Optional - Select an image from the list in the middle. A preview of the image will appear on the top right. You can configure settings for the picture right below the picture itself.
5. When you are done configuring settings for the pictures, you can create a LML mod by clicking on File>Export. You can also export as a zip if you are planning on transferring the mod over the internet.
6. A window should appear, telling you what folder to put the mod in. You can put it anywhere, but if you want the test the mod, go to your RDR2 installation, and select the lml folder. (If you don't have an lml folder, make sure that you have LML installed.) Now click Select Folder and your mod should be inside the lml folder.
7. Open RDR2 to see if the loading screen images are now custom.
Notes
Cynet may flag RDR2LoadingScreenGenerator.dll as malicious. This is a false positive.
- 322 Downloads
- 9795 Views
- 303.34 kB File Size
 Updated
 -
 Photo Mode Converter 🚀
This app allows you to convert local images from the game without having to upload them to Social Club.
Features:
An auto installer (one-click to run) Fast performance Lightweight Simple and easy to use
How to use it?
Download the setup file and run it. You can now access the app from Start Menu. Specify the folder where your local photos are stored (depends on the version: Steam, Launcher, ..) Click "Convert" and wait for a few seconds .
How does it work?
In essence, it repairs the broken* JPEG files generated from the game using Syping's Rage Photo Library. Kudus to him for building such library in the first place.
A must note is that this is the first version, and therefore, bugs are expected. Feel free to report them at Github.
- 1,902 Downloads
- 23018 Views
- 17.5 MB File Size
- 8 Comments
 pointerboy in ToolsUpdated
 -
 How it works:
This is basically Neodymium's GTA5 Texture toolkit but only with the components to create a texture file (.ytd). This means that you can't export the files from "ytd" files but you can do that with OpenIV. You can't also load "ytd" files. This program also uses the RedM "ytd" file converter from the RedM client to convert the files to the "ytd" format that RDR2 recognizes. This is NOT included with the program. There are existing ways to make RDR2 Ytd files but this tool makes it more easy and not as tedious.
How to Use:
After opening the program, click File>New. Now you can import files by clicking Edit>Import. NOTE: The program only accepts DDS files explicitly. This means if the file ends in .dds but wont open in the program, the file is not in DDS format even if it ends in .dds. If you need to delete a unwanted image, select the image you want to delete then click Edit>Delete. When you are ready to create a new "ytd" file, click File>Save. Select the folder to put the "ytd" file in. Two "ytd" files will be created. The"ytd" file that has "_nya" in it, is the file that can be used in RDR2. You can delete the other file. The "ytd" file that has "_nya" in it, can now be renamed to whatever you want and can now be used in Lenny's Mod Loader.
How to install:
Before installing, please read the Requirements section to see what you will need before installation.
NOTE: If the files are not downloadable e.g. false positive on virus scan, then download from GitHub mirror under the mirrors section.
Portable install:
NOTE: Only downloadable on GitHub because virus scans always get a false positive on this tool. Go to mirrors and click on GitHub to go to the download page on GitHub.
This is for short term use only.
1. Download RDR2 Texture Toolkit Portable then extract the files to a folder.
2. Run the exe file.
3. Follow setup instructions.
4. Done!
Package install (deprecated 😞
This is for long term use and will actually install the program.
NOTE: This will not work if you are on a version of Windows 10 earlier than version 2004.
1. Download RDR2 Texture Toolkit then extract the files to a folder.
2. Click on the .cer file. Then follow the instructions on screen. This is to allow you to install the program.
3. Click on the .msixbundle file.
4. Click install. If it does not allow you to install, repeat step 2, but select Local Machine in the prompt. If all fails, use the portable version.
5. Run the program.
6. Follow setup instructions.
7. Done!
How to update the tool:
These instructions will tell you how to update the tool.
1. Download the latest version of RDR2 Texture Toolkit then extract the files to a folder.
2. Click on the .msixbundle file.
3. Click update. If it does not allow you to update, click on the .cer file. Then follow the instructions on screen. This is due to the .cer file being expired.
4. Done!
Mirrors:
If you cannot download the tool or need the portable version, here is the list of mirrors available
Github Nexus Mods
How to Report a bug/issue:
If you find a bug/issue, please report it Here. Do not report it as comments as these kinds of reports can be hard to find when there are many comments.
Credits to:
Neodymium for his code on GitHub and the original GTA5 Texture ToolKit. CitizenFX for the conversion tool or this program would not exist. Converter is NOT included with the tool.
Links:
Source Code GitHub Profile
Requirements:
RedM by CitizenFX: Required to for this tool to work.
Permissions:
Credits and distribution permission
Other user's assets All the assets in this file belong to the author, or are from free-to-use modder's resources.
Upload permission You can upload this tool to other sites but you must credit me as the creator of the file.
Modification permission You are allowed to modify my tool and release bug fixes or improve on the features so long as you credit me as the original creator.
Conversion permission You can convert this file to work with other RAGE engine games as long as you credit me as the creator of the tool.
Asset use permission You are allowed to use the assets in this tool without permission as long as you credit me.
Asset use permission in mods/files that are being sold You are allowed but discouraged to use assets from this file in any mods/files that are being sold, for money, on Steam Workshop or other platforms.
License:
MIT License
Copyright (c) 2021 WesternGamer
Permission is hereby granted, free of charge, to any person obtaining a copy
of this software and associated documentation files (the "Software"), to deal
in the Software without restriction, including without limitation the rights
to use, copy, modify, merge, publish, distribute, sublicense, and/or sell
copies of the Software, and to permit persons to whom the Software is
furnished to do so, subject to the following conditions:
The above copyright notice and this permission notice shall be included in all
copies or substantial portions of the Software.
THE SOFTWARE IS PROVIDED "AS IS", WITHOUT WARRANTY OF ANY KIND, EXPRESS OR
IMPLIED, INCLUDING BUT NOT LIMITED TO THE WARRANTIES OF MERCHANTABILITY,
FITNESS FOR A PARTICULAR PURPOSE AND NONINFRINGEMENT. IN NO EVENT SHALL THE
AUTHORS OR COPYRIGHT HOLDERS BE LIABLE FOR ANY CLAIM, DAMAGES OR OTHER
LIABILITY, WHETHER IN AN ACTION OF CONTRACT, TORT OR OTHERWISE, ARISING FROM,
OUT OF OR IN CONNECTION WITH THE SOFTWARE OR THE USE OR OTHER DEALINGS IN THE
SOFTWARE.
- 2,977 Downloads
- 39872 Views
- 4.74 MB File Size
- 1 Comments
Updated -
 A simple ASI Loader for Red Dead Redemption 2 to easily load your custom code into the game.
Files are loaded after Arxan has finished its decryption stage so you can search for your favorite patterns right away!
Installation
Put version.dll in your game root folder. When the game launches, you should hear a few beeping sounds indicating that it got loaded.
Not supported for RDR Online. Remove the ASI Loader file (version.dll) before playing Online.
Native fixes (build 1436)
Game build 1436 on July 13 2021 removed a few natives used mostly for text rendering making any mod using those crash. The ASI Loader update 0.2 fixes that by re-implementing the following natives with their original hashes. You still need a script hook!
DISPLAY_TEXT
SET_TEXT_COLOR
SET_TEXT_CENTRE
SET_TEXT_SCALE
SET_TEXT_DROPSHADOW
TASK_EVERYONE_LEAVE_VEHICLE
Let me know if any of those do not work as expected. Thanks to fingaweg for their help.
Uploaded for www.mod-rdr.com, please do not upload it anywhere else.
-
I had a hard time getting all this working but now it does. Make sure you have typescript installed to use this or just take the .js files. This is over commented and made for beginners looking to learn. My terminology might not be 100% in the comments but the goal here is to pay it forward. ENJOY!! See README.md
In the background video, for the loop to work you need to add a playlist. Add this at the end of that link “&playlist=cJp307Ugeyk”
- 214 Downloads
- 12115 Views
- 10 kB File Size
 Save5Bucks in ToolsUpdated
 -
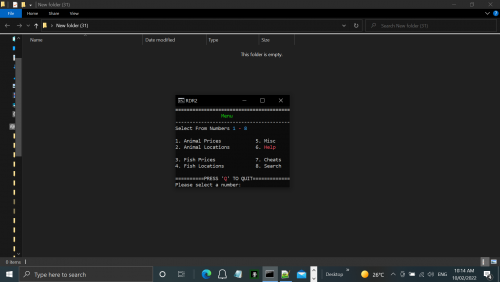 this is a nive little backround tool the keeps prices and locations at the ready
this was a project i started while stuck in Covid-19 lockdown it was ment to be made
just for my personal use but i thought i would put some more work into it and
share it with the RDR2 community
enjoy..
-
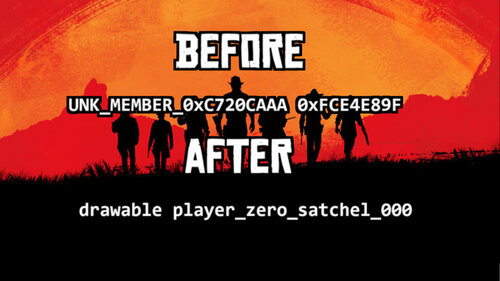 This tool converts YMT data from hashes to human readable entries. Not ALL entries are known yet, but quite a large amount.
Thank you to users rollschuh2282 and Bob Ross for providing archive items and data lines.
-
STILL IN ALPHA STATE. EXPECT ERRORS, CRASHES, ETC
Discuss in the designated forum on mod-rdr
This is an ASI plugin for Red Dead Redemption 2, ported from ScriptHookVDotNet, based on the C++ ScriptHook by Alexander Blade, which allows running scripts written in any .NET language in-game.
USAGE
Copy ScriptHookRDRDotNet.asi, ScriptHookRDRNetAPI.dll, AND ScriptHookRDRDotNet.ini to your RDR2 Install folder.
Install scripts to /scripts/ folder inside root folder
Join the official Red Dead Redemption 2 Modding Discord for the latest information about Red Dead Redemption 2 PC mods
Requirements
C++ ScriptHookRDR2 by Alexander Blade
.NET Framework ≥ 4.6
Visual C++ Redistributable for Visual Studio 2019 x64
The source for this project is on Github here
Credits
Crosire (ScriptHookVDotNet)
Jedijosh920 - lots of help
-
 With OpenIV 4.0 we introducing very basic level of support for Red Dead Redemption 2. First of all, currently, there is no editing capabilities. With OpenIV 4.0 you will not be able to edit any RDR 2 files.
Since this is our first release with Red Dead Redemption 2 support, available features also very limited. With OpenIV 4.0 you can:
Open and view RDR 2 RPF archives. (Not all file names are available, see below) Open and view RDR 2 Textures (.ydr) Open and view RDR 2 META/PSO files (.ymt, .ymf, .yas, .ych, .ymap .ytyp) Open and listen to RDR 2 Audio files (.awc) Open and view RDR 2 Language files (.yldb) Support for Red Dead Redemption 2 will be expanded in the future versions.
Learn more on the OpenIV website!
-
 Develop modifications for Red Dead Redemption 2 in your favorite .NET language such as C#! Get it over at http://ragepluginhook.net/Downloads.aspx
What is RAGE Plugin Hook
RAGE Plugin Hook, as the name suggests, hooks into RAGE engine (Rockstar Advanced Game Engine) based games and allows developers to write plugins for the games in C#, VB.NET or any other .NET language.
That was the original idea behind the name. We started working on RAGE Plugin Hook before GTA V was released, and the original internal hook was made for Max Payne 3 as it was the closest thing we had to GTA V to prepare.
But when GTA V came out, the engine had changed quite a lot, and more importantly, GTA V was 64-bit, while Max Payne 3 was 32-bit. And at the time, we decided to scrap the Max Payne 3 part, and focus on just GTA V, with the hopes that in the future, we’d be able to support multiple games as originally intended.
Well, that time has now come, and a preliminary version of RAGE Plugin Hook is now available for Red Dead Redemption 2.
We also have some stuff to announce about Max Payne 3 at some point in the future 😉
Using RAGE Plugin Hook for non-developers
To use RAGE Plugin Hook. Extract the contents of the downloaded .zip directly into your game folder.
Plugins are installed into the “C#Plugins” folder.
Then launch RAGEPluginHook.exe. On the first run, you can choose whether to load all plugins, specific plugins, or none.
Once the game has fully loaded with RAGE Plugin Hook, you can press F5 (by default) to open the console. Here you can type various commands, like SetTimeOfDay, SetWeather, TeleportToPosition, TeleportToWaypoint, etc. Use the LoadPlugin command to load plugins.
NOTE: If you plan on using the console or developing, we recommend running the game in borderless mode!
NOTE: There’s currently an issue where the game will crash if you attempt to load a save.
Developer Information
If you’re not a developer, you can stop reading now, unless you’re interested in technical and development stuff.
It’s been a lot of work making support for multiple games for RAGE Plugin Hook, and we actually started working on multi game support before Red Dead Redemption 2 was even announced for the PC.
It’s not been a “from scratch” kind of thing. We’ve had a massive API and backend that’s been so far tailored to GTA V, and it’s taken time to make this release possible, as unlike when making a piece of software like RPH from scratch for one new game, we’ve had to comment out and modify a lot of the backend code just to get it running for a game it wasn’t originally intended for.
As such, the initial release is a simple native invocation hook (script hook, if you will), but with a few extras, like the vector classes, MathHelper class, etc. and a temporary API class called TempApi which contains a bunch of properties and methods to make things a little easier, until we can get the proper API up and running. There may also be certain console commands that don’t work at all, or error out for now.
The following types are available in the preliminary API:
Rage.TempApi
Rage.Attributes.PluginAttribute
Rage.GameFiber
Rage.Debug
Rage.Model
Rage.MathHelper
Rage.WeatherTypeIndex
Rage.WeaponHash
Rage.Vector2
Rage.Vector3
Rage.Quaternion
Rage.Rotator
-
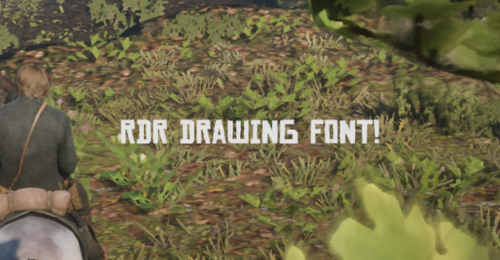 A useless tool for Developers who want to draw text with changing fonts, justification, and wrap for their mods
/* Instructions to apply for your mods for Beginner */
1. Determine your Visual Studio Toolset Version (Project -> Properties -> Platform Toolset)
2. Place the library (MeongDraw.v14x based on your platform toolset and the header (Meong.h) somewhere in your mod's folder
3. Open a source file, prefer precompiled header source (usually pch.cpp)
4. Write on top of your selected source file and write "#pragma comment(lib, "path_to_where_you_put_the_lib")"
5. Include Meong.h somewhere in your source file or a precompiled-header (this one's the .h/.hpp file)
6. In your ScriptMain (the function you registered when calling scriptRegister), put meong::initialize(); OR meong::mulai_atau_saya_culik(); before calling main(), you can use either one it doesn't matter
7. Now you can just call meong::set_text_justification or meong::set_text_font or meong::set_text_wrap before drawing your Text.
/* FAQ */
Q: Help, I use v140 and i don't have the file for it
A: Unfortunately, you'll gonna need to look at Optimization (Project -> C++ -> Optimization -> Optimization -> Disabled (/Od)
Q: The answer above still doesn't work
A: Then you'll need to get a newer Visual Studio version
Miyu, 2k19, Keep calm and keep loving memek & kontol gede