


111 files
-
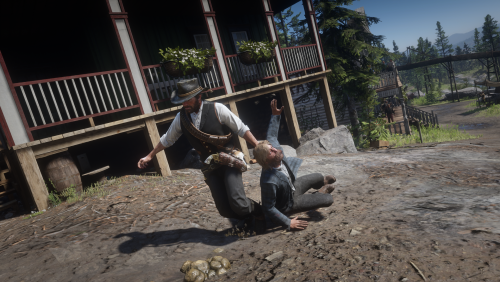
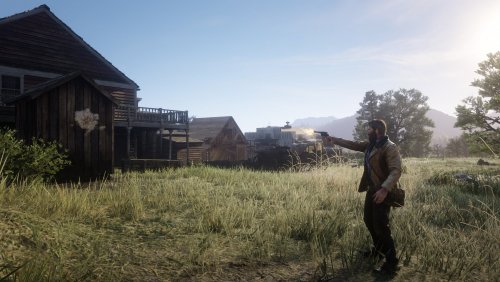
 Lenny's Simple Trainer is a mod for Red Dead Redemption II that lets you do a bunch of awesome things in RDR 2, including clear your current wanted level, give yourself money, and much more. If you've ever wanted to play as a wolf, soar in the skies as an eagle or have a personal bodyguard, then this is the mod for you.
If upgrading from a previous version, always use the new lst.ini file.
Features
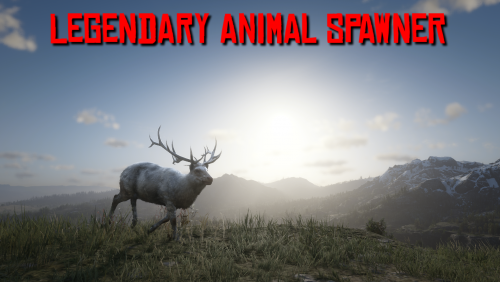
Play as any character model and easily switch between your favourites. Teleport to anywhere on the map, including your current waypoint. Nudge yourself forward through locked doors and walls. Change & pause the time of day. Change & freeze the weather. Give yourself any weapon in the game! Clear your wanted level. Never wanted setting. Toggle godmode on or off. Give yourself unlimited amounts of money! Change the game's timecycle speed. Quickly spawn a new horse to use. Spawn any wagon, coach, vehicle, etc. in the game. Speed up and slow down the game's time scale (slow motion!) Spawn an unlimited number of bodyguards! Command your bodyguards to attack people all at once. Make any ped enter or leave your vehicle (you can fill entire wagons!) Exploding, incendiary and super explosive ammo! Super Godmode - protects against ragdoll too. All settings can now be reloaded while in-game. Scaling options - play as tiny or giant characters! Call in a deadly flying eagle to rain death from above! Play hundreds of player actions and scenarios like swinging pickaxes! Choose gender when spawning horses! Change player gender when playing as an animal Option to disable the sniper in New Austin Always get perfect pelts when skinning Make your horse invincible, enable unlimited stamina and change horse gender on the fly Enable unlimited stamina and dead eye for the player Drop your current weapon Freeze weather and time Set formations for your bodyguards Make your bodyguards lasso people! Configure bodyguard control keys Instantly reveal the whole game map Instantly bond with your horse Change weapon damage Enable unlimited items Make bodyguards invincible (god mode) and explosion proof (super god mode) Make bodyguards hold their position Increase honor, decrease honor, set to min and max Freeze spawned peds in place Keep your changed model and outfits when replaying story missions (experimental - does not work for all missions and outfits yet)! Bond with gang horses Spawn legendary animals Select outfit for newly spawned peds Load multiplayer only weapons, such as the Navy Revolver (Set LoadMPWeapons to true in the ini, please note that this can cause severe side effects due to how we hack in the weapons) Select outfit for bodyguards New! Change amount of money to receive New! MP models work again (big thanks to deterministic_bubble)!
Controls
F5: PRESS to open or close the Trainer Menu.
F11: PRESS to teleport to waypoint.
F12: Log your current position (and some other info) to the logfile. Also works on peds/entites you target.
NumPad 0: HOLD and PRESS Left/Right/Up/Down/PgUp/PgDn to nudge the player, forward, up, left, backwards, etc. Go through doors with this.
Menu controls:
Up/Down to navigate the menu vertically. Left/Right to change item options. Enter to select an option. Backspace to return to the previous page.
Bodyguard controls:
Hold and Release F9 to make your bodyguards regroup with you. Hold F9 to dismiss all of your bodyguards. Aim at a Ped and Press 1 to make all bodyguards attack them. Aim at a Ped and Press 2 to make the closest bodyguard attack them. Aim at a Ped and Press 3 to make the closest bodyguard lasso them. Aim at a Ped and Press 4 to make them enter your vehicle. Press 5 to make your bodyguards hold their current position.
Eagle gunship controls:
Aim at a Ped and Press F8 to make the eagle attack them.
Installation
All you need to do is drag the files into your game root folder - the one where RDR 2 is installed.
When the game launches, you should hear a few beeping sounds, indicating that the trainer is loaded.
Do not attempt to play Online with this trainer. Remove all files from your game folder before playing Online.
Do not save your game as a changed character model. We recommend that you disable autosaves before using this trainer.
Configuration
Character models, bodyguard models, weapon models, settings and teleport positions can be customized in the lst.ini file while the game is running:
For a list of character models check: https://www.mod-rdr.com/wiki/list-of-rdr2-ped-models/ For a list of weapon models check: https://www.mod-rdr.com/wiki/list-of-rdr2-weapon-models/ For a list of teleport coordinates: https://www.mod-rdr.com/wiki/list-of-rdr2-teleports/ For a list of vehicle models check: https://www.mod-rdr.com/wiki/list-of-rdr2-vehicle-models/ For a list of player actions check: https://www.mod-rdr.com/wiki/list-of-rdr2-scenarios/
Troubleshooting
If you are having trouble running Lenny's Simple Trainer, please check the log file. If you see "System.OutOfMemoryException: STATUS_NO_MEMORY: Failed to allocate memory", please download this fix to your game root directory: www.mod-rdr.com/EasyHookPatch.zip
If you do not get a logfile, please launch the game as administrator and make sure the folder is writable!
Please don't upload or redistribute this mod, link here instead so that everyone has the most up to date version.
-
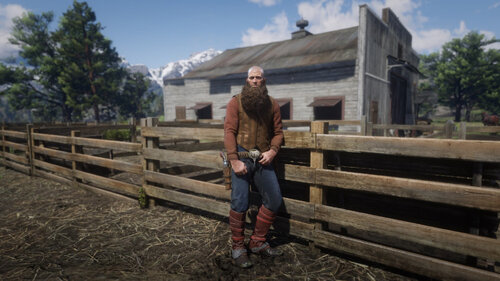 We are proud to release our latest modification for Red Dead Redemption 2: An outfit changer! Featuring all of the more than 1300 single player clothing items (and in version 0.2 all multiplayer components!), Arthur has never looked more unique. A word of caution: The component system in RDR2 is very powerful and even many parts of your skin are components which you might need to toggle to make body parts (re)appear! Please read the readme.txt file for more information on how the system works.
Features
Change clothing items in over 40 categories with over 10000 total variations! Save your current outfit Quickly equip saved outfits Reset all your components Change Ped Skin (see readme) Enable Multiplayer Assets (try changing your model to mp_male or mp_female using our trainer to access them in all your glory) New! Change beard and hair length, untuck shirts and much more! New! Customize menu key
Controls
Press F2 to open/close the Outfit Changer menu:
Up/Down to navigate the menu vertically. Left/Right to change item options. Enter to select. Backspace to go back.
Installation
All you need to do is drag the files into your game root folder - the one where RDR 2 is installed.
The Outfit Changer is loaded from the same folder and shares many of the same files as Lenny's Simple Trainer but works without it. When the game launches, you should hear a few beeping sounds, indicating that the mod is loaded. RDR Online is not supported for modding. Don't attempt to play Online with this mod. Remove all files from your game folder before playing Online.
Configuration
Open the outfitchanger.ini file (found in your game folder) in a text editor to configure the Outfit Changer where you can:
Change the names of categories. Name your favourite clothing items to make finding them again easier. Manually edit/manage your saved outfits (although you can do this in the menu).
We are working on a Wiki page to document all of the clothing items.
To load any changes to the outfitchanger.ini file, use the "Reload Settings" feature in the menu.
Please don't upload or redistribute this mod, link here instead so that everyone has the most up to date version.
Please note that you are not permitted to sell configuration files for this mod. This mod is free and so should be your files!
-
 This mod is a teamwork of @fitfondue and @HughJanus.
The beta version of Ped Damage Overhaul 2.0 has been released! It contains new features and major adjustments (described in the changelog), so we'd appreciate your feedback on any bugs and performance issues you encounter. When reporting performance issues, please post your system specs if you can!
Part of this beta are the "optional features" (which require LML to work). Those are separated in two files. One is responsible for longer reactions after dismemberment (not compatible with euphoria mods), the other increases the chances of arterial bleeding (e.g. for neck shots).
OVERVIEW
This mod tries to make gun fights more diverse, dynamic and interesting and keep them that way throughout the game.
You will find NPCs stumbling when trying to run with hurt legs, getting the wind knocked out of them when getting shot, squirming on the ground when fatally injured, moaning in pools of their own blood until they meet their end, clutching their wounds and stumbling around when hit, etc.
IMPORTANT KEYS (for toggling effects)
These are the standard keys, they can be modified via the ini file (as can everything else this mod adds to the game):
F9 - Toggling the mod on/off (the mod is enabled by default). F8 - Toggling "Kill Wounded Mode" on/off (is disabled by default). This mod adds a feature called "Dying States" which makes NPCs go down when injured and still stay alive for some time (until they bleed out). If "Kill Wounded Mode" is activated, NPCs will die instead of entering the "Dying States". F7 - Toggling "Longer Bleedouts Mode" on/off (is disabled by default). Per default this mod makes NPCs in "Dying States" bleed out within a maximum of 25 seconds (to not interfere with spawning waves of enemies during missions, which are only triggered when the first wave is dealt with). If "Longer Bleedouts Mode" is activated, NPCs will take longer to bleed out (more realistic, but also hindering during some missions). F2 - Toggling "Friendly Fire" on/off (is disabled by default). "Friendly Fire" currently only works for the Dutch Van Der Linde gang.
FEATURES
Here is a quick overview of the most important features:
First off, almost all of the features and their characteristics are based on chance, so the behaviors won't be the same every time you encounter them - which should ensure more diverse fights and keep things interesting for longer than vanilla does... that was the idea, at least 🙂
Almost every feature can be enabled, disabled or tweaked in the ini (more information further down the page), so this is not only a mod, but also enables you to create your own experience.
This mod only alters behaviors and attributes of human NPCs - animals or anything else remain untouched.
Light version:
NPCs will react to where they are being shot (leg shots will make them stumble when trying to run, hand shots will disarm them, torso shots will stagger them, etc.). When NPC's health decreases below a certain threshold, they fall over and don't get back up. Then they go through different stages of dying, each with its own randomized behavior. Eventually NPCs will die of blood loss. NPCs will sometimes (based on chance) audibly react when in hopeless situation (panicking, begging, cursing, etc.). There is a bleeding feature, which makes NPCs lose health after they have been fatally injured. It operates bassed on chance, so NPCs don't all bleed out in the same amount of time. NPCs burn alive for longer when set on fire. There is a chance of NPCs surviving a fire (although they won't be able to do much afterwards). NPCs have a chance of staying on the ground for a random amount of time when shot (based on their health) - so you can now knock the breath out of your opponents. For all included behaviors the movement and pain sounds have been adjusted (and also randomized) to hopefully make your experience more interesting.
Standard version:
The same features as in the light version apply as well as the following additions: NPC health and player damage tweaked to offer a more satisfying experience (no more bullet sponges). NPC damage tweaked to offer more challenge to the player (since NPCs don't eat bullets for breakfast anymore). You can now feel the difference between weapons, their condition and ammo types in combat (shooting with a properly maintained, powerful weapon with special ammo now feels like it should). NPCs are less accurate shots and their accuracy declines along with their health. Arm and leg shots do less damage to NPCs. All NPCs can be disarmed (yes, even lawmen). Hogtying disarms NPCs, so if they manage to get loose, they can't shoot you - they might draw a hidden knife, though.
Overhaul version:
The same features as in the standard version apply as well as the following additions: Core Drain (health, stamina, dead eye) has been moderately increased - now hunting and buying food become necessary options. Cores will be fully drained after death. Additional 25% of money lost after death.
We hope that you have as much fun with this mod as we have creating and improving it!
INSTALLATION
Download Alexander Blade's ScriptHook: http://dev-c.com/rdr2/scripthookrdr2/ Extract Dinput8.dll and ScriptHookRDR2.dll into the main directory of RDR 2 (where the .exe file is). If you want PDO's additional features, download Lenny's Mod Loader. If not, ignore steps 4, 5 and 8. https://www.rdr2mods.com/downloads/rdr2/tools/76-lennys-mod-loader-rdr/ Extract the folder Mod Manager into the main directory of RDR 2 (the actual Mod Manager folder, not just its contents). Then go into the Mod Loader folder and extract only its contents into the main directory as well (not the actual folder, just its contents). In the Mod Manager folder, run the ModManager.UI.exe file to make sure Lenny's Mod Loader is properly installed in the RDR 2 directory. Download your preferred version of Ped Damage Overhaul, then open the zip and choose whether you prefer Light, Standard or Overhaul configurations (see mod description to understand the differences). Extract the contents of the chosen folder into the main directory. If you're using Lenny's Mod Loader, any files pertaining to it will be automatically placed in the correct folder. If you're using Lenny's Mod Loader, run ModManager.UI.exe to see if the optional files are showing as installed. If they are, you're good to go. Start the game and have fun! While in game, you can press F9 to check if the mod was loaded correctly (F9 once to disable, then F9 again to re-enable the mod).
TWEAKING
In general, every parameter in the ini has a description (including information on how to disable the feature). Feel free to play around.
There are already a lot of features enabled and tweaked for out-of-the-box use, yet there are some features left untouched which can be enabled in the ini. That said, if you just want to disable one or more features, set their respective values to 0 (or whatever value the description suggests).
Examples:
To turn off the bleeding feature: set BleedWhenDying to 0 To turn off the disarming when hogtying NPCs: set HogtyingDisarms to 0 To turn off the dying state features: set DyingStateChance to 0
If you want to disable a feature which is based on chance, just set the chance value to 0.
Examples:
To turn off the knocking the wind out of your opponents: set KnockbackChance to 0 To turn off the possibility of NPCs surviving fire: set FireSurvivalChance to 0 To turn off the chance of stumbling when shot in the leg: set StumbleChanceOneLeg and StumbleChanceBothLegs to 0
There are also many other features that can be activated in the ini - here are some examples:
LassoDisarms -> makes catching someone with your lasso disarm them (no hogtying necessary) NPCWeaponModifier (and many other damage modifiers) -> makes NPCs do more or less damage, depending on what you set it to BleedWhenShot -> enables a bleeding feature which triggers when an NPC gets shot (so not the usual "bleed out when under x health" but consistent bleeding which is applied after the first hit of a bullet - the bleeding chance and deducted health points can be set separately)
The ini is full of values for those wanting to experiment a little.
One word of warning to tweakers: If the NPCHealth is set too high, headshots might not be lethal anymore, unless they hit the actual brain of the NPC (so a shot in the jaw would do more damage than other body parts, but would not be an instant kill). Actual "brain-shots" are always one-shot-kills, no matter the health.
KNOWN "ISSUES" (they are not real issues)
The disarming feature can be exploited to slow down new waves of lawmen. The same is true for the dying state feature. If there are too many lawmen dying or fleeing around the player, new waves won't spawn in until the lawmen die or get enough distance (this feature can be turned of in the ini file, if that is a deal breaker to you). When disarming is enabled, the dropped weapons may appear partly invisible. This is only optical, though, they can be picked up and used as usual.
The source code of Ped Damage Overhaul can be found here:
https://github.com/HJHughJanus/PedDamageOverhaulRDR2
If you are looking to enhance your experience by using an Euphoria Mod, please take a look at the work of @AnymYo.
C.E.R.R. is tweaked for cineastic reactions and designed to work with PDO:
-
.thumb.png.cc32062f3cdcf019708021e78c886334.png) # RDR2-Tie-Your-Lasso - Hangman Edition 3.1.0
# RDR2-Tie-Your-Lasso - Hangman Edition 3.1.0
This mod allows you to hitch your lasso, along with the peds tied to it, to the surface your are standing on.
### Installation:
- Download and install AB's ScripthookRDR2
- Make sure you have an asi loader, it usually comes along with Scripthook.
- Remove previous versions of the mod, if you have any installed.
- Copy TieYourLasso.asi to the game's main installation folder.
### How to use:
- Use your lasso just as usual.
- Press the key ("Look Back" key) when on foot to hitch the lasso to the ground.
- After you hogtie a npc, get close to him and then you can attach him to the ground (without lassoing it). You're also able to give him a little push.
- It's also possible to attach the ped you carry to the ground.
- After attaching a ped to the ground, you can wind the rope by standing near it and pressing E or unwinding it by pressing R.
- Hang peds by hogting them and stand under a bridge or a tree. Then press V. Try to keep the player's front area clear because there the rope will be hitched so you can control it.
- Hang peds from gallows: pick up an hogtied ped and get under the gallows' beam. Use the Tie Noose prompt to noose the ped properly.
Then approach the lever and pull it. Supported gallows: Valentine, Strawberry, Rhodes, Blackwater and Saint Denis.
-
 Pimp My Horse is a mod for Red Dead Redemption II that lets you personalize your horse with many different components as well as save and load your creations.
If upgrading from a previous version, always use the new pimpmyhorse.ini file.
Features
Change all components for your horse from saddles to stirrups Save your horse's current outfit Quickly load saved outfits Reset all your components Some convenience functions such as bonding with your horse, changing its gender, making it invincible etc.
Controls
Press F3 to open/close the menu (key can be changed in settings):
Up/Down to navigate the menu vertically. Left/Right to change item options. Enter to select. Backspace to go back.
Installation
All you need to do is drag the files into your game root folder - the one where RDR 2 is installed.
Pimp My Horse is loaded from the same folder and shares many of the same files as Lenny's Simple Trainer but works without it. When the game launches, you should hear a few beeping sounds, indicating that the mod is loaded. RDR Online is not supported for modding. Don't attempt to play Online with this mod. Remove all files from your game folder before playing Online.
Configuration
Open the pimpmyhorse.ini file (found in your game folder) in a text editor to configure the mod where you can:
Change the names of categories. Name your favourite clothing items to make finding them again easier. Manually edit/manage your saved outfits (although you can do this in the menu).
We are working on a Wiki page to document all of the clothing items.
To load any changes to the pimpmyhorse.ini file, use the "Reload Settings" feature in the menu.
Please don't upload or redistribute this mod, link here instead so that everyone has the most up to date version.
Thanks to @Sniper296 for the logo!
-
-
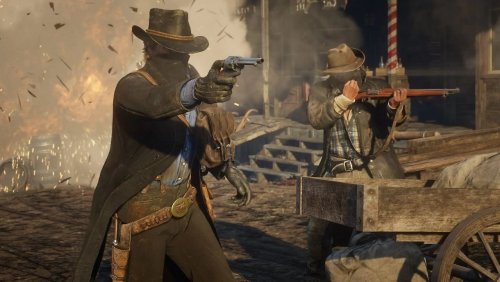
 This mod contains all of my works that aimed to improve melee combat only in one file. (Restored animations and mechanics, grapple sequences, new subdue animations, 6 brawling styles, struggle challenge, charging with knife, shoving, kicking, more environmental finishers, new brawl animations and alternatives for default ones, grapple position switching, ability to take hostage with every weapon and more)
New updates changes will be written in the "posts" section.
My Patreon if you want to support me.
Changes:
[Stream File]
- The stream fol
der is essential for lasso struggle animations (loads update_0.ycds).
- Includes blunt animations from online, moonshiner drunk animations, and unarmed mounted animations.
- Also loads the online window throw animation.
- Avoid using version.dll as it may prevent some animations from loading.
It generally works fine, but let me know if you encounter major issues.
[Brawling Styles]
6 Brawling Styles all of them with their unique grapple and melee animations
• BS_PLAYER= Default animations
•BS_PLAYER_WINTER1 = Unique grapple dismiss animations that put the NPCs in intimidated position | Unique rightside counter attack animation
•BS_PLAYER_FINALE = Different knife attack and parry animations
• BS_BRUISER = Slow but heavy attacks | Unique subdue reversal and knockout animations | Different animations for ground grapple attacks | Grapple back from front | Unique blocking stance
• BS_MICAH_FINALE = Fast but light attacks | Different animations for both standing grapple and tackle | If your enemy is using that brawling style you can block their grapple attacks by pressing [R]. | Wall Grapple Sequence | Unique blocking stance | Different knife parry animations | Different dodge animation to back
• BS_MIXED = This one is a custom brawling style that has all the dodge and parry attack animations from BS_BRUISER, BS_MICAH_FINALE, BS_PLAYER and BS_PLAYER_WINTER1.
[Grapple Attack Blocking]
When you're grappled either from front or on ground, you'll get a "Block" prompt. Pressing this button play 6 unique animations for front grapples + 2 already existing bs_micah_finale animations for front and ground grapples.
- Blocking resets the reversal sequence and gives another chance to reverse the grapple.
[Grapple Reversals]
Complete new feature that I also released as a standalone mod.
- When you're grappled you'll have an option to rapidly press E to perform a grapple reversals in 3 grapple situations.
- If you fail you won't be able to reverse and your only option will be "break free".
For controllers the key is "Triangle"
How hard the button mashing will be or how fast the button will drain can be changed from the EnhancedBrawling.ini file.
[New Struggle Animations]
- Struggles work similarly to online PvP, excluding lasso and ground knife.
- Spamming F results in a knockout; F + LMB/R2 leads to execution.
- All animations are unique, some with escape or KO variants.
- New struggle additions:
- Fixed broken lasso struggle – enemy must be subdued to tie now. Works
from regular tackle and facedown grapple. It also includes ability to exit the struggle.
- New struggle idle animation for blade struggles.
- New sequences: front rifle grapple, pistol (front and ground), blade (front and back).
[Struggle Exit Mechanic Restoration]
When you start a struggle, you'll get a prompt on right side of the screen that says "Exit" to stop the struggle animation to go back to previous grapple state. For controllers key is "Square"
[Window Throws on Command]
When grappling press X+WASD or RB+Directions in controllers to throw enemies over rails, onto tables or through the windows whenever or wherever you want.
[Restored takedowns for crouching and seated NPCs]
Takedowns on Crouching NPCs
- 1 unarmed takedown from rear
- 2 restored knife takedowns from front and back for machete and knife + 3 blade takedowns from rear, left and right
- 4 armed takedown entry animations that you will choose to follow up with either a knockout or execution by pressing melee button or fire button.
[Showcase]
Takedowns on Seated NPCs
These can be performed with either one handed or two handed guns.
- 4 armed seated takedown entry animations that will play depending whether you're attacking from front, left, right or back. You'll choose to either follow up with knockout or execution by pressing melee or fire button.
[Showcase]
[Hand to hand combat]
- You can kick with blades by pressing G or by performing counter attacks.
- Restored 4 attack animations to be used on NPCs that are in on ass and on knees intimidated state to either knock them or hit them.
- Restored 1 knockout or attack animation for pistol on intimidated enemies that are in on ass or on knees state.
- Restored 1 knockout or attack animation for rifle on intimidated enemies that are in on ass or on knees state.
- Restored unused intimidation attack animations.
- Restored unused GTA V takedowns for fists, pistol and machete [Showcase]
- Ability to perform takedowns with molotov and dynamite.
- Ability to use BS_MIXED which is contain all the brawl animations in one brawl style.
- Ability to charge at NPCs with knife. You can also do that move with left mouse click or F [Showcase]
- You can start all of the combo animation by counter attacking
- Ability to kick and shove NPCs just like Micah with BS_PLAYER_FINALE. [Showcase]
- Shoving NPCs just like in Online mode by pressing Left Mouse Click or R2 [Showcase]
- Struggle challenge [Showcase]
- Ability to kick NPCs while brawling [5 Animations] [Showcase]
[Grapple Enhancements | Changes and Animations Expansions]
- Intimidated NPCs can be punched without player throwing them to the ground automatically if you press LMB or R2.
- There's a chance for intimidated back grapple throws to trigger.
- Performing a stab with a blade now knocks out enemies (front, back, mounted) rather than executing.
- Added new mounted struggle breakout animation.
- Ability to block grapple attack with 6 unique animations. Works for front and mounted grapple attacks.
- 2 alternative back grapple counter escapes
- 1 alternative mount grapple counter escape
- 9 alternative front grapple counter escapes
- New breakout animation for back grapple struggle [Showcase]
- Alternative animation for grapple enter counter [Showcase]
- Ability to switch from front to mount and mount to front with pistol and knife [Showcase]
- Alternative knife parry block animations [Showcase]
- New counter escape variations for ground grapples
- Ability to grapple grounded enemies with every possible weapon. [Showcase]
- New variations for Unarmed, Knife, Machete, Rifle and Pistol knockouts and executions including new animations for pistol [Showcase Variations]
- When you perform grapple with knife, you'll get Micah's grapple entry and throw animations [Showcase]
- You'll get a "Subdue" when you're grappling an NPC in position that you can subdue them [Showcase]
- You'll get a "Exit" prompt when subduing enemies to stop subduing them.
- Front grapple challenge will player a little more often while in a melee combat
- You'll be able to shove the enemy off of you when performing a counter escape
- Ability to subdue and get subdued ( [F] to Breakfree | [E] to reversal | If you're attacker [F] to kill or knockout) [Showcase]
- Ability to throw NPCs to any direction whether there is a object or not
- Ability to switch from front grapple to back and from back grapple to front [Left Mouse Click or Aim Button] [Showcase]
- Taking NPCs hostage with every weapon possible by grappling them from behind[Showcase]
- Ability to switch from front to back and back to front grapple [Showcase]
- Unique trough drowning animation that can be used in water [Showcase]
- Defenestration, window throw animations that can be used anywhere while grappling a NPCs [Showcase]
- Back grapple sequence [Showcase 1 | Showcase 2]
- Now you can throw enemies to every direction you want even if you are too close to an object
- You can perform standing front and back grapple against lawmen now
[New animations for hand to hand combat and changes]
- 2 front and 2 rear blunt execution animations added for hatchet, machete, and pistols.
- 1 left and 1 right blunt execution animation added for hatchet, machete, and knife.
- 1 blunt grapple execution and 1 knockout animation added for pistol and knife. Knockout animation also works with hatchet and machete.
- New front execution animation added for blades and machetes.
- 1 front and rear takedowns animations for molotov.
- 1 new front combat knife execution
- 1 new grapple front grapple counter escape animation
- 1 new rear grapple knife execution
- 2 new rear grapple pistol execution
- 4 new one handed weapon execution animations for both front grapple and front
combat executions [3 of these executions cause a short bleedout]
- 10 new rear unarmed takedown animations
- 2 new knife stealth kill animation
- 1 new sleeping unarmed takedown animation
- 1 new seated rear knife takedown animation
- 2 new front pistol takedowns + 2 new front pistol executions
- 1 new front rifle takedown + -2 new front rifle xecutions
- 1 new rear front takedown animation
- 7 new front takedown animations
- 4 new front grapple knockout animations
- 2 new ground grapple knockouts
- 4 new knife struggle knockouts
- 1 new mount struggle reversal animation
- 1 new ground grapple attack animation
- 2 new takedowns for two handed weapons
- 4 new takedowns for pistols
- New choking animations
[Showcase For New Animations]
- Running executions from right and left can be performed with knife
- You can perform execution from left with a knife
- Alternative knife execution for knife and machete
- 2 alternative grapple knockout animations for front and 1 for back
- Grapple knockout animation can be performed as takedown animations
- Restored unused GTA V melee combat animations for fists, machete, and knife [Showcase]
- 3 new unused knife combo animations [Showcase]
- New alternative knife dodge animations [Showcase]
- New struggle knockout animation for bs_micah_finale while using a knife [Showcase]
- 10 New brawling animations that can be activated by pressing[T] while brawling [Showcase]
- New grapple fail animations for front grapples
- 2 extra unarmed counter attack animations (1 for left and behind, 1 one for rightside)
- New punch animation that can be performed while too close to an enemy
- New unarmed takedown animation to be used on seated enemies (Approach them from left or right) [Showcase]
- 2 new pistol animations for both pistol grapple knockouts and executions. [Showcase Pistol Animations]
- You can execute enemies while in non combat stance by pressing Left Mouse click or R2 instantly [Showcase]
- 3 new takedown animations for rifle and pistol. (2 for rifle, one for pistol) [Showcase]
- 3 extra knife counter attack animations (1 for left and behind, 2 for right side) [Showcase]
- 3 new knife takedown fail animations (2 for front one for back) [Showcase 1 | Showcase 2]
- Knife wall execution will work just like rifle and pistol wall
executions(While near a wall press F or Left Mouse click. Then either
press F to knockout or left mouse click to execute)
- New running executions for hatchet and machete (Left, Right, Back, Front) [Showcase | Showcase 2]
[Brawling Style Changes]
- BS_MICAH_FINALE can dodge while holding a knife and can perform BS_PLAYER_FINALE animations.
- BS_MICAH_FINALE has alternative grapple throw animations
- BS_MICAH_FINALE front grapple knockout punches has sound now.
- All brawling styles can perform armed grapples.
- BS_PLAYER_FINALE can perform all the counter attack moves Micah do to enemies now. [Showcase]
- Alternative grapple throw animations for BS_MICAH_FINALE [Showcase]
- BS_PLAYER_WINTER1 has all more counter attacks and now able to perform grapple attacks
- BS_BRUISER special counter attack animation now can be performed regardless of the brawling style
- Changed BS_BRUISER's grapple entry animation to fix an animation issue
- Added all of the counter attack animations to BS_BRUISER
- Back grapple from front and wall grapple sequence now can be performed in BS_PLAYER (No need to change your brawling style to use these moves.) [Showcase]
- You can subdue enemies from behind regardless of your brawling style
- BS_PLAYER_WINTER1's grapple throws can be performed with every weapon
- 4 Extra new parry attacks for BS_MICAH_FINALE [Showcase]
[Bar Brawls]
- Now you'll be able to start bar brawls in Valentine and Rhodes saloon. Just go and attack someone and everyone will start to attack each other. [Showcase]
- You'll be able to perform more environmental finisher on different objects that you couldn't before like some barrels, tables, windows and railings. (For example, you can perform window throw animations near every window inside Valentine Saloon) [Showcase]
- AI will be able to perform environmental finishers [Showcase]
[AI Enhancements and Other Enhancements]
- AI can execute front/back armed executions and grapple or tackle during close combat.
- AI may grapple/tackle in melee if you're not blocking.
- AI can perform grapple attack blocks.
- AI can perform grapple reversals.
- AI can perform lead in.
- AI is set to attack you from behind when you're fighting with multiple enemies.
- AI will be able to tackle you from behind instead of always grappling you.
- AI can perform knife combos.
- AI and player can counter armed executions (NPCs mostly counter it if they're using a melee weapon) [Showcase]
- AI will be able to perform environmental finishers [Showcase]
- AI can perform armed executions on from behind.(If you don't like it download the alternative version which this function is disabled from the optional files section) [Showcase]
- All brawling styles can be dazed in a fight.
- AI can subdue you.
- AI will be able to dodge into all directions Left, Right and Back. This will allow them to perform more counter attack animations.
- They can also duck instead of stepping back to counter.
- When you try to grapple, they can initiate front grapple challenge. If you don't escape, you'll be grappled.
- When AI performs GTA V counter attacks on you, you'll ragdoll.
[Environmental Attacks]
- You'll be able to perform more environmental finisher on different objects that you couldn't before like some barrels, tables, windows and railings. More of it will be added in the next updates(For example every window inside Valentine Saloon) [Showcase]
- If an NPC is leaning against a wall, crouch and perform a takedown to trigger a head slam finisher.
[First Person Melee Combat]
- Every melee move that was disabled for first person mode now can be performed in first person mode.
[Camera]
- Added cameras for struggle intro, struggle outro and struggle mount reversal.
- Removed camera movements (For example, table smash animations camera movements are removed and struggle knockout)
[Bug fixes that was in the base game and other stuff]
- Fixed front choke knockout ending with a regular choke.
- New pain sounds added to various melee moves.
- Adjusted animation blend speeds.
- Enhanced blood particle size and visibility.
- Fixed armed ground grapples not working properly with guns.
- BS_MICAH_FINALE is able to dodge while holding a knife now.
- The texts you'll see when you change your brawling style will look better now.
- New camera movements are added for mount grapple struggle intro and outro.
- Controller users can perform kick with RB while in melee fight.
- You'll be able to start dragging enemies with whatever brawling style you're using. This is done to make this mod and Drag NPCs work better together.
- Certain features like new takedowns, reversals, struggle exit etc won't work in certain missions.
- Fixed the problem that caused players not to be able to subdue the NPCs from behind.
- Fixed the issue that caused player to go into T pose when grappling NPC with a machete from behind.
- There won't be choke button when you're grappling a NPCs with machete anymore.
- Wall grapple sequence now kills the enemy. [Showcase]
- Micah's tackle knockout now kills the enemy and has blood effects. [Showcase]
[New Configs & Abilities]
- Enable dragging intimidated peds via .ini.
- Change back grapple (hostage) movement style in the same file.
- Removed NoTexts folder; toggle prompts and voice lines from .ini.
- Disable kick function on controllers from .ini.
- Added tougher AI file: "MCD_AI_DEFAULT_TOUGHER" — values are nearly 2x harder.
- This data is currently used for BS_AI, but you can create and apply your own by editing pedbrawlingstyle.meta.
- Optional files folder includes these tougher AI files for easy install.
- MAX_DISTANCE added to config file. If you set value high, you can perform scripted melee moves from more far away.
------------------------------------------------------------------------------------------------------------------------------------------------------------------------
[Credits]
These are the people I’d like to thank for their efforts in assisting and offering support throughout the process of developing these mods.
ModiFiver - He is always willing to help me with file editing and helped figure out how to edit these files.
TuffyTown - His open sourced mods helped me to understand scripting and he also help
Ked - He also assisted me with scripting, especially when I was new to scripting.
PixieV - Showed me how to trigger speech lines.
People that suggested new ideas and reported bugs.
Also other people I can't name, but helped or offered support when I needed help in RDR2Mods Discord server.
------------------------------------------------------------------------------------------------------------------------------------------------------------------------
[DONATIONS]
These mods take a lot of time to develop and test to make sure that every function is working properly. So, I'd appreciate donations if you would like to support what I do.
Here's my Patreon if you want to support me.
------------------------------------------------------------------------------------------------------------------------------------------------------------------------ [INSTALLATION]
- Always make sure to have latest versions of both Lenny's Mod Loader and Alexander Blade's Script Hook
- Drop Enhanced Brawling.asi and EnhancedBrawling.ini to your Red Dead Redemption 2 folder.
- Drop "Enhanced Brawling" folder inside of "lml" folder to your own lml folder.
[CONTROLS]
Numpad1 / F1 = bs_player
Numpad2 / F2 = bs_player_winter1
Numpad3 / F3 = bs_bruiser
Numpad4 / F7 = bs_micah_finale
Numpad5 / F8 = bs_player_finale
Numpad6 / F9 = bs_mixed
Numpad8 / F11 = Struggle challenge
Numpad0 / Z = (Resets grapple animations if you're stuck or can't grapple anyone)
Right Mouse Click / Aim Button = Standing Grapple Switch
N / Left D-PAD= (Subdue Animations and Grapple Sequences)
G / RB= Kick [Combo]
Up Arrow / RB= Kick to the chest
Left Arrow / RB = Kick [No Ragdoll]
Right Arrow / RB = Kick [Ragdoll]
Down Arrow / RB = Kick to the leg
Z = Trough drowning animation (This feaute doesn't work as it should, don't worry if it's not working in your game. I'll try to fix it later)
Left Mouse Click / R2 = Shove NPCs (Run and press the button)
X + WASD / RB+Directions = (Defenestration, window throw animations)
------------------------------------------------------------------------------------------------------------------------------------------------------------------------
-
 Yet another very simple mod removing the bullet trail when firing weapons. Drag the file into your game folder and enjoy. Please note that you need to have an ASI loader for this mod to work.
I have not tested this mod much (< 5 minutes), so if something else breaks, please let me know.
Please don't upload or redistribute this mod, link here instead so that everyone has the most up to date version.
-
 This is a file listing that links to the official dev-c.com website for Scripthook RDR 2. To download this file, follow the instructions on the page that you will be directed to.
Script Hook RDR 2 is the library that allows to use RDR2 script native functions in custom *.asi plugins. Note that it doesn't work in RDR Online, script hook closes RDR 2 when player goes in multiplayer, see details in the readme.
This distrib also includes the latest Asi Loader and Native Trainer.
-
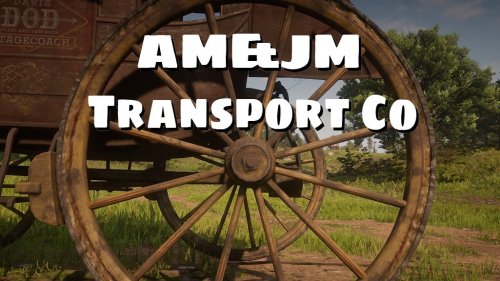 Buy your own customizable wagon, stagecoach or boat and transport people or goods all over the west to make an honest living (AND MORE).
Main features in short:
- Buy your own customizable wagon, stagecoach or boat. (Hot air balloon and "portable" Maxim Gun is also available to buy)
- Earn money by taking jobs at general stores, hotels or saloons, and transport goods or people all over the map, including every town and 46 minor locations.
- Find gang hideouts and retrieve stolen cargo or wagons from them. (the hideouts are added by the mod, not the vanilla ones)
- Protect your goods or passengers from random bandit attacks during jobs (with optional random bandit attacks outside of jobs).
- Work as a bounty hunter, capture criminals dead or alive.
- Hire people to work for you, drive your wagon or provide protection against the dangers of the road.
- Work on your ranch at Beecher's Hope and transport your goods to Blackwater, Armadillo or Tumbleweed to sell them for a handsome profit.
- Deliver special hunting / fishing requests for butchers.
- Zombies, because everything is better with zombies... (disabled by default)
Buy your own customizable wagon, stagecoach or boat:
Go to the general store in any town, approach and target the owner for the "Jobs / Wagons / Boats" prompt to come up.
The menu should come up where you can chose from several wagons, stagecoaches or boats. After choosing one, leave the store and find the wagon or boat outside to customize it. There you can confirm your purchase or go back to the store to chose another one.
Once you own a wagon or boat you can change it's customization options or store it any time at the store.
If your boat or wagon is not nearby or missing it's horses you can repair and recover it for a fee at general stores. Recovering your wagon during a job will fail the job.
However, if you wreck it, it'll be gone for good and you need to buy a new one.
Wagon / boat menu: Press the hotkey while you're sitting in your wagon or boat, or hold the key for a second while standing near them to bring up the menu.
- You can open your weapon locker from the wagon menu.
- You can switch between your saved custom outfits, so you can change your clothes or weapons without your horse being nearby.
- It lets you make some changes to your wagon on the fly, like adding / removing lights.
- You can store / unpack your maxim gun if you own one.
Steam boats have a 'get on board' option that'll make your hired guns get on board.
The hotkey is not bind by default, find the "WAGON_MENU_KEY" option in the ini to set it.
When you buy a wagon it spawns in somewhat of a remote location to avoid spawning on top of something else, a yellow wagon wheel icon shows it's location on your world map if you're not sure where to find it.
Boats:
There are some teleport zones near a few bridges that'll put you from one side of the bridge to the other, so you can traverse some rivers with boats you couldn't otherwise.
You can sail to Guarma if you own a boat by traveling north up river. The "Sail to Guarma" prompt should come up shortly after you passed Annesburg. (I only tested it in the epilogue, I don't know if it causes any issues if you travel there earlier in the story)
There's an "auto forward" function for boats so you don't have to keep pressing the forward key the whole time. It's disabled by default. You have to set BOAT_FORWARD_KEY in the ini to whatever key you use as forward for boats. After that, a forward prompt should appear when you're in a boat.
It's a script that just presses a key on your keyboard, and it'll be pressed even if you alt+tab out of the game, so make sure to stop your boat before you alt+tab or close the game...
Delivery jobs:
You can also find delivery jobs at general stores.
There are two types:
- "Supply delivery jobs" where you need to use your own wagon to transport things.
- "Wagon driver jobs" where you get a job wagon that you need to take. (you can't use your own wagon for this type)
Both types has "deliver" and "fetch" versions.
"Deliver" means you load your wagon where you started the assignment and deliver it to a destination.
"Fetch" means you go to a different place, load your wagon there and bring the supplies back to where you started the job.
How a delivery job is done:
When you accept a job you'll see a blip on your map marking the place where you have to load the supplies into your wagon. You'll also see a wagon wheel icon for your job wagon if it's that type of job. Park your wagon nearby and the prompt to load your wagon should come up.
After that, a new blip should mark the place you're supposed to deliver the goods. Drive your wagon there and use the prompt to unload you wagon. The job is completed at this point, you can talk to the store owner at your destination to pick up your payment, or pick it up later at a train station / post office. (you get a few bucks more if you pick it up in person)
Passenger transport jobs:
You can find these jobs in hotels / saloons (same as above, approach and target the owner / barkeep).
There are also two types:
- "Passenger transport jobs" where you have to use your own stagecoach.
- "Stagecoach driver jobs" where you use a borrowed stagecoach for the job. (can't use your own)
You might have to stop at minor locations to drop off or pick up passengers on your way to your destination. You can customize how many stops you want in the ini.
How a stagecoach job is done:
Once you accepted the job find your passengers (they're usually upstairs, check your map for blips). They should follow you to your stagecoach and get in with you.
A blip on your map should mark your destination. If the job has multiple stops the blip will mark the first stop. Once you're there, the prompt to confirm the destination should show up. If there are more stops a blip on your map will show the next stop. It goes like this until you're at the final destination.
At each stop some passengers will get off, and there might be new ones to pick up. You can take your payment from every passenger one by one at their destination (stand close and target them for the prompt). They'll only hang around for a short time, if you don't take their payment you'll be able to pick it up later at a post office / train station in any town. (They give you a few extra bucks if you take it from them in person)
Recover stolen cargo / stolen wagon jobs:
You can find these type of jobs in general stores.
Just like the other job, there is two type:
- Recover cargo using your own wagon.
- Recover stolen wagon (no need to own a wagon)
How a recovery job is done:
Go to the hideout marked on your map. Once you engaged the bandits in combat, getting too far from the objective will fail the job - they'll get away with the goods (but also for technical reasons).
After you dealt with the bandits, park your wagon near the spot and use the prompt to load the cargo. If you're recovering a stolen wagon you still have to load it, too.
As optional side objectives you might find hostages to rescue or wanted bandits to capture. Bring them back with you dead or alive to earn some extra cash (alive pays more, especially for the hostages...).
Head back and unload the goods at the store you started at, and take your payment from the owner.
There are a random amount of bandits at each hideout, larger ones can have up to 20 of them, so make sure you're up for the task!
Delivery jobs using boats
...are pretty much the same as the wagon ones. You have to get out of your boat and stand on the shore to load / unload the cargo.
Recover stolen cargo by boat:
You need to own a tugboat for these jobs. Sail out and find the pirate ship on the Lanahassee river. Kill them and 'park' your boat next to theirs. Get on board the pirate ship for the "transfer the cargo to your boat" prompt to come up. After that return the cargo and unload it at your starting location.
Sometimes you can come across "Wanted pirates" you can bring back dead or alive for a small extra profit.
Failing a job usually results in having to compensate your employer for the trouble you caused.
Jobs don't persist when you quit the game, but exiting the game during a job doesn't count as failing them either (no fine).
Beecher's Hope:
Instead of selling your goods by magically making them disappear, actually drive the wagon to town to sell them for extra profit.
There's a wagon on the ranch that's being used to transport the goods (if you don't know which one just start doing the chores and you'll see). While you're near the back of this wagon the "job menu" will come up, listing all the chores around the ranch.
Every chore you complete before selling the goods will increase the payment you'll get - even unrelated ones like chopping wood.
Once you loaded two egg crates and two milk jugs on the wagon the "Sell goods" option will be available in the menu (but you can keep doing chores for more profit).
Once you selected the 'Sell goods' option you can chose to sell them at Blackwater, Armadillo or Tumbleweed. The farther location you chose, the more money you'll get.
Once you're there, unload the cargo, talk to the shopkeeper to get your payment then return the wagon to the ranch to finish the job.
You can do it once a day, the job resets every midnight, whether you finished it or not.
Bounty Hunting:
Find the sheriff (wherever he is) or talk to a deputy in the sheriff's office / police station to take these jobs. (In any town except for Van Horn and Armadillo)
Find the target, bring them back by any means, then talk to the sheriff / deputy to get your reward.
Sometimes the target is wanted *alive*, you'll fail these jobs if the target dies. (Even if wanted dead or alive, you get a small bonus if you bring them back alive).
Sometimes the target will try to flee while their allies fight you . Their icon only shows up on the map if they close to you so make sure you don't lose sight of them.
If you bring them back alive you have to put them into a cell then the deputy will give you your reward. If dead, just throw them anywhere in the building, target the deputy, open the jobs menu and select 'complete job' to get your reward.
There are high reward and low reward bounty jobs:
The high reward ones will take you to gang hideouts with up to 20 or so bandits.
The low reward ones will take you to a smaller group of bandits (4-6), that'll you'll find either in a small campsite or travelling around on horse, on foot, or in a wagon. If they have a wagon, bringing it back to the sheriff's office will earn you a little extra reward.
Pirate Hunting:
Pretty much the same as bounty hunting, only you'll find your target on a boat on the Lanahassee river. You don't need to own a boat for these jobs, just return the target any way you can. (though you might sink if you use a vanilla boat, the mod only prevents you owned boats from sinking in deep water)
Hunting / Fishing jobs:
You can find special hunting requests at any butcher.
You need to deliver the actual animal unless it's specifically says 'pelt' or 'skin'.
To deliver you need to drop the requested animals on the ground near the butcher and press 'Deliver' in the menu. Animals you're about to sell should be listed on the deliver page.
Things you hold in your hands or stowed on your horse will NOT be sold (to prevent accidentally selling things you don't mean to).
Normally these requests change every day. Pressing 'accept job' will prevent the requests from changing until you delivered or cancelled the job. (Otherwise you can deliver stuff without accepting the job first, it's just to prevent the requests changing while you're out hunting)
You can deliver as many requested animals as you want (multiple ones of the same type too), but once you delivered, the requests will change so make sure everything you want to sell is listed before you hit 'Deliver'.
They'll pay a little extra for better quality (except for fish, couldn't figure out how to do that yet..)
Bandits:
There's a chance that a random group of bandits will attack you during jobs. Be prepared and watch your back! Customizable in the ini.
There are also 24 bandit hideouts added by the mod, with 15+ bandits. Some jobs will take you to them but you can also find them outside of jobs.
There are also ini options to enable random bandit attacks outside of jobs, and random roaming bandits outside of jobs, who'll not attack you just go about their own business.
Hired Guns:
Hire people who'll travel with you and (try to) protect you from bandits (or anything else). To do so, talk to the barkeep in any saloon.
You can hire random people or you can customize their looks and weapons to your liking.
Hired Guns will not fight while in a town.
Story characters are also available.
- You can use the 'Rest & Recover' option in the menu that will teleport your hired guns to you in case you got separated, they'll be cleaned and their hats and weapons will be recovered if they lost them.
- They automatically go into "sneak and hold fire" mode while you're crouching / sneaking outside of combat.
- If the "Allow revive" option is enabled, instead of dying then can go down into an injured state and they can be revived by crouching close to them until the 'Help' prompt fills up (10 seconds)
- Making hired guns drive:
Target them and use the "You drive" prompt. Put down a custom waypoint on the map to make them drive there. Deleting the waypoint will make them stop. Use the 'speed up' and 'slow down' hotkeys to change their driving speed (up arrow and down arrow by default).
Their driving skills are ok-ish, generally they'll find their way from point A to point B, but sometimes they can take a wrong turn... Also, they can't really turn around.
If you're sitting next to them, you can take away / give back the control with the 'switch seats' key, should be 'Z' on keyboard. Make sure you stop them (slow down key until they're fully stopped) before you take away the control, or they might bug out.
- Using the 'Wait for signal' command will make them stay and don't do anything until you signal to them by whistling.
-The 'Ride with me' command will prevent them from spawning in their own horse. If there's another free horse around they'll use that, but if not they'll ride with you on your horse.
Commands menu: You can also give commands to them through their command menu, Numpad 1-3 keys by default.
The command menu has some extra commands:
- Aim at person while the menu is up: Attack target, lasso target
- Aim at dead / hogtied person: pick up target
- Aim at horse: put carried body on horse
- Aim at downed hired gun: help up (it'll take them the same amount of time as for you)
Buyable Maxim Gun:
You can buy it in gun stores.
You can pick up the gun and carry it around by standing close to it and holding the reload key for a second or so.
You can also put it down by holding the reload key. Holding the attack key (left mouse) while you're putting it down will snap it to the ground, in case it keeps falling over.
You can store it on your wagon or boat using the wagon / boat menu, and you can also buy extra ammo that you can store on your wagon / boat. To store it, it needs to be close to the wagon.
Right now storing the gun or simply putting it down next to the wagon will reload it from the wagon's ammo stash.
Zombies:
They're disabled by default, you can enable them in the ini or in the debug menu (see below).
There are some options in the ini to customize them, like how many should spawn, how aggressive they should be during the day or night, or for them to burst into flames when they die just for the spectacle.
Sheriffs in towns will pay 5$ for every undead you hunt down and bring back to them. For a corpse to count they have to be nearby in the back of your wagon, stowed in your main or temporary horse (with the icon, not just any horse), or carried by you in hand.
They won't spawn while you're in a town.
Pick up you payment / pay your fines at train stations / post offices.
If you didn't pick up your payment in person after completing a job or you have a fine to pay you can do it at train stations / post offices. Only in towns, might change later.. Walk up to a station clerk and target them for the prompt to come up.
Banking:
You can store your money in banks to keep your hard earned cash safe, or take a loan to buy a wagon and start your business.
Stored money will earn you 0.5% interest a day. Loans will be added to your bounty (with an added fine) if you don't pay it back in time.
You can set in the ini if you want to get jobs to New Austin or not. (turned on by default)
Major locations with job givers:
Valentine - General store (job, wagon), Hotel (job), Saloon (hiring), Sheriff's office(bounty), Butcher (hunting), Train station (payment)
Strawberry - General Store (job, wagon), Welcome center (job), Sheriff's office(bounty), Butcher (hunting), Post office (payment)
Rhodes - General store (job, wagon), Saloon (job, hiring), Sheriff's office(bounty), Butcher (hunting), Train Station (payment)
Saint Denis - General Store (job, wagon, boat), Saloon (job), Bar (hiring), Police station(bounty), Butcher (hunting), Train Station (payment)
Van Horn - Store/Fence (job, wagon, boat), the Depot (where you can rent a room - job, payment), Saloon (hiring)
Annesburg - Gunsmith (job, wagon, boat), Train station (job, payment), Sheriff's office(bounty),
Blackwater - General store (job, wagon , boat), Saloon (job, hiring), Sheriff's office(bounty), Butcher (hunting), Train station (payment)
Armadillo - General store (job, wagon), Saloon (job, hiring)
Tumbeweed - General store (job, wagon), Saloon (job, hiring), Butcher (hunting), Sheriff's office(bounty)
Lagras - Store (job, boat)
There are also 51 other minor locations in the mod that are only job destinations with no job givers, 36 gang hideouts and many minor bandit campsites.
Debug / cheat menu:
Open the debug menu by holding down the Wagon menu key for a couple seconds while on foot.
Set the hotkey in the ini - WAGON_MENU_KEY. You can also disable the debug menu in the ini.
- Respawn wagon: Let's you respawn the wagon you own with horses - in case it spawned in without horses. You have to be near the wagon.
- Respawn Boat.
- Respawn Hired Guns: Respawns all your hired guns and teleports them to you, in case you lost them somehow.. It *might* help if they stopped following or bugged out in some other way.
- Remove fine - in case you failed a job due to a bug.
- Select Job Destination: If enabled, you can select destinations for any job by pressing the left and right key in the job menu.
- Trigger random attack.
- Despawn all bandit hideouts: In case they're in the way during a story mission or something...
- Reset Hideout Spawn Cooldown: Normally once you attack a hideout it won't spawn again for a while. This resets the cooldown so they spawn again even if you just cleared them out.
- Enable zombies
- Teleport to main land: If you travel to Guarma and somehow get stuck there you can use this to teleport back to Annesburg.
Known issues:
-The revive mechanic for hired guns is incompatible with some mods that change NPC health, it will cause them to start dying right after they're spawed in. You can disable it in the ini if you're experiencing issues.
- You can't return bounties alive to the Rhodes sheriff office before chapter 4. You can still return them dead though.
- The "mount up" command for hired guns can be wonky. The game handles their horses spawning in and it can take a while sometimes. They also won't mount up while you're sitting in a vehicle, so if you want them to follow your wagon on horseback, wait for them to get on their horses before you get into your wagon.
Installation:
Download AM&JMTransport.rar, extract it and drop the files into your Red Dead Redemption 2 game folder.
You're going to need Script Hook By Alexander Blade.
https://www.dev-c.com/rdr2/scripthookrdr2/
Credits: Some of the "own a wagon" part of the code was straight lifted from opsedar's Stash That Wagon mod. Big thanks for him for all his work and especially for open sourcing them ❤️
-
 Since it seems that a lot of people still want this and no one bothers to make it, here is a simple mod which removes the hitmarker when shooting. Drag the file into your game folder and enjoy. Please note that you need to have an ASI loader for this mod to work.
I have not tested this mod much (< 5 minutes), so if something else breaks, please let me know.
Disable any reticle color change
In the .ini you can set "DisableReticleChanges" to true to disable any reticle color changes.
Please don't upload or redistribute this mod, link here instead so that everyone has the most up to date version.
-
 Tired of being just a pawn for Dutch and the others? Well now YOU can be the leader!
For discussion, suggestions, and bug reports, join the mod's Discord.
To start the mod, visit the Strange Man in the Bayou Nwa and focus on him (default right click) to see the prompt. His location is marked with a skull icon.
Your camp will have 4 camp managers, marked by icons on the map. Focus on them (default right click) to see the prompts.
-
 If you've ever pointed a gun at a bank teller in vanilla and then been highly disappointed that nothing happens, this mod is for you.
Now you can force them to open the vault, after which you can silently crack or blow open the safes containing lootable money and gold!
All 5 banks in the game are supported:
- Valentine
- Rhodes
- Armadillo *
- Saint Denis
- Blackwater
* Requires the mod Project New Austin.
-
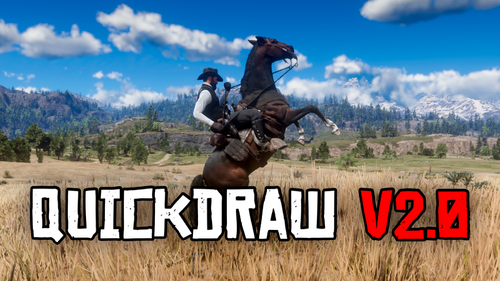 🌟 QuickDraw Immersive V2.2 Update
Are you a Red Dead Redemption 2 fan and love mods that enhance immersion? Meet QuickDraw Immersive V2.2! Featuring insane weapon cheats, lightning-fast loot, a streamlined menu, and a new addition: the O'Driscolls gang now roaming the world of RDR2.
New:
Old:
🔧 About the mod:
This mod was created to provide a fully immersive experience, with weapon and gang cheats that bring more life to the world of RDR2. I'm constantly working on improving performance and fixing bugs.
⚙️ Main features of the mod:
QuickDraw: Press "X" for a quick draw.
Weapon cheats: Press "TAB" to perform weapon cheats.
Menu: Press "F7" to access cheats and other options, to exit the menu just go back all the way by pressing "Backspace".
New gangs: You can now find the O'Driscolls gang roaming the map.
✨ Recent improvements:
The mod no longer activates during missions!
Quickdraw has been improved from 4ms to 2ms.
Gun tricks have been improved from 9ms to 5ms.
Added a function to delete stationary peds!
Known bugs are being fixed continuously. Check the menu to see what has been updated!
All mods within "QuickDraw Immersive V2.2" will have their own separate versions in the future in case you want to have specific mechanics of the mod.
Many thanks to everyone for supporting this project.
- 3,542 Downloads
- 140342 Views
- 173 kB File Size
- 2 Comments
 Updated
 -
 RDR2-Duels
A simple mod lets duel you everyone with a gun in the game.
Features
Much inspired by the real duels in the game. Adds an option to duel any npc. Customizable settings. Cinematic duels, converstaions and sound effects. Controller friendly. Installation:
Download and install AB's ScripthookRDR2: http://www.dev-c.com/rdr2/scripthookrdr2/ Make sure you have an asi loader, it usually comes along with Scripthook. Remove previous versions of the mod, if you have any installed. Copy Duels.asi and Duels.ini to the game's main installation folder. How to use:
Approach a ped and lock on it. You'll notice a new prompt, letting you to challenge the ped for a duel. Once challenged, get to the blip marked on your radar. Draw your sidearm by holding the attack control. Kill your opponent! You may walk from the duel at any time, but your opponent might attack you for bailing. Playing a dirty move like attacking your opponent while it's getting into position will cause him to attack you. Settings and customization
Add the Duels.ini file to the game's main installation folder. Follow the instructions in the file and make sure you make the right changes. Notes:
If you'd like to report an issue, please attach your Duels.log file.
Donate:
https://www.paypal.com/donate?business=X4H3B5F6JD8AG
-