15 files
-
 Description
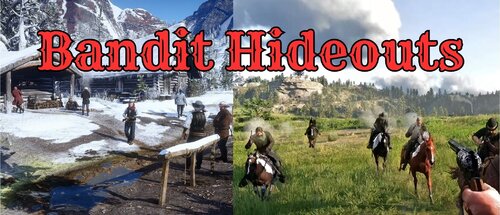
The mod adds 134 new bandit hideouts, 46 ambush points, a bandit posse on horseback that will chase and hunt you,
random roaming bandits on foot, horse, or wagon. Hire up to 9 gunmen at saloons, and fight against zombies.
Players can customize all features through various settings with the included Bandit_Hideouts.ini file.
Bandit Hideouts is a standalone mod it is a highly upgraded version of all the AMJM Transport mod bandit features,
created by crossed99 and Gunter Severloh
////////////////////////////////////////////////////////////////////////////////////////////////////////////////////////////////////////
Warning - Before you install!
For those installing the mod for the first time and want to also play the story/missions.
So you understand what this mod does, it adds 130+ bandit hideouts
and ambush points all over the map, thats everywhere and anywhere except towns (settlements).
That means there are some hideouts that will spawn at story, and mission
locations. There are also ambush points that will spawn bandits that may
interfere with story missions, or while riding to them.
There are also other bandit features like the bandit posse on horseback
that will spawn and attack the player anywhere, anytime.
That means they may come when your in the middle of a story mission, or traveling
with another character from the story during a mission.
If you do play the story and dont like the idea of hideouts, and bandits interfering
during the story and missions.
There is a Bandit_Hideouts.ini file included in the download, it is a configuration file that will
allow you to configure every feature in the mod, this includes being able to disable the mod while ingame,
or disabling certain features, hideouts, and ambush points that could interfere with the story.
As said everything in the mod is configurable, it can be enabled, disabled, or adjusted if it uses numbers.
Do not install the mod if you are not at least in chapter 2 of the story!
Any questions or problems review the articles, or ask on the post tab!
/////////////////////////////////////////////////////////////////////////////////////////////////////////////////////////////////
Features
Bandit Hideouts
The Bandit Hideouts mod adds many new hideouts across the RDR2 map for the player to discover and clear out.
Each hideout ranges in the number of bandits, but you can define in the ini of the mod how many bandits
a hideout will have, what gang will spawn there, and how many reinforcements will come if any,
even if zombies will spawn there instead of bandits.
Hideout Locations Map
The hideout locations map is a high resolution map of the RDR2 world you can download and use it as a reference to
see where all the hideouts, & ambush locations are at in the world.
The legend on the map will tell you what region a hideout or ambush location is in, what gang is at each hideout/ambush
point. All hideouts and ambush points are marked with a colored skull icon to represent a hideout, and an X to represent an ambush location,
both a numbered and listed in the legend accordingly. Icons on the map will indicate their exact locations.
Download
Google Drive: 59.5mb https://drive.google.com/drive/folders/1iLI3Yjmay0uw22f-0MUg0j0__DAEYlGK?usp=sharing
Credits: LittleBigSmoak & Moth-man
Ingame Blips & Icons
Hideout Locations Blip (icon)
A blip (icon) of a house with a skull inside it, will show up at the bottom left corner of your screen
it means a hideout has spawned in and is nearby.
If you pass by a hideout without attacking it, the map blip (icon) will disappear once your out of range of the hideout.
If you attack and clear the hideout then the blip on the map will be removed and your screen until the hideout timer is up.
You can disable this icon if you wish through the included bandit hideouts.ini
Default spawned in hideout map blip
When a hideout spawns in, by default this icon will be showing on the map at the location of the hideout,
the player has 3 other choices of map icons they can use if they want to change it which can be done through the ini
Persistent Blip (icon)
The Persistent blip icon will show on every hideout location on the map whether your near a hideout or not,
if you clear a hideout the blip icon on the map will be removed until the spawn time for that hideout has returned.
The persistent blip icons have their own icon type vs the one on screen. The icon can also be disabled in the ini, and
only the blip icon of a hideout will show on the map when the hideout spawns in.
Types of bandit hideouts
Each bandit hideout can be a house, camp, cabin, abandoned building, cave, mine, fort, ruin, and other places.
Hideouts will spawn bandits in by chance when you're nearby, this means that if set in the Bandit Hideouts.ini
you set the chance to 100 then each time you come close to an area where a hideout would be then bandits
will spawn there for sure, the lower the chance then it becomes random or less.
Cleared hideout message
A small feature by default is if you cleared a hideout a message will show on the screen saying
"You have cleared the hideout!"
you can disable this in the ini if you wish.
Earn money from clearing hideouts!
Yes you read that right, after killing all the bandits in a hideout, you will earn a random
amount of money ranging from $25 - $150
You can customize the amount you want to earn in the ini or set it to 0 to disable it.
Cleared hideout respawn
Once you clear a hideout you can set in the ini the cool down of how long before they respawn again.
If you set the respawn to 1 for example then in one hour from when you cleared the hideout bandits will spawn in again.
Hideout bandit/gang types
Each hideout will be populated with gang members for the area the hideout is in, for example:
Valentine area will have O'Driscoll members or a generic gang. Lemoyne/ Rhodes area will have Lemoyne Raiders, and a generic gang. Annesburg area will have Murfree gang members. Saint Denis area may have either Nightfolk, or a generic gang. Tall Trees area you will see the Skinner brothers gang. New Austin area you will see the Del Lobo gang. Grizzlies West (snow region) area will have a generic gang. Grizzlies East (snow region) area will have a generic gang. Guarma will have the Cuban Army and Nightfolk.
Disable individual Hideouts and Ambush points
This feature allows the player to disable any individual hideout and ambush point in the mod through the included ini
all you need to do is locate the hideout you want to disable through the downloadable map and then change the number from a 1 to a 0.
There is a list for both hideouts and ambush points in the ini.
Custom Gangs in hideouts
Each hideout listed in the ini for the Disable Individual Hideouts list can either be disabled, or changed so it spawns another gang.
The gang types to choose from are the following:
// Gang Type Reference //
Generic gang - 7 Murfree Brood - 8 Lemoyne Raiders - 9 O'Driscoll Boys - 10 Skinner Brothers - 11 Del Lobo gang - 12 Nightfolk -13 Cuban Army -14 Ku Klux Klan - 15 Wapiti Warriors - 16 United States Army - 17 Laramie gang - 18 Micah's gang - 19 Angelo Bronte's Mob - 20 Cornwall Goons - 21 Braithwaites - 22 Gray Family - 23 Foreman Brothers - 24 Bounty Hunters - 25 Pinkertons National Detective Agency - 26 Chelonians - 27 Vampires - 28 Here is an example hideout in the ini that is listed in the Disable Individual Hideouts list:
ENABLE_ABANDONED_FACTORY=1
- With the setting at 1 the hideout spawns its default gang.
- With its setting at 0 the hideout is disabled and wont spawn.
- If the number is changed to a number from either 7-28 seen in the list above, then that hideout will spawn that gang based on the number.
For example if we changed the number to say
ENABLE_ABANDONED_FACTORY=18
then the Laramies gang will spawn at that hideout instead of the default gang.
Here is an article on how this works in more detail with a video demonstration/guide
https://www.nexusmods.com/reddeadredemption2/articles/435
Custom Gangs in Regions
A feature where you can define what gangs will spawn in what regions for hideouts, a list in the ini of all the regions
or areas on the map, each region has a default number, the number represents what gang will spawn in that region.
From the reference in the ini, you can change the number for the region for whatever gang you want to
spawn at the hideouts in those regions. This feature is disabled by default.
Exact or random number of bandits in a hideout
The amount of bandits you can encounter in a hideout will be defined in the Bandit Hideouts.ini
there you can set the minimum and maximum numbers you will encounter, this is for all hideouts.
If you set the number for both min/max the same you will get that exact amount, if you set the number to
exceed the default random min and max then the extra bandits will come as reinforcements.
Bandit Reinforcements
Bandits at hideouts can call in reinforcements, they will show up on horses and or on foot.
Reinforcements is set by chance in the ini, the higher the percentage (chance) then reinforcements will show.
Reinforcements also has a setting where you can define how many bandits will come, and if you only wanted
bandits on horses, or foot, or both, you also can disable reinforcements from coming in the ini.
Bandit Spawn Amount
In the included bandit hideouts.ini there is a list called spawn amount, this list will list every hideout/ambush point
and allow you to set a specific number that you want to spawn at a or each individual hideout.
This lets you customize hideouts based on how you want to play.
Each hideout and ambush point has a default or base number of spawn points you can use this article reference
to get the base default number of each hideout: LINK
Knowing the base number of a hideout or ambush point will tell you how many bandits can be spawned there.
For example: If you chose a hideout that had 10 bandits spawn positions that means if you set the spawn amount
to say 5 then only 5 bandits would spawn. If you set the number to say 15 then the extra 5 bandits would spawn
at the reinforcement spawn points.
The would respawn at the reinforcement spawn points because there are only 10 available spawn points
at the hideout. The same applies to ambush points.
Bandits will chase the player
Bandits will chase you if you ride off or run away after attacking their hideout.
Bandit Ambushes
Ambushes are not dynamic they are built the same as hideouts and are at set locations.
Each ambush location can vary between 2-6 bandits that will attack you on foot if you enter an ambush location.
If you run away on foot or on horse the bandits at the ambush location will chase after you either on foot or get on a horse.
Ambush locations are marked on the downloadable map with an X
Enable/Disable individual Ambush Points
This feature introduced in v1.18 gives the player the option to enable or disable an individual ambush location through the included ini,
all you need to do is refer to the map linked for download and decide which ambush location you want to disable for whatever reason,
you open up the ini file, locate the ambush point in the list, and just set the setting accordingly.
Ambushes can also be customized to have a certain amount of bandits spawn using the spawn amount setting.
Bandit Posse on Horseback
As players explore the game world, they will randomly be attacked by bandits on horseback, these encounters can happen at any time.
In the Bandit Hideouts.ini you can define how often (how many ingame hrs) bandits will attack,
and a minimum and maximum number of bandits on horseback that will attack, you can disable this feature in the ini if you want to.
Random Roaming Bandits
Bandits roaming the world, they will spawn in the area you are in and will be bandit/gang members
from that area so if your in Valentine Area then you might see a small group of O'Driscolls wandering around.
These bandits may be on foot, on horseback alone, in a group, or on a wagon, or both.
You can also set in the ini if they attack you on sight or not, and set how often they will spawn.
Hired Gunmen
Players can hire up to 9 gunmen to fight alongside them, to do so just talk to the barkeep in any saloon.
These hired guns will assist the player in combat, making it easier to take on large groups of bandits or zombies.
You can hire up to 9 gunmen at a time. You can hire a random gunmen with their own gear and weapons. You can customize what they wear, and the weapons they carry. Set how much it costs to hire a gunmen. Hired Guns will not fight while in a town (can change this in the ini). Story characters are also available. You can use the 'Rest & Recover' option in the menu that will teleport your hired guns to you in case you got separated, they'll be cleaned and their hats and weapons will be recovered if they lost them.
They automatically go into "sneak and hold fire" mode while you're crouching / sneaking outside of combat. If the "Allow revive" option is enabled, instead of dying they will go down into an injured state and be revived by crouching close to their head until the 'Help' prompt fills up (10 seconds).
Using the 'Wait for signal' command will make them stay and don't do anything until you signal to them by whistling. The 'Ride with me' command will prevent them from spawning in their own horse. If there's another free horse around they'll use that, but if not they'll ride with you on your horse.
Commands menu:
You can also give commands to them through their command menu, Numpad 1-9 keys by default.
Hired Gunmen Voice Lines
When you tell your hired gunmen to stay or follow, Arthur or John will actually say out loud those commands,
and when your crouched and you tell your gunmen to stay Arthur or John will say it in a quiet voice.
This feature can also be enabled and disabled in the ini, and is enabled by default.
The command menu has some extra commands:
Aim at person while the menu is up: Attack target, lasso target. Aim at dead / hogtied person: pick up target. Aim at horse: put carried body on horse. Aim at downed hired gun: help up (it'll take them the same amount of time as for you). Press numpad 0 to make all hired guns stay / follow Zombies
As if bandits weren't enough to deal with, the mod also adds zombies to the game world.
Disabled by default, you can enable them in the Bandit Hideouts.ini
There are some options in the ini to customize them, like the following:
Spawn frequency - this is how much more or less you will see of them. Day/night detection - this is a setting where you can set if the zombies detect you. Zombie health - this is how much a zombie can take before you kill them. Min/max spawn amount - this will be the group size of how many groups of zombies. Min/max number - number of zombies that can spawn during day or night. Min/max spawn time - how often they will spawn in seconds. Zombies burst into flames upon dieing. Zombie lairs - this will change all the bandit hideouts to zombie lairs, so instead of bandits spawning, zombies will.
Customization
All of the features in the mod can be customized by editing the Bandit Hideouts.ini file.
Each setting in the ini has a description on what it does and how to enable/disable it or adjust it.
Open the ini file with notepad to edit it, also run it as administrator if you are being denied access.
Installation
Move the following files:
Bandit_Hideouts.asi Bandit_Hideouts.ini Bandit_Hideouts_CustomPeds.txt to your RDR2 directory which can be found here:
C:\SteamLibrary\steamapps\common\Red Dead Redemption 2
Requirements
Scripthook by Alexander Blade is required to run the mod.
https://www.dev-c.com/rdr2/scripthookrdr2/
If AB Scripthook gives you issues with the mod then try using
ScriptHookRDR2 V2
https://www.nexusmods.com/reddeadredemption2/mods/1472
Credits
Crossed99 for his help and support, and patience in helping me create and update this version of his great mod!
LittleBigSmoak & Moth-man for their help in creating the Bandit Hideouts map showing all the locations
of the hideouts, and sorting them based on color and gang.
Bandit Hideouts Youtube Channel
Gunter Severloh RDR2
Check out the Bandit Hideouts Youtube Channel for gameplay, guides and how to videos on the mod.
-
 Description
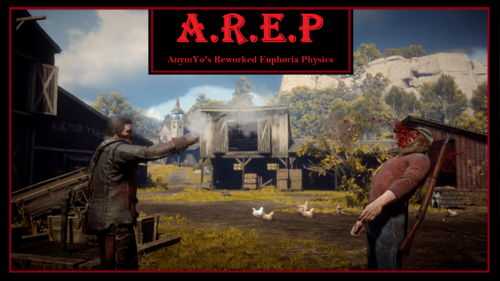
This mod brings you Max Payne 3-inspired, yet authentically tuned for a western-style, "exaggerated" shot and burning reactions. The shot reactions are written from scratch and shouldn't break the immersion of RDR2. It's actually a WIP update for C.E.R.R that I initially abandoned to revert to an earlier stage after the physicstasks hotreload tool was released. I've added some of the new C.E.R.R features that I'm working on for the upcoming update. Now it's a solid euphoria mod, created without experimentation, following the same pattern as seen in older Rockstar Games titles. No weapon customization via the weapons.ymt file and no updates planned.
A.R.E.P Main Preview:
A.R.E.P now caters to a broader range of ragdoll-related preferences by offering various versions to choose from, each focusing on specific aspects. Despite the different adjustments, each version retains the core elements that make for a satisfying ragdoll physics experience—exactly what I aim for with A.R.E.P and what we were accustomed to in older Rockstar Games titles.
- A.R.E.P 1.1:
This is the main version of A.R.E.P (1.1). Inspired by Max Payne 3 ragdolls, this version offers a ragdoll result adapted to the western genre. If you're looking for a balanced and immersive experience between balancing/collapsing, appropriately exaggerated shot reactions, and satisfying Euphoria physics, this is the version to choose. Headshots can result in a drop or sometimes in a "the brain isn't working so well anymore" reaction. Fire reactions are much more dramatic—NPCs either throw themselves to the ground or run away while burning.
###################
Alternative Versions:
These are alternative versions of A.R.E.P that were requested by the community.
### It is important to mention that, unfortunately, it is not possible to modify A.R.E.P 1.1 without altering the overall result in the game (even aspects, which shouldn't be affected)... Even adding a simple empty line in the physicstasks.ymt file or changing a comment somehow causes Euphoria-related aspects like stumbling/balancing and bullet force effects to slightly change. I have absolutely no idea why this happens, nor do I know how to fix it. Nevertheless, I have done my best to create a satisfying experience for all versions. ###
- Version A "A.R.E.P v.A (Less balance, faster drops)":
In this version, the Euphoria balance time and NPC stability have been reduced, causing NPCs to fall to the ground noticeably faster. As a result, their body weight feels heavier. Additionally, NPCs immediately drop upon receiving headshots. Those who enjoyed the vanilla Euphoria tuning of RDR2 but prefer a touch of "realism" in A.R.E.P, will love this version!
- Version B "A.R.E.P v.B (Drop Headshots)":
This version is like A.R.E.P Main, but with the difference that headshots make the NPC drop to the ground instantly. Changing the parameters slightly affected the balancing. It feels a bit altered due to the aforementioned phenomenon/bug.
- Version C "A.R.E.P v.C (Spaghetti Western incl. more stumbling)":
Many wanted more stable NPCs that stay in balancing mode for longer. This version has been adjusted in various aspects to achieve a higher chance to let NPCs stumble longer, especially when you rapidfire them. But even here, it was important to me to make it immersion-friendly, so I tried my best to adjust it this way. Overall, this version feels more like a 1960s spaghetti western.
###################
-> Installation:
Choose a version and copy the corresponding folder into your LML folder. For example the "A.R.E.P Main" Folder. Make sure the mod is active in Lenny's Mod Loader UI.
Important for troubleshooting:
- Be aware that you can only run one Euphoria/Ragdoll mod at a time.
- Custom settings in weapons.ymt (like custom impulses or associated Euphoria tuning sets) can affect A.R.E.P's Euphoria tuning, possibly in a negative way.
- If you use PDO, make sure you set "euphoriamodinstalled" to "1" in the .ini file.
-
 Experience true spaghetti western with this euphoria physics overhaul mod that recreates RDR 1's physics from the ground up and adds a bunch of new additions.
Ever since GTA 5 was released, the euphoria physics have been a major downgrade compared to games like MP3, GTA IV and RDR 1. RDR 2's euphoria physics have improved a ton, but it still feels very repetitive and rather boring.
(If you want to download older versions of W.E.R.O, you can get them in my discord server)
FEATURES:
• No Air Restriction when flying super fast during ragdoll & RDR 1 like falling gravity
• Every weapon and ammo type will affect differently on how the NPC will react (WEAPONS.YMT REQUIRED)
• RDR 1 Falling Reactions. Falling behaviors are fluid and flexible, allowing more variety
• RDR 1 like gunshot reactions. NPCs no longer stumble to the same direction and they spin when shot in the shoulder area. They also react dynamically and gunshot reactions are fluid
• RDR 1 Rolling Reactions. No more rigid movements!
• Advanced InjuredOnGround behaviour. The NPC will reach for the exact wound where they have been shot on instead of reaching for the stomach all the time
• More improved and diversified legshot reactions. NPC's will stumble or fall depending on the bullet/weapon (WEAPONS.YMT REQUIRED)
• Improved On Fire behaviors. NPCs stumble in agonizing pain
• Every single shotgun affects differently on how the NPC will react and the NPCs now spin more violently (WEAPONS.YMT REQUIRED)
• Improved behaviors when bailing out of a wagon
• RDR 1 like knockout reactions
• Improved the NPC reactions caused by arrows and added different behaviors to other arrow types (WEAPONS.YMT REQUIRED)
• Alternative versions! Want the deaths feeling more realistic? Want realism mixed with fun? I got you! Versions such as Instant Drop On Headshot and Fall To Knees On Death (or both combined) will give you exactly that!
• Improved explosion behaviors & distance of flight when near an explosion
Compatible with: Ped Damage Overhaul, Red Dead Offline, WhyEm's DLC, 1899 Firearms and All Shots Cause Bleedouts & basically any mod at this point (excluding mods that use physicstasks.ymt). WILL REQUIRE VERSION.DLL (Lenny's Asi Loader) AND W.E.R.O - AUTOMATIC COMPATIBILITY PATCH, if you have a mod conflicting with W.E.R.O's weapons.ymt file.
A massive thanks to LMS, Bolmin & Senexis for letting me use some of their Red Dead Offline files! Without them, i wouldn't be able to implement different reactions to every weapon and ammo type into this mod
Massive thanks to the following mod authors for letting me add compatibility to their mod/agreeing on a merge:
WickedHorseMan
WhyEm
Maverick
Also huge thanks to AnymYo for a lot of the discoveries made so that I can bring you the most advanced mod to date. A lot of struggle went through making and continuing to make this mod to fit your preferences and to give you more options, so if you like my mod, definitely consider endorsing and perhaps providing feedback and letting me know what you like the most about W.E.R.O. Thanks for downloading! This mod wouldn't be possible without you guys and AnymYo for helping me crack the file and unlock it's full potential! The amount of support you show to this mod definitely means a lot to me and pushes me to continue this project! Thanks again
If you want to, you can:
Join my DISCORD server to stay up to date with latest early update previews and more
Download my wero mod for GTA 5 as well: https://bit.ly/2QZNO6V
For realism, I recommend using the latest Ped Damage Overhaul mod that has added support for euphoria mods and i also recommend using All Shots Cause Bleedouts mod (or any other blood mod like BloodLust by WhyEm or Center Mass by walrus159). Make sure that the EuphoriaModInstalled value is set to 1 in PDO so you can have the best experience possible
and much much more that gives the game a more satisfying feel when killing enemies or falling and rolling
How to install this mod into your game
Just drag and drop the WERO folder in your LML folder. IF the mod doesn't work, make sure you have the latest ScriptHook, ASI Loader by Lenny and a properly installed LML. Make sure you don't have any other mods that have the physicstasks.ymt file.
REQUIRED: LENNY'S MOD LOADER & SCRIPT HOOK
Hope you enjoy this mod!
Thanks to all my Patreon supporters for participating in making this mod better and better:
Jack Fisher
Myles Brown
Catfish
Ole Kristian Tveit
AidenNapalm
Sloot.
Julien Lecleire
UAEXAE
Prodigii
Abizhey
Joe Ray
Roy Luo
NotBatman
joel Davey
Madoks Filek
Pokker-Gamer
El Morty
martin gustafsson
Fer Bueno
Ta'Quan Anthony
Miguel Lefebvre-Sabourin
Rex._.
Tim Tran
Jason Schaefer
Tristan Darden-Lawrence
Braylan
Stephen Killam
Abizhey
Like what I do?
Consider supporting me on Patreon!
- 68,871 Downloads
- 268767 Views
- 6.02 MB File Size
- 30 Comments
 VolaticWolf in MiscUpdated
 -
.thumb.png.43567234faf1d65a898828d9720bfd17.png) Best TAA and Visual Effects is intended primarily for players who play the game with an upscale of 1.5, 1.75 or higher (in the game settings) Also works great using DSR and DLDSR technologies. Or use real 2k/4k monitors!
Best TAA and Visual Effects is intended primarily for players who play the game with an upscale of 1.5, 1.75 or higher (in the game settings) Also works great using DSR and DLDSR technologies. Or use real 2k/4k monitors!
Big update v.1.6.0 Changes below:
✔️Reflections from water have been reworked (now objects are reflected more clearly: trees, hills, houses).
✔️Improved glare from water (especially at night).
✔️Improved SSDO screen space occlusion (SSAO).
✔️Other minor improvements.
✔️Still the same vanilla performance, without loss of FPS. 💪🏋💯
Big update v.1.5.0 Changes below:
✔️Added terrain tessellation.
✔️Improved water glare, foam and its physical behavior.
✔️Other small improvements.
Big update v.1.3.0 Changes below:
✔️Now the best volumetric reflections from clouds.
✔️Improved tessellation of water surface.
✔️Thanks to: Cazanu We now have an incredibly beautiful Milky Way constellation, which I included in this update. Now in the Wild West there are stunningly beautiful nights in 8k resolution!
✔️Improved the quality of all reflections from water and puddles.
✔️Water glare has been adjusted.
✔️Improved foam near the ocean shores.
Advantages:
✔️FPS + -absolutely the same as in the stock version of the game (But the difference is calasal)
✔️The mod is fully compatible with the mod: "Visual Redemption" https://www.razedmods.com/red-dead-redemption-ii by Razed. You should simply delete the "visualsettings.dat" file from the "Visual_Redemption" folder in your LML directory.
✔️This TAA fix is equal in quality to anti-aliasing: MSAA 2x. At the same time, it is much more productive!
✔️Higher rendering of objects at all distances in the game
✔️Trees now have more volume
✔️Higher terrain detail
✔️Very flexible TAA sharpening scale (If you want a less sharp image, you should decrease TAA sharpness)
✔️Better detail for pedestrians and animals
✔️People and horses now spawn at long distances
✔️Grass quality at all distances in the game has a clearer outline
Now you no longer need texture packs with high-poly objects that will cause frame rate drops when using a not-so- expensive graphics card, or have texture loading before your eyes! I also recommend you use my free ReShade Preset:
Through extensive testing and tweaking, I was able to increase the draw distance of objects, especially trees. Also the distance of the appearance of pedestrians, horses and other objects at a greater distance. If you're playing on PC, remember that people and animals used to be downloaded over long distances, with the latest Rockstar updates, this thing is broken. This add-on will help solve the problem.
Attention! This assembly is an early version and may have some bugs, treat it with understanding!
WARNING: 👇The screenshots use my own preset for ReShade: "Red Dead Vision", details on my server 👇
Subscribe to my Discord server: https://discord.gg/BbavTG7 to follow and stay updated!
Flaws:
❌Some people may find these settings too sharp (However, people who like a clear picture and know how to play with scaling will be delighted with the detail)
INSTALLATION METHOD:
unpack the entire contents of the archive into the"lml"folder.
WARNING: At the start of the game, you should have an option on the tab: "TAA Antialiasing"set to"High".
If you already have a file: "visualsettings.dat" in the LML package, then the mod may not work! Therefore, before installation, you need to delete the file with the same name.
Buddy, if you like these settings, leave your approval and your vote!
You can leave your wishes in the comments 🙂
-
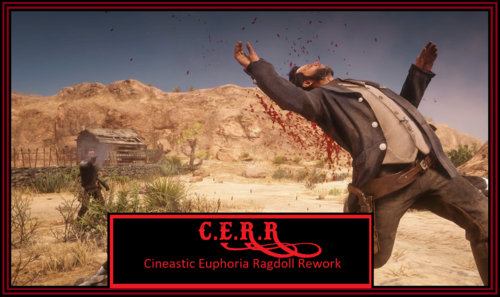 Hello everyone!
Prolog
This Mod is bringing back some cineastic and diversified euphoria ragdoll shot reactions which R* did not consider necessary to implement since they think that the euphoria engine is a feature that "costs more time and money and players dont notice it"...
A really sad attitude and absolutely wrong in every way!!!!
The fact that youtubers these days making successfully videos about
ragdoll showcases from a game which was released 2010, speaks for itself...
When the most people talking about realism in Euphoria driven games, most of them actually mean "authentic" motions. And that was what Rockstar Games aimed for in GTA4, Red dead Redemption (2010) and MaxPayne 3. It wasnt realistic in a way that NPCs immediately fell lifeless to the ground after you shot them, but the motions the NPC was performing were really authentic, believable and movie-like for each genre the game was set in. Since GTA5 this feature is missed.
Cineastic Euphoria Ragdoll Rework (C.E.R.R)
This mod is inspired by the great and "evergreen" Red Dead Redemption from 2010 and other classic western movies!
Unfortunately its really hard to recreate this great shooting
experience from RDR1 by just watching videos and playing the game, thats
why I started studying the euphoria behaviours and parameters to create
something that maybe go in the "right direction" and would reach a kind
of the old R* standards of Euphoria ragdoll physics...
This mod is bringing you new and diversified gunshot reactions, for each weapon and also ammo type (revolver, pistol, shotgun, bow and so on)
NPCs behaving differently when shot depending on each weapon, ammo and hit zone!
I also implemented a range of random varieties to certain shot behaviors.
Some of the features:
- The reactions are inspired by the original Red Dead Redemption (2010) and classic western movies (Tombstone, A Fistful of Dollars, The Good, the Bad and the Ugly, and so on)
- All modded Euphoria tasks have been rebuilt from the ground up to match the motions
- All own created reactions containing those classic and "alive" looking authentic euphoria features like they were before GTA5 was released
- NPCs reacting longer to shots without collapsing
- Different hit zones with significant reactions (legs, neck, head, stomach, arms, torso)
- Almost each weapon and its ammo type has its own reactions (Normal ammo, express, splitpoint, different arrows, slug, fire ammo)
- NPCs start writhing in flames instead of simply falling down when you shoot them with a fire arrow
- NPCs stay active and more life like on the ground
- A Lowered stiffness to create more "fluid" motions to match that "satisfying" feeling, people know from GTA4, RDR1 and MP3
- And more!
Feel free to post your feedback in the comments/review section 🙂
I hope you enjoy the mod!
A special thanks goes to SyntheticOutlaw for giving me that great start into this kind of modding!
Please see Installation.txt for installation instructions!
This mod is 100% compatible to Red Dead Offline! -> Its really awesome. If you dont have it yet, I relly recommend to check it out!
This mod is also 100% compatible to PDO! (Go to the .ini and set "EuphoriaModInstalled = 1")
In case you want to make other mods compatible which are also using the weapons.ymt file, you will need to merge all changes from the other weapon.ymt (from the other mod) into the weapons.ymt file from C.E.R.R. There are a lot of euphoria related changes in the weapons.ymt file from C.E.R.R so its less work to use this file as a base. Each section which contains changes, is marked with a comment which contains "C.E.R.R REDONE". I also marked all explicit changes with a comment which contains "CERR" (without dots between the letters to make it easy to find). Ive done this only in the weapon section "Cattleman Revolver Single" but its a repeating pattern for all other weapon sections. Just keep all values marked in the "Cattleman Revolver Single" section also in all other weapon sections to keep the C.E.R.R adjustments properly.
Just download Notepad++ and download the "Compare" and the "XML Tools" plugin.
With these plugins, you can collapse all sections by pressing "ALT+0". This makes it easier to keep track of things.
All changes are done only in:
<CWeaponInfoBlob> -> <Infos> -> <Item type="CAmmoInfo"> and <Item type="CWeaponInfo">
By using the compare function, you can compare both files to see the differences and what to take over. After you did this, just copy the changes of the other mod to the weapons.ymt file from C.E.R.R.
I also warmly welcome any creator to make their mods compatible with C.E.R.R!
Have fun!
Other media:
-
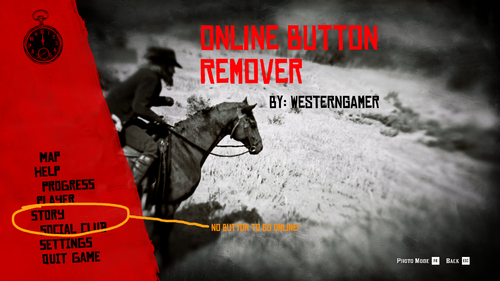 This removes the online button from the pause menu, that is what this mod does!
- 5,193 Downloads
- 20368 Views
- 2.44 kB File Size
 WesternGamer in MiscUpdated
 -
.thumb.png.c2d473bfbddd5f01c361323c0ed93dc4.png) This mod skips the legal menu and the main menu and puts you directly into story mode. Since this mod tells the game to replace certain files, Red Dead Online is disabled when you install this mod to prevent the risk of being banned due to modified game files. Any attempt to connect to Red Dead Online will redirect you to story mode. Attempting to open the online menu in the pause menu will cause you to get softlocked.
This mod skips the legal menu and the main menu and puts you directly into story mode. Since this mod tells the game to replace certain files, Red Dead Online is disabled when you install this mod to prevent the risk of being banned due to modified game files. Any attempt to connect to Red Dead Online will redirect you to story mode. Attempting to open the online menu in the pause menu will cause you to get softlocked.
NOTE: When the loading bar disappears, you will be on a black screen for a few seconds. The game is waiting for social club to sign you in. Story mode will start loading when you sign in.
Installation:
1. Download the zip file from the downloads page.
2. Extract the x64 folder in the zip file.
3. Put the x64 folder in your game directory.
4. The file explorer will say that there is a x64 folder in the game directory and if you want to merge the folder.
5. Click yes.
6. Done!
NOTE: The rockstar launcher may show a scary warning saying that there are modified files and that you may get banned for using online services with the modified files. Don't worry, this mod blocks you from going into online mode.
Uninstallation:
1. Go to your game directory.
2. Open the x64 folder
3. Delete the main_and_legal_menu_skip_data folder.
4. Open the data folder
5. Delete the startup.meta file.
6. Done!
Components:
These files can be found in x64/main_and_legal_menu_skip_data in the game directory.
legal_screen_patch.ymt - This skips the legal screen. Delete this file if you want to disable this. main_menu_patch.ymt - This skips the main menu and enables protections that prevent you from going online. Delete this file if you want to disable this.
Disclaimer:
I am not responsible if you get banned online for using this mod with protections that prevent you from going online being disabled in any way.
- 40,582 Downloads
- 239691 Views
- 2.26 kB File Size
- 8 Comments
 WesternGamer in MiscUpdated
 -
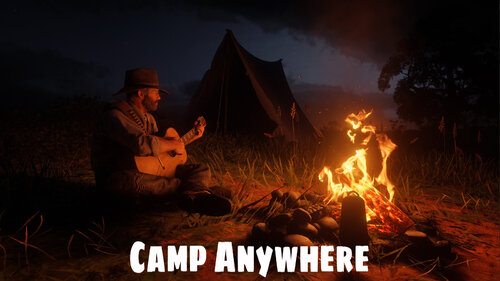 Set up your camp anywhere you want. Build a permanent custom camp that you can save, and place anywhere you want.
- Set up camp anywhere:
Use the hotkey to bring up the prompts. ('K' by default, you can change it in the ini, or the 'sprint' button while crouching on controller, DISABLED in the ini by default)
You can choose to build a campfire, set up a tent, place a bedroll or 'set up camp' that'll place a campfire and a tent at the same time.
To make them disappear, use the hotkey again and choose the tear down camp prompt (it will work regardless of your distance from the camp).
You can change the campfire, tent and bedroll models to other models used in advanced mode. Check the model's number in the menu and set it in the ini.
- Use one of the three rest options
...to recover your stamina core, or just for immersion.
- Sit
- Relax: your character will sit and do random stuff like drinking, smoking, reading...
- Play guitar
You can rest even when you don't have a camp set up.
Followers spawned in by other mods will also rest around you or your campfire while you're resting.
If somehow you get stuck, the hotkey should cancel the rest animations and unstuck you.
(New) - Advanced mode:
Use the "Advanced" prompt to bring up the build menu.
Menu actions:
Type: select the type of the object you want to spawn in. (Campfire, tent, etc...)
Model: browse through the objects in the selected type.
Distance: The distance the object should spawn in in front of the player.
Rotation: Rotate the object. Both distance and rotation can be wonky because some object has their "center" well outside of their actual visible model. Some object will spawn behind you or next to you because of this...
Place Object: Spawn the selected object.
Save and Exit: Save spawned objects and close the menu.
Tear Down Camp: De-spawn every spawned object. They will remain saved and can be re-spawned at the same or at a new location.
Respawn Camp: Respawn every object at their current location. You can use this in case your saved camp didn't spawn in properly.
Saved Objects: Browse through the object you saved as part of your camp.
Delete Saved Object: Delete the currently selected saved object.
Your saved camp should persist when you quit the game, whether it's currently placed in the world or not. If it's placed, it should automatically respawn upon loading the game. (If not, the 'Respawn Camp' option should spawn it in)
You saved camp is stored in CampAnywhere.dat in your game folder, you can back-up that file if you want to make sure you don't lose your built camp.
You can turn off advanced mode in the ini.
The campfire doesn't have a grill so you can't cook seasoned meat.
Known issues:
- Once the campfire is spawned, the game doesn't consider the area wilderness anymore, so normal camping will be blocked nearby, even after you remove the campfire, for some reason (resets when you reload the game).
Installation:
Download CampAnywhere.rar, extract it and drop the files into your Red Dead Redemption 2 game folder.
You're going to need Script Hook By Alexander Blade.
https://www.dev-c.com/rdr2/scripthookrdr2/
-
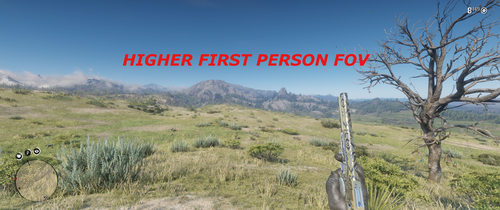 Increases the on-foot field of view while in first person. The version included in the download ups the FOV up to 112 at 21:9 aspect ratio and 97 at 16:9.
I may release more pre-modified versions in the future, but for now, I have included a quick .txt file in the download with instructions on how to modify it yourself.
Note: This only changes the walking FOV. Aiming and aiming-down-sights are unaffected. I know how to change these but at the moment, this is all that is changed.
-
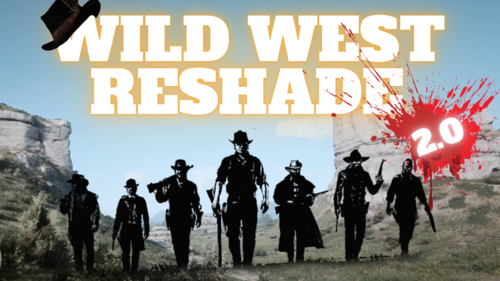 WELCOME TO A PHOTO-VERISTIC GRAPHICAL EXPERIENCE THAT BREATHES NEW LIFE INTO RED DEAD REDEMPTION 2
THERE ARE TWO VERSIONS DEPENDING ON YOUR TASTE
1.) WILD WEST 2.0 STANDARD (EVERYTHING SEEN IN THE STANDARD 2.0 IMAGES SECTION WITH DARK NIGHTS)
2.) WILD WEST 2.0: BONE ORCHARD (SIMILAR TO STANDARD BUT WITH MORE COLOR AND EVEN DARKER NIGHTS)
⇩⇩⇩⇩ IF THIS IS YOUR FIRST TIME USING RESHADE ⇩⇩⇩⇩
**NOTE**
⇩⇩⇩⇩
IT IS RECOMMENDED THAT YOU INSTALL THE LATEST VERSION OF RESHADE AND THAT YOU SELECT EVERY AVAILABLE EFFECT JUST IN CASE YOU NEED THEM TO BE INSTALLED FOR FUTURE UPDATES.
MAKE SURE CLARITY.FX IS NOT SELECTED TWICE WITHIN RESHADE DURING YOUR GAME.
- The western plains look dried out and dusty, while a vivid clarity gives the visuals a whole new feel. -
- Crackling ancient rocky mountains look bleak and faded. -
- Dead and dying grass now looks appropriate. -
- Marshes and swamps have fog color corrections while maintaining their vibrance and charm. -
- White lights are actually white, and not yellow, while yellow lights remain yellow and toned. -
- Shadow instances HBAO/HDAO/SSAO are greatly enhanced, showcasing the true depth the games' shadows deserve. -
**** ABOUT ****
⇩⇩⇩⇩
This Mod/Reshade preset is specifically designed to adjust colors, shadows, tone, balance, nights, and days, to try and look as photo-veristic as possible, in comparison to other mods that attempt the same. This Reshade is designed to give the country in RDR2 a specialized clearer visual look, complimented by the climate. Plains with droughts will showcase dying grasses, while marshes and swamps will showcase lush vibrancy. This is a film-style noir, wild west Reshade. It looks like this for a reason. There is a lot more clarity to the picture, and the yellowish-green film layer that was covering the screen is now removed. I truly hope you enjoy it. ❤️
-
.thumb.png.f5cf48b08fdeef51da83488a55a4d0a8.png) Changes:
Changes:
Removes all hunting requirements fom Pearson's shop Removes the need to scavenge non unique items for the fence The trapper will only ask you for legendary pelts and skins
Known Issues:
None
Compatibility: Anything that modifies catalog_sp.ymt is incompatible
only_legendary_hunting_epilogue: In this alternate version, the legendary pelts only obtainable in the epilogue AREN'T required by the trapper
How i did it:
Use OpenIV to export update_4.rpf/x64/data/itemdatabase/catalog_sp.rpf/catalog_sp.ymt to xml Rename the root element to ItemDatabaseParser I wrote some java code that removes the items from recipes Rename the file produced by the code to catalog_sp.ymt and create an install.xml for LML Some great help can be found in this wiki page, this hash converter and in the catalog_sp.ymt file from All items unlocked and purchasable
Huge thanks to @Senexis for his mod All items unlocked and purchasable, this mod is based off his files and research.
BACK UP YOUR SAVE before using!
Feel free to comment about any bugs you find or suggestions you have 🙂
-
 This mod removes the reticle sway that occurs when the player is getting shot at
you must have lennys mod loader installed for this mod to work
place "lml" folder in your rdr2 directory
Update 1.2 fixes most of the bugs.
-
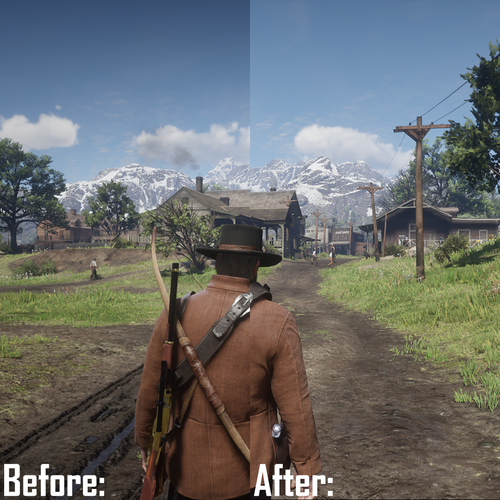 This mod completely removes the vignette effect from every weather/time preset via timecycle files. No Reshade/SweetFX is used here.
Installation:
1.You'll need Lenny's Mod Loader to be able to use this mod.
2.After installing Lenny's Mod Loader put the "No_Vignette" folder to the "lml" folder in your RDR2 main folder.
3.Done
Feel free to join my Discord community if you want: https://discord.gg/m96EEx2uR6
-
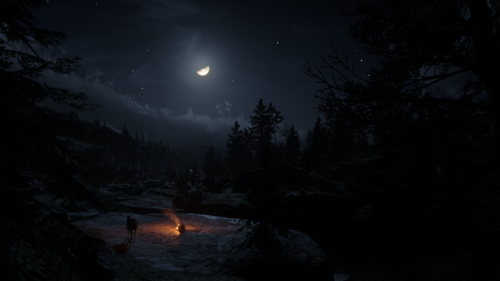 This mod makes the nights darker and more realistic. It also gets rid of the vignette effect.
There are 3 files.
Darker = Very dark (Like the screenshots)
Light = Slightly brighter
Lighter = Even more bright but still much darker than vanilla
Install:
Extract and place the 'dark_nights' folder into 'lml' folder.
Lenny's Mod Loader is required!
-
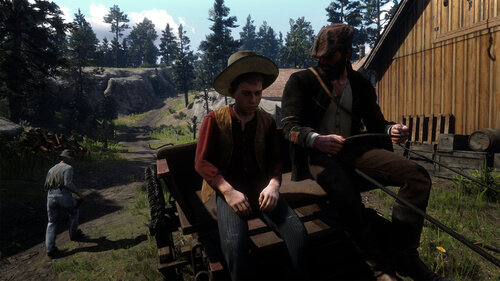 Cinematic Grading
Color grading, correction and enhancing.
Featured:
Removed excessive Vignette. Color temperature adjusted, reduced blue tint. Chroma boost, Luma as original.
Install Reshade (Vulkan)
Copy mauman.ini to main folder
~\Rockstar Games\Red Dead Redemption 2
Replace lut.png
~\Rockstar Games\Red Dead Redemption 2\reshade-shaders\Textures



.thumb.jpg.5b8458d020408e6928c97df7c880f0d7.jpg)