


379 files
-
A tool with a built-in mod manager that checks your LML folder for any conflicting mods that edit the same files. Now with an auto-merge tool!
Now there is no need to manually search through your mod folders to check for conflicts! This simple tool will iterate through the mods in your LML folder and check for any duplicate file names. It will then list the files that are conflicting, the mods they are being edited by, and where they currently are in the load order.
Version 1.4.0 out now with an ASI mod manager, a merge tool (BETA) and other major improvements! Please read the guide here before using the merge tool. I have released it in Beta as it is impossible for me to test merges across every single game file, so your feedback is always appreciated!
There are two download options for LMCCT:
LMCCT - Installer
The tool must be installed before you can run it. LMCCT - Portable
Download and run, no need for installation. You only need to download one or the other.
I made the decision to move away from a single standalone .exe file due to issues with false positives on VirusTotal and older versions of Windows Defender, which is typically the case with standalone Python .exe files. The only difference is that LMCCT.exe must remain within the 'LML Mod Conflict Checker Tool' folder (where the lib and share folders are), just like a typical portable program. Alternatively you can just use the installer, which can also create Start Menu and Desktop shortcuts for you.
If you find any bugs, be sure to report them to me. I have many more features planned for the future.
- 4,515 Downloads
- 22983 Views
- 37.31 MB File Size
- 2 Comments
 Updated
 -
 DESCRIPTION -
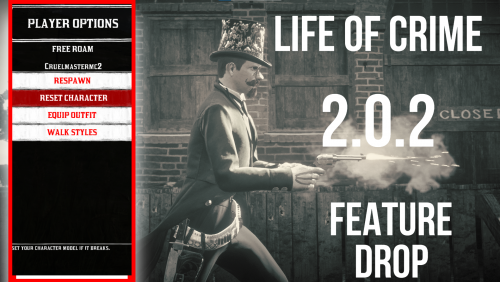
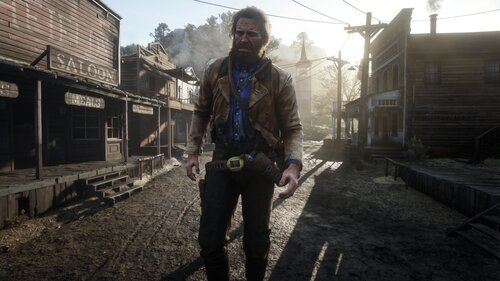
Alright, I have taken a long break but then decided to get back into rdr2 scripting so this will be the first update of many to life of crime.
In the version of the mod, there is a skill tree (which can be opened with U), ranks, one train heist, and an intro, and an interaction menu (which can be opened with Z)
I Plan on updating this mod regularly and adding a lot of jobs too like bounty hunting, heists, etc.
In order to start/continue this mod, go up to the white hat BLIP at copperhead landing, near Siska penitentiary, and then press F on the boardwalk with the given prompt AFTER you created your character at the saint denis tailer. The mod will first start off by putting you into the character creator where you can design your mp ped the way you want it, then go through the intro and there are wardrobes around the map in different towns that you can use to change your outfit parts with a $20 fee. I will not be making a story anymore (explanation - https://www.youtube.com/watch?v=YeSuqw7xU9c)
If you have ANY FEEDBACK please let me know, I want to improve and get better at this, and to make this mod the best it can be so letting me know if I did something stupid is very appreciated.
The whole point of the mod is to play as a completely NEW character with all of your weapons and money being removed that is designed by you (using mp male or female), NOT to play as Arthur or John. This is the whole point of the mod. And while you play on in the game you can earn all of the weapons by buying them from a gunsmith or finding them anywhere on the map, and earn more money from doing missions and such to pay for these things and many more things I plan on adding.
I recommend that you have a fresh scripts folder because I only run about 2 mods in my game. I Use the rampage trainer and my mods, that's it.
Also, make SURE that you make a main save for your normal story characters (Arthur/John) and then make another main save for your life of crime so as to not LOSE your main save game.
INSTALL -
Just Drag & Drop the asi into your RDR2's main directory.
Script Hook RDR2 - http://www.dev-c.com/rdr2/scripthookrdr2/
ASI Loader - Version.dll (make sure to have this installed too as most MP things don't work without it.)
MOD CONFLICTS -
-Lenny simple trainer
-Red Dead Offline
-Native Trainer
-ZMenu
-dinput.dll - (Make SURE to use the VERSION.DLL)
-PIRATED GAMES WILL NOT WORK!!!
Thanks to -
Lilaaloo - For making a trailer and thumbnail for the mod 1.0 update.
------------------------------------------------------------------------------------------------
Vers.1.0
-Base Mode
-Added First heist Mission (The Manor)
Vers.2.0
-Revamped everything
-Added character creator
-Added Wardrobes
-Added intro and first train robbery mission
-Added Rank System
-Added Skill Tree
Vers.2.1 - Female Hotfix
-Fixed Female Characters not working with the character creator
CONTACTS -
If you need to contact me you can message me on discord, as that is were i am most active.
Discord: CruelmasterMC#6140
Discord Server: https://discord.gg/4HjPhnBwHt
- 8,490 Downloads
- 123422 Views
- 688.29 kB File Size
- 21 Comments
 Updated
 -
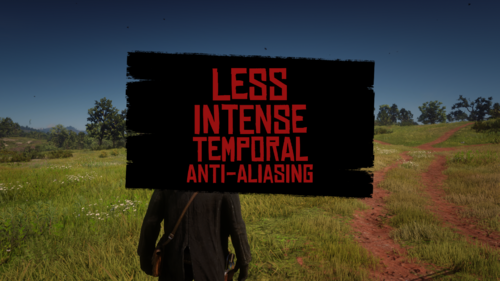 this mod makes taa less intense
---
only use 1.0.2 if you play on 1080p or lower because the aliasing is very noticeable on 1.0.1 especcialy if taa is on medium
---
CHANGELOGS:
1.0.2: made taa more intense in static and in-motion (only use on 1080p or lower)
1.0.1: reduced in-motion taa and distant taa. 28.12.2024 - like 30 minutes after release
1.0.0: release. 28.12.2024
---
taa high is better for sharpening than medium because medium will have weird sharp ghosting and will be very noticeable
(1080p is very soft without sharpening) i recommend taa high, 1/3 taa sharpening because thats what i use (image with train tracks is 50% taa sharpening)
if my mod is too flickery to you use another one on nexus like best taa mod
---
https://discord.gg/NTbsJukAhT
---
NOT COMPATIBLE WITH ANY GRAPHICS MOD!
---
- 566 Downloads
- 10815 Views
- 59.26 kB File Size
.thumb.png.e2e27f7f47ccaa0f37835bee1f3103b0.png) Eemeli2343 in MiscUpdated
Eemeli2343 in MiscUpdated -
 Lenny's Simple Trainer is a mod for Red Dead Redemption II that lets you do a bunch of awesome things in RDR 2, including clear your current wanted level, give yourself money, and much more. If you've ever wanted to play as a wolf, soar in the skies as an eagle or have a personal bodyguard, then this is the mod for you.
If upgrading from a previous version, always use the new lst.ini file.
Features
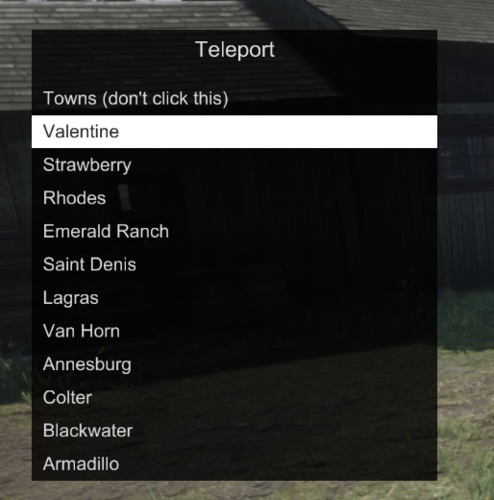
Play as any character model and easily switch between your favourites. Teleport to anywhere on the map, including your current waypoint. Nudge yourself forward through locked doors and walls. Change & pause the time of day. Change & freeze the weather. Give yourself any weapon in the game! Clear your wanted level. Never wanted setting. Toggle godmode on or off. Give yourself unlimited amounts of money! Change the game's timecycle speed. Quickly spawn a new horse to use. Spawn any wagon, coach, vehicle, etc. in the game. Speed up and slow down the game's time scale (slow motion!) Spawn an unlimited number of bodyguards! Command your bodyguards to attack people all at once. Make any ped enter or leave your vehicle (you can fill entire wagons!) Exploding, incendiary and super explosive ammo! Super Godmode - protects against ragdoll too. All settings can now be reloaded while in-game. Scaling options - play as tiny or giant characters! Call in a deadly flying eagle to rain death from above! Play hundreds of player actions and scenarios like swinging pickaxes! Choose gender when spawning horses! Change player gender when playing as an animal Option to disable the sniper in New Austin Always get perfect pelts when skinning Make your horse invincible, enable unlimited stamina and change horse gender on the fly Enable unlimited stamina and dead eye for the player Drop your current weapon Freeze weather and time Set formations for your bodyguards Make your bodyguards lasso people! Configure bodyguard control keys Instantly reveal the whole game map Instantly bond with your horse Change weapon damage Enable unlimited items Make bodyguards invincible (god mode) and explosion proof (super god mode) Make bodyguards hold their position Increase honor, decrease honor, set to min and max Freeze spawned peds in place Keep your changed model and outfits when replaying story missions (experimental - does not work for all missions and outfits yet)! Bond with gang horses Spawn legendary animals Select outfit for newly spawned peds Load multiplayer only weapons, such as the Navy Revolver (Set LoadMPWeapons to true in the ini, please note that this can cause severe side effects due to how we hack in the weapons) Select outfit for bodyguards New! Change amount of money to receive New! MP models work again (big thanks to deterministic_bubble)!
Controls
F5: PRESS to open or close the Trainer Menu.
F11: PRESS to teleport to waypoint.
F12: Log your current position (and some other info) to the logfile. Also works on peds/entites you target.
NumPad 0: HOLD and PRESS Left/Right/Up/Down/PgUp/PgDn to nudge the player, forward, up, left, backwards, etc. Go through doors with this.
Menu controls:
Up/Down to navigate the menu vertically. Left/Right to change item options. Enter to select an option. Backspace to return to the previous page.
Bodyguard controls:
Hold and Release F9 to make your bodyguards regroup with you. Hold F9 to dismiss all of your bodyguards. Aim at a Ped and Press 1 to make all bodyguards attack them. Aim at a Ped and Press 2 to make the closest bodyguard attack them. Aim at a Ped and Press 3 to make the closest bodyguard lasso them. Aim at a Ped and Press 4 to make them enter your vehicle. Press 5 to make your bodyguards hold their current position.
Eagle gunship controls:
Aim at a Ped and Press F8 to make the eagle attack them.
Installation
All you need to do is drag the files into your game root folder - the one where RDR 2 is installed.
When the game launches, you should hear a few beeping sounds, indicating that the trainer is loaded.
Do not attempt to play Online with this trainer. Remove all files from your game folder before playing Online.
Do not save your game as a changed character model. We recommend that you disable autosaves before using this trainer.
Configuration
Character models, bodyguard models, weapon models, settings and teleport positions can be customized in the lst.ini file while the game is running:
For a list of character models check: https://www.mod-rdr.com/wiki/list-of-rdr2-ped-models/ For a list of weapon models check: https://www.mod-rdr.com/wiki/list-of-rdr2-weapon-models/ For a list of teleport coordinates: https://www.mod-rdr.com/wiki/list-of-rdr2-teleports/ For a list of vehicle models check: https://www.mod-rdr.com/wiki/list-of-rdr2-vehicle-models/ For a list of player actions check: https://www.mod-rdr.com/wiki/list-of-rdr2-scenarios/
Troubleshooting
If you are having trouble running Lenny's Simple Trainer, please check the log file. If you see "System.OutOfMemoryException: STATUS_NO_MEMORY: Failed to allocate memory", please download this fix to your game root directory: www.mod-rdr.com/EasyHookPatch.zip
If you do not get a logfile, please launch the game as administrator and make sure the folder is writable!
Please don't upload or redistribute this mod, link here instead so that everyone has the most up to date version.
-
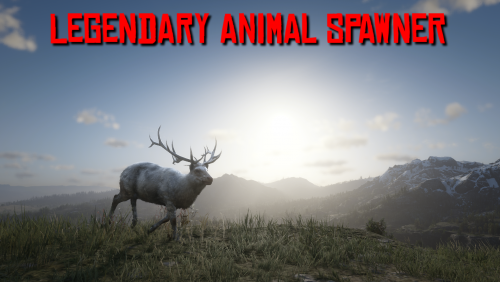
 The general idea of Lenny's Mod Loader is to provide an easy way to modify the game. In its current state for RDR 2 it will allow you to replace any file in the game, whether they are streaming files such as models or data files, font files etc. It also includes full UI support akin to the GTA V version.
The three screenshots show replaced assets, replaced font and an altered meta file to change the police response in Valentine to Saint Denis police. These are all provided in an example download, see "Examples" further down below for more information.
Installation
1.) Copy all files from "ModLoader" into your RDR 2 game root folder so that files such as vfs.asi are in the same folder as your RDR2.exe.
2.) The Mod Manager folder can be anywhere and does not need to be inside the game folder.
3.) New mods go into lml folder or use the button "Download with Mod Manager" on the mod website if it is supported (see installation video for an example).
Beta 11 highlights - Data file merge and manifest support
A few new exciting features are part of this update. First, support for overriding files used very early during game load has been improved significantly. While I hope that this does not cause any side-effects, please let me know if mods that worked well previously no longer function correctly. For instance, it was not possible in previous versions to override the skydome textures to change the moon. Thanks to @VideoTech for testing.
Second, data file loading allows you to separate your changes to certain files, such as assets_* or metapeds into individual files so that you no longer have to modify the existing one (effectively merging them). This should make it a lot easier to create mods such as custom peds since you can contain most changes to separate files. Please note that this does not magically work for all games files but only those where the internal game parser supports additions (so no catalog for instance). In addition, custom manifest files for peds and maps are supported now. The ped support has been tested extensively, but map support will only really become useful once CodeX can generate these files for you. An example for these features is provided in the download courtesy of BHmaster.
Beta 9 highlights
Very much a maintenance update, this version hopefully fixes the random DRM integrity crashes. Thanks a lot to @calledme.kev who spent tens of hours testing various builds to find the issue! It also adds a lot of caching for collection calls that rely on read-only data, so LML should be a little less demanding.
Beta 8 highlights
This version adds a few new features such as allowing you to override the _manifest.ymf and _cache.ych files found in RPFs. Support to replace hashed files has also improved and now includes ymaps among other file types. The streaming folder now loads pso files, such as ymap, as text files, too. Most data files that are forced to be loaded as pso by the game have been patched to support being loaded as text files, such as cameras.ymt or the archetype definitions. Due to heavy refactoring to improve startup performance, previous builds are still made available. See changelog for more details.
Ymap & Ytyp support (beta 7)
This version introduces experimental support for ymap and ytyp. Two very simple examples are included that move some of the blue barrels around Valentine (check behind the saloon) via a different ymap and that make the lights inside the Saloon much brighter (ytyp - thanks to Modifiver). For ymap modifications, if you unload the imap via script and modify the file on disk, the changes will be applied on reload so no need to restart the game.
Bk2 support (beta 7)
Bink files were technically already supported in previous versions but caused some problems. In the current version they still behave somewhat differently in that they need to have two '.' in their file name as the extension '.bk2' is part of the actual file name. So name your file "movie.bk2.bk2" to make sure it gets replaced correctly. An example for replace would be "replace\movies_0\movies\filename.bk2.bk2".
Settings file (beta 7)
A settings file has been added that is to be placed in the game's root folder and called lml.ini. It is mostly geared towards developers and allows for more verbose logging output (or less..) making it easier to identify files you want to replace. If you set the log level to 0 you can see most of the game's requests to load files and it should be much easier to correctly identify the path you want to replace. Please note that many files are only loaded via hash and not via their name. You can also choose to disable the streaming and replace folders if you do not use them for added performance.
Ymt support (beta 5)
The biggest new feature in this update is the support for ymt file editing even if the source file contains unknown hashes. In order to replace a file, export the ymt to xml with OpenIV and then either use replacement via install.xml or the replace folder to replace the original file. Since you are replacing the ymt file, make sure that your file also has the ymt extension even though it contains xml. For the replace folder method you also need to match the file name. Now you can edit the file in plaintext and the game will treat it as a ymt with all names fixed up when loading. See the included examples for more information.
If you do end up finding a file where you feel that it is not properly fixed up by LML (for instance when exporting the file directly from OpenIV without any changes breaks the game), please let me know. The only file I know of that will currently cause problems is weapons.ymt, but this is not due to LML but because of an export bug in OpenIV which cuts off certain weapon flags. The High-Roller revolver example has these flags manually restored and hence works fine, but this is not the case when exported directly from OpenIV. I have notified the team and trust that they will fix this export problem in the future. Until then you will have to manually inspect the ymt, gather the flags and restore them manually in the xml for weapons if you plan to use them. Please note that this requires advanced knowledge of game structures.
Ymt Examples
This download comes with extensive examples courtesy of @Modifiver that modify various aspects of the game. Check them out in the included examples folder and copy them to your lml folder to try them out!
Upgrading from earlier LML versions without install.xml support (beta 2 and earlier)
This version of Lenny's Mod Loader introduces install.xml files to instruct LML on how to load your mods. Thus, mods can be separated in folders and no longer require nested folder structures. This is a proven concept from our GTA V version and has now been ported over. You can still use the replace and stream folder under your lml folder. Please note, however, that the Mod Manager UI will only pick up mods that use the new install.xml system so it is recommended to convert your mods to the new system. Only mods using install.xml support Download with Mod Manager. Consult the examples below to learn how to use the new system.
Examples
You can find more examples by @Modifiver here:
https://www.rdr2mods.com/downloads/rdr2/mods/80-modifivers-six-shooter-teaser-pack/
More examples with detailed documentation on the new install.xml system can be found here:
https://www.rdr2mods.com/downloads/rdr2/mods/77-examples-for-lennys-mod-loader/
Verify your file got replaced
If you feel that your file is not being replaced properly, have a look at the log file and see if you can find any entry related to it. Perhaps the path was not correct and hence it did not work. Search for "replaced" for files in replace and "adding" for files in stream.
Support
Since this is the first release for RDR I expect there to be quite a few problems and certain files might not work as expected. If you have trouble replacing specific files, please do not hesitate to comment here or reach out and include your modified file and file structure so I can have a look.
Installation Video
Please find a detailed installation video including a guide through our examples here (thanks to @Gan Ceann)
Detailed explanation of stream vs replace (older versions)
In the lml folder you can find two subfolders, one called "replace" and one called "stream". Both can be used for the same thing but replace is ultimately more powerful, but also more advanced. The stream folder you might recognize from Map Editor or Rampage Trainer and just loads streaming files directly.
Stream
As mentioned, similar to other tools available this merely loads streaming files into the game when the game is loading. For instance, model or texture files would go in there and will replace the existing assets in the game. If you do not know the name of an asset, but only its hash, simply name it 0xhash.ext (e.g. 0x9E54B506.ytd for w_melee_machete01+hi.ytd) and it will still be recognized and replace the asset correctly.
This is the most convenient way to quickly replace streaming files as you do not have to worry about where in the game files they are located but only their name.
Replace
This folder creates a virtual mapping of the entire game file structure and hence allows you to replace any game file, granted you know its full location. This is similar to the paths you can see in OpenIV when navigating RPFs, but not exactly the same. If you want to change the dispatch.meta file for instance, you will need to modify it in update.rpf, as the one in common.rpf is superseded by that. To do that, you would create the following structure: "replace\update\common\data\dispatch.meta". This is exactly the path you would use in OpenIV (without the .rpf ending for update). Now, whenever the game wants to access this file, it will load yours instead. It is that simple!
If you want to replace the font file font_lib_efigs.gfx in scaleform_frontend.rpf for instance, you would create the following structure: "replace\update\x64\patch\data\cdimages\scaleform_frontend\font_lib_efigs.gfx".
Word of caution: File paths do not always match their RPF names unfortunately, hence this is a bit more advanced but also allows greater control. Say you want to replace player_zero_coat_001_open.ydd which is present in both packs_1.rpf (original) and dlc.rpf (from patchpack001, an update to the file). Files DLCs follow a slightly different pathing scheme. The full path to this file would be "replace\dlc_patchPack001\x64\packs\base\models\component_models\player_zero_coat_001_open.ydd". As you can see, it does not match the file path directly, which is also why for many files using the stream folder is just simpler. This is because the game maps some files differently and when you open the dlc.rpf (in patchpack001) and its setup2.xml you will see why: the device name is dlc_patchPack001 which is the "root" of all files inside this archive. Thus the path starts at "dlc_patchPack001" and then follows the RPF structure until you arrive at "replace\dlc_patchPack001\x64\packs\base\models\component_models\player_zero_coat_001_open.ydd". Not that complicated, but certainly not as easy as the streaming folder and something to look out for.
Acknowledgements
Thanks to NTA for his work on fwEvents, hooking, fiDevice and sysAllocator
Thanks to listener for his work on fiDevice and advice over the years (hope you are well!)
Thanks to the OpenIV team for OpenIV
Thanks to dexyfex for CodeWalker
Thanks to Gan Ceann, Will and GameRoll for testing as well as Jewels, GuiCORLEONEx794, jack.sharif and Modifiver for providing example assets
-
-
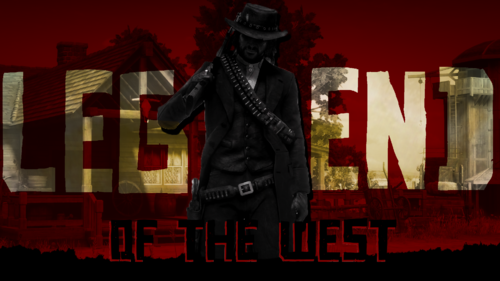 This Outfit gives John his Legend of the West Outfit from Red Dead Redemption 1 back. i got a little help from Eki AKA Redemptify on that. it also has a Leather Variant thx to MOR7UM. This Mod aims to be as accurate as possible to the Orignal One from Red Dead 1. Replaced Items are in the install.txt file along with the installation guide 😉. ENJOY!
- 6,742 Downloads
- 103687 Views
- 17.66 MB File Size
- 2 Comments
 Updated
 -
 Replaces Arthur’s original holster, Gambler holster, Nuevo Paraiso holster and Upgraded holster.
To merge assets_drawable.ymt (WhyEm uses this file):
1. Delete assets_drawable.ymt file from this mod
2. Open assets_drawable.ymt file from another mod with text editor (notepad)
3. Press CTRL+F to open search window (search for the hashed names in the brackets if un-hashed names are not found)
4. Search for player_zero_holster_cup_000 (0x737D98EF) and delete COMPONENT_HOLSTERS (0xDA59F244) text that is a few lines below it
5. Search for player_zero_holster_cup_004 (0x6FC08772) and delete COMPONENT_HOLSTERS (0xDA59F244) text that is a few lines below it
6. Search for player_zero_holster_cup_009 (0x4F26CFEA) and delete COMPONENT_HOLSTERS (0xDA59F244) text that is a few lines below it
7. Search for player_zero_holster_cup_013 (0xB2CF8FAE) and delete COMPONENT_HOLSTERS (0xDA59F244) text that is a few lines below it
8. Search for player_zero_holster_front_cup_000 (0xC8ECC9A2) and delete COMPONENT_HOLSTERSLEFT (0xFF123945) text that is a few lines below it
9. Save the file
Requires lml. To install extract inside lml folder.
Version 1.1:
-removed .asi script
-added Gambler holster, Nuevo Paraiso holster and Upgraded holster
- 1,118 Downloads
- 14613 Views
- 1.88 MB File Size
- 1 Comments
 Updated
 -
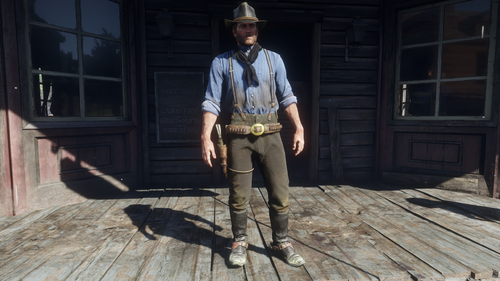
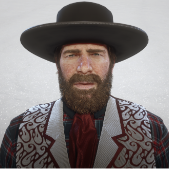
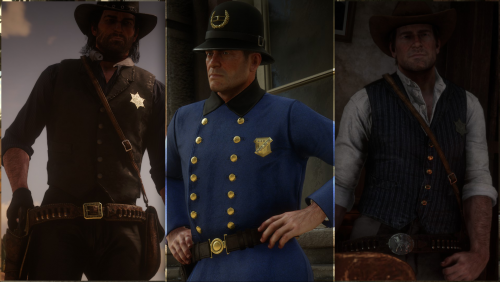 This mod adds 4 Preset outfits to your outfit changer. (Which is big time required)
Nothing fancy here just some presets that I've manually setup, so you don't have to.
the mod includes the Saint-Denis officer uniform for both john and Arthur, but also two preset for Deputy Sheriff. John Marston outfit is inspired from the beta U.S Marshal Outfit from Red Dead Redemption I and Arthur Morgan is just from my own tast, feel free to use those as a base for your own outfits.
Installation:
Download the file and replace your outfitchanger.ini with the one included Or Copy paste those lines in your outfitchanger.ini [Outfit5] Name=Deputy Callahan IsMp=False IsFemale=False Components=0xDE42DD9E:0x44E21C90, 0xE8B0946D:0x44E21C90, 0xAAA8BD9D:0xEC35CD5A, 0x89EE6BFA:0x44E21C90, 0x5536513B:0x31582ACA, 0xA8CAFE6:0x44E21C90, 0x987C359D:0x44E21C90, 0x8071A64D:0x44E21C90, 0x16C30C8A:0x44E21C90, 0x9D5EFFF9:0x1E1C1B2C, 0x795FF3A1:0x83E8716F, 0x6B174584:0x44E21C90, 0xCF748206:0xC003685E, 0x1781880D:0x44E21C90, 0xAAAA4DCC:0x44E21C90, 0x23D0ECD0:0x44E21C90, 0x7AF05834:0xB8719F3E, 0x710E8D72:0x44E21C90 [Outfit6] Name=Deputy Milton IsMp=False IsFemale=False Components=0x23D0ECD0:0x44E21C90, 0x7AF05834:0xB8719F3E, 0x48FF3E48:0x44E21C90, 0x6B3703AB:0x44E21C90, 0x9C6EC971:0x44E21C90, 0x67FFB7FF:0x44E21C90, 0x3E995419:0x44E21C90, 0xFFBC3D1C:0x44E21C90, 0xD27A6462:0x44E21C90, 0x7C76451B:0x44E21C90, 0x506791A8:0x44E21C90, 0x850EEE39:0xEC35CD5A, 0xD166D2F9:0x31582ACA, 0x144BC64A:0xEF580C34, 0x4CD4102D:0x44E21C90, 0xB920F6EF:0x8999FB88, 0x16C30C8A:0x44E21C90, 0x92304BC9:0x44E21C90, 0x4FB035E3:0xA68AF260, 0xCE2B7AE:0xA68AF260, 0x4F585B0F:0xA68AF260, 0xA8CAFE6:0x44E21C90, 0x194C1920:0x44E21C90 [Outfit7] Name=Officer Morgan IsMp=False IsFemale=False Components=0xE3093CF5:0x44E21C90, 0x3296ADD6:0x44E21C90, 0x2BF95796:0x44E21C90, 0x15B5D51:0x44E21C90, 0xF81C1579:0x44E21C90, 0x14E18306:0x44E21C90, 0x9B3E539B:0x44E21C90, 0x8071A64D:0x44E21C90, 0x7591C78C:0x44E21C90, 0x59465335:0xFF8B2631, 0x101D9130:0x35205D41, 0xDB4C451D:0x44E21C90, 0x10DC5877:0xB23DCCD3 [Outfit8] Name=Officer Marston IsMp=False IsFemale=False Components=0xE3093CF5:0x44E21C90, 0x2BF95796:0x44E21C90, 0xF81C1579:0x44E21C90, 0x9B3E539B:0x44E21C90, 0x7591C78C:0x44E21C90, 0x101D9130:0x35205D41, 0xDB4C451D:0x44E21C90, 0x67FFB7FF:0xFF8B2631, 0x16C30C8A:0x44E21C90, 0x92304BC9:0x44E21C90, 0xA846C709:0xB23DCCD3, 0x3296ADD6:0x44E21C90, 0x15B5D51:0x44E21C90
- 3,416 Downloads
- 51332 Views
- 3.94 kB File Size
- 2 Comments
 Alex Ashfold in MiscUpdated
 -
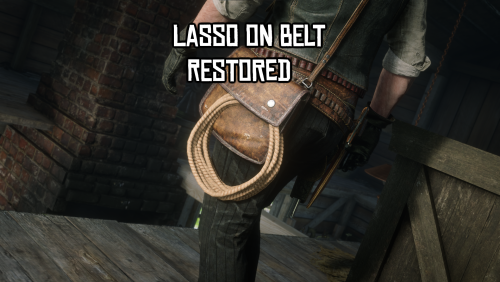 Restores the cut lasso on the belt that was removed during the production of Red Dead Redemption 2. It works completely as it was intended.
Thanks Dooge for letting me make a merge for RDR1 Weapon Overhaul
Read readme.txt for installation details.
- 19,010 Downloads
- 75870 Views
- 296.77 kB File Size
- 6 Comments
 Updated
 -
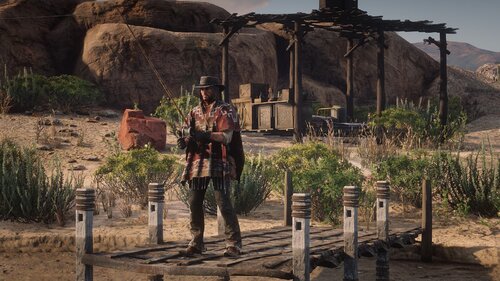
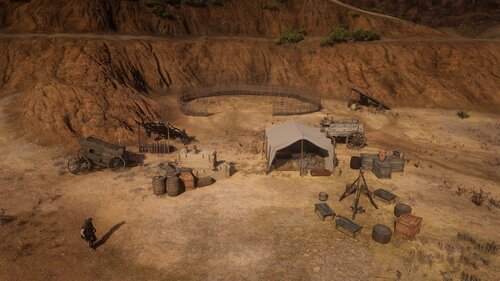 A Reupload of my Laguna Borrego map from nexus, this adds in the abandoned camp called laguna borrego from mexico in rdr1 into rdr2
Lennys Mod Loader Is Required
place the ymap into your stream folder located in your lml folder
- 651 Downloads
- 7281 Views
- 3.87 kB File Size
 Updated
 -
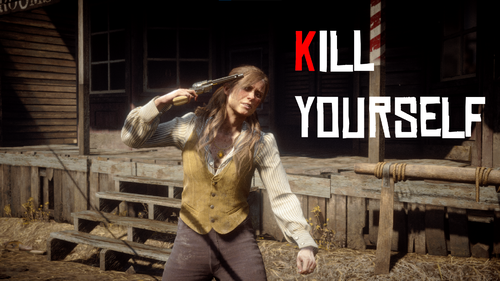 Kill Yourself
This mod allows you to commit suicide in Red Dead Redemption 2!
Choose from any 3 available animations to go out with style!
Features:
- Allows the player to perform a suicide animation on themselves
- Includes every known suicide animation in the game
- NPCs flee when seeing you attempt to kill yourself
- Configurable keybinds and enable/disable features
- NEW: Make NPCs Kill Themselves
- NEW: Controller Support
How to Use:
- Hold out any single-handed gun
- Press T to perform a quick suicide (Shady Belle encounter suicide animation)
- Long press T to perform Billy Midnight's suicide animation
- Press K to perform a manual suicide (Jamie Gillis' suicide animation).
- Press O while targeting an NPC to select the NPC you want to make kill themselves. Then perform any suicide animation.
- Controller: Press right on D-pad while holding a single-handed gun; to make NPCs kill themselves, target them, then press right on D-pad, then stop targeting to see prompt
Installation:
- Install ScriptHookV2: https://www.nexusmods.com/reddeadredemption2/mods/1472
- Have an .asi loader installed
- Copy KillYourself.asi and KillYourself.ini to the game's main installation folder.
- 4,068 Downloads
- 27706 Views
- 144.5 kB File Size
 Updated
 -

- 8,723 Downloads
- 75151 Views
- 20.62 kB File Size
- 10 Comments
 Updated
 -

- 954 Downloads
- 20955 Views
- 45.81 kB File Size
- 2 Comments
 Updated
 -
 John's RDR1 duster, replaces the legend of the east coat.
If you plan on using other shotgun coats in your playthrough, be warned that older files that use the checked coat with the red lapels, the normal and wrinkle map will be affected with every shotgun coat.
I had to take a few liberties as one tends to in this situation. RDR1 is a very old game, and ripping textures directly from it wouldn't be practical, so the leather texture is unique. The buttons were a personal preference, RDR1's duster seems to lack buttons so I just went with what I preferred.
The colour has been given yet another rework, I'm still not too sure yet and it's definitely not final. The normal map has been greatly improved, even zoomed in you should still see concise details.
Some may not like the colour etc I chose compared to the earlier versions, so the archive will let you download all old versions that don't have glaring issues if you prefer.
I'm currently learning the ropes with RDR2 modding so this is more of a test than anything else. If there's any obvious issues here I'll fix them,
Scratch that, this project is officially back on the burner. I hopefully will have some free time in the coming weeks, I hope to basically completely remake this mod from the ground up. The damage on the coat and resolution issues were really annoying me, so those will be the main focuses in the "remake".
P.S. Sorry if the damage looks bad on your end, I suck at normal maps.
- 788 Downloads
- 24617 Views
- 44.92 MB File Size
- 3 Comments
 Updated
 -
 John's deadly assassin outfit, replaces several regular clothing items. To see which to select, refer to the last images in the gallery. Use john's gunslinger ranch pants and your choice of black boots to match the original.
This mod edits merges that several other items refer to, so you may notice small changes in other traditional vests, stalker hats and shotgun coats.
Please keep in mind, this is a work in progress. There are several things I will change over time, for example the coat buttons are slightly broken. I also plan to add a "faded" variant to even closer match the rdr1 textures
I'd also like to thank Eki for providing me with official rdr1 textures for reference matieral, several parts of this outfit would've been far worse without his help.
- 3,585 Downloads
- 41960 Views
- 13.32 MB File Size
- 1 Comments
Updated -
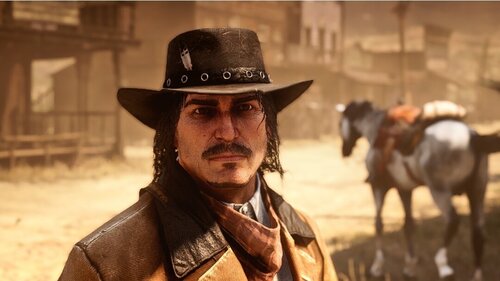
As of now, the mod is based off of John's face in the RDR1 Trailers, more versions and different looks are to come, as well as an update to alter his npc textures.
- 802 Downloads
- 16543 Views
- 18.86 MB File Size
- 1 Comments
 Updated
 -
 Tired of seeing Arthur Marston when accessing the player option in the pause menu?
well this mod is for you!
REQUIRES LML AND SCRIPTHOOK
https://www.rdr2mods.com/downloads/rdr2/tools/76-lennys-mod-loader-rdr/ https://www.dev-c.com/rdr2/scripthookrdr2/
This is the first mod i created
i hope you like it!
Also make sure to install these wonderful mods that made this one happen:
https://www.nexusmods.com/reddeadredemption2/mods/478
https://www.nexusmods.com/reddeadredemption2/mods/774
https://www.nexusmods.com/reddeadredemption2/mods/756
https://www.nexusmods.com/reddeadredemption2/mods/771
https://www.nexusmods.com/reddeadredemption2/mods/933
- 356 Downloads
- 17561 Views
- 14.81 MB File Size
- 1 Comments
 benisbeater in MiscUpdated
 -
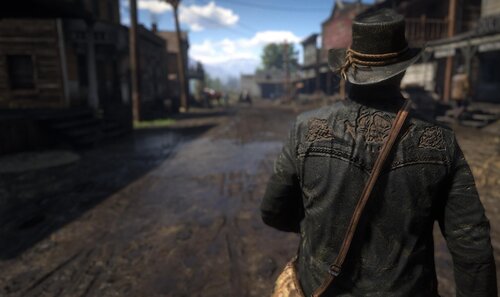
 From badass gunslinger to shuffling penguin, Rockstar has done a lot over the years to destroy the John Marston we knew from the original game in 2010, this mod aims to fix that.
Restores John's beta animations and adds some new RDR1 style animations to bring back that classic gunslinger vibe from the first game.
Huge thanks to Eki aka Redemptify for finding, and providing me with some of these animations
Follow me on Twitter for mod updates, new animation finds, and more Twitter.com/DickHertz
RDR1 STYLE WALK (BETA)
I have included a second file that changes John's walkstyle to an altered version of the classic RDR1 walk. May come with some issues due to current limitations with LML, but as soon as these are able to be fixed I will fix them.
Now includes a merged metapeds.ymt file for compatibility with Ambient Gang by Blackjack Colver Voltaire
To install delete metapeds.ymt from both Ambient Gang and JMAO, and place this one in either folder. Ambient gang is still required for this to work.
INSTALLATION
Drag the lml folder into your main directory, requires Lenny's Mod Loader
MODS I RECOMMEND
John Marston Restoration Project by GuiCorleonex794, Eki, and AfroBandit
Cut Dialogue Restoration and Enhancement by PixieV
Classic RDR1 Face by JohnnyBajungas, Boah, and GuiCorleonex794
Classic Cowboy by GuiCorleonex794
1.00 Clothing Fitment by Dooge
KNOWN ISSUES
The transition for the aiming animation while standing still isn't fully finished, looking for a fix
Breaks some first person animations like holstering/unholstering your gun
Shout to GuiCoreleonex749 for being the first to find any beta animations for John
- 11,489 Downloads
- 67574 Views
- 6.6 MB File Size
- 6 Comments
 Updated
 -
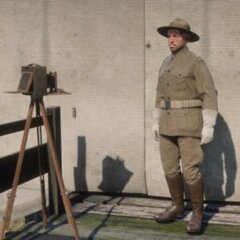
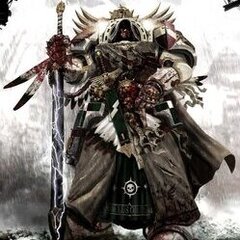
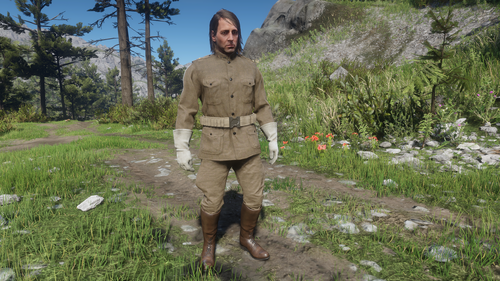 This mod changes Second Lieutenant John J. Weathers uniform into a khaki version. There is also an optional "Snow Goose" Native American Accessors download option for those that want it.
For installation unzip and extract the folder into the LML folder (Lennys Mod Loader is required) There is additional info on the ReadMe!.txt file.
A few sources that helped me in learning about and recreating the uniforms:
https://sosri.access.preservica.com/uncategorized/IO_a4348ea1-ef44-4a06-bf86-7bd7c86fde75/
https://www.usmilitariaforum.com/forums/uploads/post-83-1168121014.jpg
https://www.usmilitariaforum.com/forums/uploads/post-83-1168121097.jpg
https://www.germandaggers.com/Gallery/USRa.php
- 411 Downloads
- 10816 Views
- 3.82 MB File Size
 Updated
 -
 The mod restores an unused outfit for Javier, I also added a variation of the outfit with a sombrero but only one variable can be used for now.
He will be wearing the outfit in chapters 3, 4, 6.
Credits to Huell for showing me the outfit in the first place.
Installation: drop the files in the lml folder.
- 1,017 Downloads
- 26198 Views
- 10.27 kB File Size
 Updated
 -
 Available for download
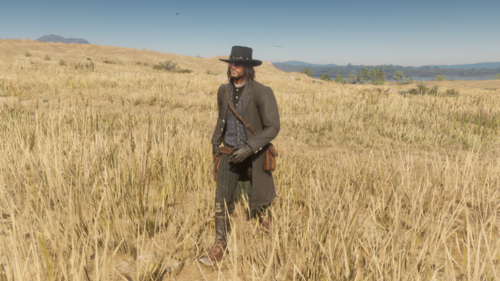
Leather Gunslinger Jacket (Special thanks to pintailduck100) Brown on Brown Gunslinger Jacket (Optional) Black Weathered Winter Gunslinger Coat Grizzlies Outlaw Coat Retexture Dark Ram baby The Black on Brown Gunslinger Jacket Lenny's Gunslinger Jacket Revisited
Please note that i do not accept requests; i made these for my playthrough and decided to share them.
Installation
Lenny's Mod Loader
If the mod has a instal.xml in it then extract the mod in your lml folder
otherwise drop all files in the Stream folder; you need to create one if you don't have it already
Here is my humble YouTube channel … consider subscribing 🙂
Lenny's Gunslinger Jacket
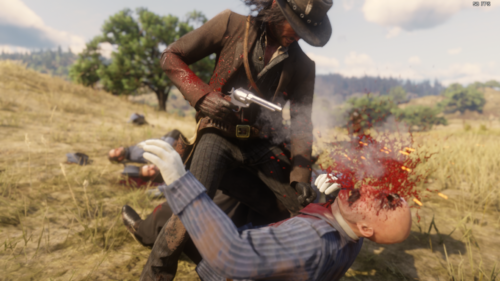
Most Old West men who were labeled as being "gunfighters" did not kill nearly as many men in gunfights as the famed LMS.
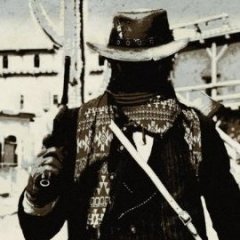
This Gunslinger adopted his own look; outlaws and Pinkertons trembled when they saw his symbol.
There are some legends that say LMS’s death was staged, and he continued to live his life in the Wild West.
Now both Arthur and John get to wear this signature gunslinger jacket aka Lenny's Gunslinger Jacket.
Installation
Drag and drop a version into your lml folder
Notes:
Also coming soon "Spurs and Such" Some users have reported that Lenny's Gunslinger Jacket is not working for them or keeps disappearing from the wardrobe. We found that this is only effecting users that are not worthy.
- 111,810 Downloads
- 321067 Views
- 193.71 MB File Size
- 19 Comments
 Updated
 -
 Add adult Jack Marston as a new ped
To install: copy both folder to lml directory. Requires version.dll
To play as Jack: enter cs_jackattack on rampage trainer model changer's custom input
- 3,562 Downloads
- 48431 Views
- 127.38 kB File Size
- 9 Comments
 Updated
 -
 This is my edited Ist.ini file for Lenny's Simple Trainer !
I added everthing i have found here: www.mod-rdr.com/wiki/pages/ and everything what's added from other users there.
Whats inside the file:
- Full Charakters list
- Full Peds list
- Full Weapons list
- Full Horses list
- Full Vehicles list
- Many Teleport Locations (inclusive some "Out Of Map" - you should have at least a fly mod for proper use.)
- Many Actions (like drinking coffee)
Known issues:
- Because of RDR2 updates, the mod can cause unwanted behavior to the game, expect random crashes and or being stuck somehow
- Spawned legendarys will be not recognized as legendarys. You will get perfect pelts/skin only.
Installation:
- Install Lenny's Simple Trainer and everything mentioned there
- Drag the Ist.ini in your Red Dead Redemption 2 root folder
Credits: LMS for Lenny's Simple Trainer,
NetSSH for his actions list
- 87,555 Downloads
- 350873 Views
- 183.42 kB File Size
- 96 Comments
 Aaskereija in MiscUpdated
 -
 This is a reupload of my Irish's Shack map originally posted to nexus, it adds irish's shack located in Puerto cuchillo
place Ymap in your Stream Folder located inside lml
lenny's mod loader is required
- 485 Downloads
- 7990 Views
- 7.03 kB File Size
Updated