


379 files
-
 Hey everyone!
This is my very first RDRFR plugin so I hope you all enjoy it!
This plugin is in VERY early development and is meant as just a couple things to play around with, please don't expect the world here.
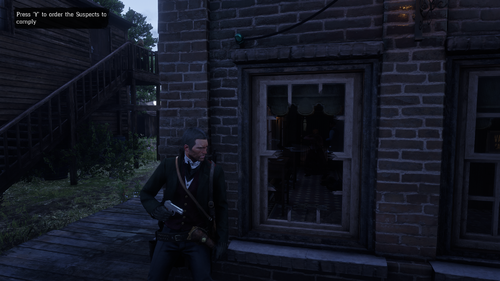
There are currently 3 working callouts, all of which are still being refined and elaborated on.
Valentine Savings Bank Robbery Fleeing Thief Murder Investigation Gang Chase
All the callouts are currently designed specially for Valentine and other patrol areas might not work with them.
Like I said these are nowhere near complete, just something I threw together in a few hours, nevertheless, I hope you all enjoy them 🙂
RDRFR is available to LSPDFR insiders, as seen on their Patreon https://www.patreon.com/lcpdfr
Want to support development of this mod? You can donate today below the download button or by joining my Patreon: https://www.patreon.com/sneakysteve .
Please post a comment about any bugs you find so I can fix them as soon as possible!
Got a suggestion for a callout? Leave a comment or send me a message on mod-rdr.com!
How to uninstall the plugin:
- Navigate to Red Dead Redemption 2\rdrfr\plugins\ and delete "SneakyCallouts.dll"
- 12,969 Downloads
- 89498 Views
- 18.31 kB File Size
- 18 Comments
 Updated
 -
Installation:
Download and install AB's ScripthookRDR2: http://www.dev-c.com/rdr2/scripthookrdr2/ (make sure you install the asi loader). Remove previous versions of the mod, if you have any installed. Copy BountiesExpansion.asi and BountiesExpansion.dat to the game's main installation folder.
How To Play:
Get to one of the new bounty poster appeared on you map. It's in a different spot from the game builtin bounty posters to prevent collisions. Collect it. Head for the new bounty area added to your map. Locate and hogtie the target. Get to the police department. Drop the target by the cell and get your reward.
Known Issues:
Sometimes some of the blips are not removed. You're welcome to report if you encouter other issues, and please add the log file (BountiesExpansion.log)
Special Thanks To:
S.T.R.I.K.E.R for helping with the research.
LMS for helping with the research and having a lot of patience 🙂
jedijosh920 for helping with the research
cad5150 for testing the mod
-
 Cinematic Grading
Color grading, correction and enhancing.
Featured:
Removed excessive Vignette. Color temperature adjusted, reduced blue tint. Chroma boost, Luma as original.
Install Reshade (Vulkan)
Copy mauman.ini to main folder
~\Rockstar Games\Red Dead Redemption 2
Replace lut.png
~\Rockstar Games\Red Dead Redemption 2\reshade-shaders\Textures
-
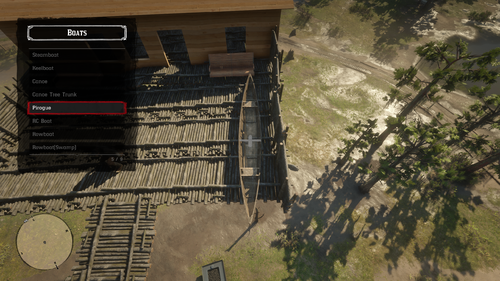 Extremely customizable trainer for Read Dead Redemption 2. It includes an edit mode where you can add, move, and delete options in game.
Edit mode notes
To add a new Submenu, go to the bottom of the list and select Add, then type the name of the submenu (this is not the same as the title, title will be what you type in text).
The submenu will then be created once you press the exit and save button.
Controls (Keyboard)
F3 to open menu Numpad 2/8 to go up and down Numpad 5 to select option Numpad 4/6 to adjust number Numpad 7 to enter edit mode Numpad 7 to exit edit mode and save Numpad 9 to exit edit mode without saving Insert to add option in edit mode Numpad * to edit option in edit mode Delete to delete option in edit mode Shift to activate bind boost W to accelerate in boat fly mode S to decelerate in boat fly mode Up/down to turn up/down in boat fly mode A/D to turn left/right in boat fly mode Q/R to control yaw in boat fly mode
Controls (Xbox controller)
RB + D-Pad down to open menu D-Pad up/down to go up and down A to select option LB/RB to adjust number X to enter edit mode X to exit edit mode and save B to exit edit mode without saving Y to add option in edit mode RB to edit option in edit mode LB to delete option in edit mode LB to activate bind boost A to accelerate in boat fly mode X to decelerate in boat fly mode LS to go turn up/down/left/right in boat fly mode Yaw is not bound to anything by default but you can change it in Settings -> Controls -> Controller
Controls (PS4 Controller)
R1 + D-Pad down to open menu D-Pad up/down to go up and down X to select option L1/R1 to adjust number Square to enter edit mode Square to exit edit mode and save Circle to exit edit mode without saving Triangle to add option in edit mode R1 to edit option in edit mode L1 to delete option in edit mode L1 to activate bind boost X to accelerate in boat fly mode Square to decelerate in boat fly mode L3 to go turn up/down/left/right in boat fly mode Yaw is not bound to anything by default but you can change it in Settings -> Controls -> Controller
Installation
Install Scripthook RDR2 from Alexander Blade if you don't already have it
Drag all of the files into your RDR 2 installation directory
Editing controls
All menu controls (both controller and keyboard) can be changed in the settings menu
- 8,392 Downloads
- 119452 Views
- 676.49 kB File Size
- 64 Comments
 Updated
 -
STILL IN ALPHA STATE. EXPECT ERRORS, CRASHES, ETC
Discuss in the designated forum on mod-rdr
This is an ASI plugin for Red Dead Redemption 2, ported from ScriptHookVDotNet, based on the C++ ScriptHook by Alexander Blade, which allows running scripts written in any .NET language in-game.
USAGE
Copy ScriptHookRDRDotNet.asi, ScriptHookRDRNetAPI.dll, AND ScriptHookRDRDotNet.ini to your RDR2 Install folder.
Install scripts to /scripts/ folder inside root folder
Join the official Red Dead Redemption 2 Modding Discord for the latest information about Red Dead Redemption 2 PC mods
Requirements
C++ ScriptHookRDR2 by Alexander Blade
.NET Framework ≥ 4.6
Visual C++ Redistributable for Visual Studio 2019 x64
The source for this project is on Github here
Credits
Crosire (ScriptHookVDotNet)
Jedijosh920 - lots of help
-
 With OpenIV 4.0 we introducing very basic level of support for Red Dead Redemption 2. First of all, currently, there is no editing capabilities. With OpenIV 4.0 you will not be able to edit any RDR 2 files.
Since this is our first release with Red Dead Redemption 2 support, available features also very limited. With OpenIV 4.0 you can:
Open and view RDR 2 RPF archives. (Not all file names are available, see below) Open and view RDR 2 Textures (.ydr) Open and view RDR 2 META/PSO files (.ymt, .ymf, .yas, .ych, .ymap .ytyp) Open and listen to RDR 2 Audio files (.awc) Open and view RDR 2 Language files (.yldb) Support for Red Dead Redemption 2 will be expanded in the future versions.
Learn more on the OpenIV website!
-
 REQUIRES: https://ragepluginhook.net
Overview
RAGE Hook Plugin for adjusting the timescale of the in game clock to make the days/weathers last longer.
Installation
- Copy Rage Hook Plugin files to your main RDR2 folder
- Start RAGEPluginHook.exe and it will create a folder called C#Plugins in the main RDR2 folder, or create it yourself
- Copy DLT_Time_Scale_W.dll & DLT_Time_Scale_W.ini into C#Plugins folder
- Open the RAGE console in game and type LoadPlugin DLT_Time_Scale_W.dll or enable it to load on start up. 🙂 Versions DLT_Time_Scale_W - Scales weathers with your timescale choice DLT_Time_Scale_A - Only scales the time, weather duration stays vanilla
Info
Change the SecondsPerMinute in the .INI file to your liking. The value is real life seconds for every minute in-game.
Lowest value you can set is 1. Set it to 60 if you want realtime scale (Weathers will last about ~45 minutes :D). If you run from one district to another weather might change faster, this is to prevent getting snow in Lemoyne for example. Mod disables during missions to prevent any issues where a weather/time change might be forced.
If you have any issues please feel free to ask.
- 1,788 Downloads
- 40787 Views
- 11.17 kB File Size
- 16 Comments
 Updated
 -
This mod is enabled/disabled by pressing F9.
It shows the ID of the last bone the player hit on a ped on the screen.
-
This mod silences Arthur (he wont speak anymore).
Unfortunately this comes with prohibiting him of verbally interacting with NPCs (you wont be able to greet or threaten NPCs).
You can activate the mod by pressing F9.
See here for more information:
-
 Overview
I made this simple plugin for RAGE Hook that let's you toggle slow motion and push Arthur in the direction your camera is looking at. Customize the ragdoll force in the INI file. By default it also activates slow motion on push.
REQUIRES: https://ragepluginhook.net
Instructions
Copy the .DLL and .INI file into /C#Plugins/ folder.
Open the RAGE console in game and type LoadPlugin DLT_Slow_Motion.dll or enable it to load on start up.
See the INI file for settings.
Info
SlowMotion = Default key 'C' on keyboard and R3 on controller or 'Look Back' action
Ragdoll = Default key 'E' on keyboard and Y on controller or 'Interact' action
There's also an option to disable either Ragdoll or Slow Motion if you don't want to use both.
- 1,264 Downloads
- 22248 Views
- 7.24 kB File Size
- 1 Comments
Updated -
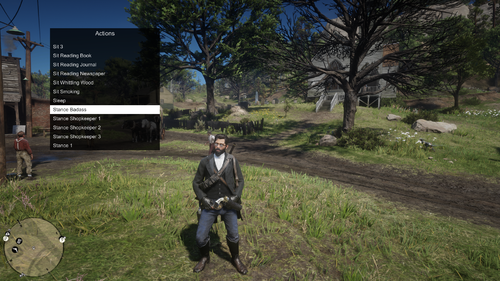 An .INI file for Lenny's Simple Trainer, Adds all of the actions, Guns and more Models.
Installation: Go into the Rockstar launcher, Goto settings then click on "Red Dead Redemption 2" Then click on the "OPEN" button next to "View Installation Folder" Once the folder opens drag and drop the file(s) into the folder and either start the game or click "Reload Settings" inside of the menu 🙂
DON'T REPOST ANYWHERE
-
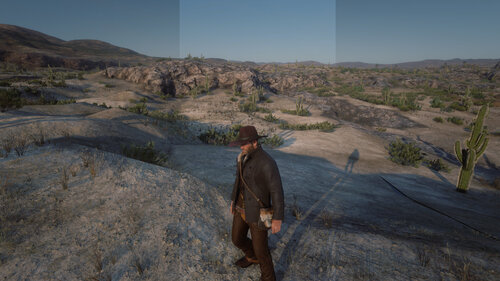 It’s here! A way to do something about the vignetting in Red Dead Redemption 2 (RDR2)!
I did found the vignetting in RDR2 really distracting , so I tried to eliminate it. That is sadly not (yet) completely possible. So I did make a ReShade preset that at least reduces the amount of vignetting.
The first version was just 1 setting, this new version however has an extra night setting to reduce the vignetting even more.
There is however 1 drawback: since this mod brightens the edges of the screen (in fact a negative vignette), surroundings of the sun and moon are getting somewhat brighter too. I tried to minimize it, getting a balance between the brightness and reducing the vignetting.
It is no “easy” fix though, some steps are required. At first I did put the description here on this page but changed that: you will find all info inside the Reduced Vignetting ZIP file you download here. Make sure you read and follow the steps given in the text files! Even if you know how to use ReShade 😉
For new ReShade users there is also a YouTube link in the included text file or here on this page in the Video section.
By default only the normal setting is active. This also reduces the vignetting at night but not much.
If you want the night setting active, press the N-key. This is by choice: the nights have also reduced vignetting by default, but pressing N reduces it even more. When it becomes day, press the N key again to prevent too much brightness.
The N key is used in the Online mode of RDR2 for "Push to Talk". But since this mod should only be used in Story mode, that should be no problem. If used in Online mode, you risk a ban!
See the included text file if you want to change the N key to whatever key (or key combination) if you want to change that.
Also a text file is included on how to change the default key for the ReShade menu in-game. By default that is the Home key but that is also the same key for the Social Club thing. Just press it a few times and both the ReShade menu and the Social Club thing are disappearing. That can be changed.
My mod can be used with other ReShade settings but it can intervene with them. Especially when you use a brighten setting.
The provided screenshots are showing the effect. The night time screenshots are with the Night setting active. To see the full (sometimes subtle) effect, watch it in full screen.
Last but not least: I will try and answer all questions ... but not about ReShade not working and so on. There are for example reports that on certain AMD graphics cards it will not work. That is not the cause of my mod but of ReShade. For more info on how to use ReShade in the game, see the FAQ or Forum on https://reshade.me/
Thanks and credits to ReShade for allowing me to alter one of their shaders files!
Simple ReShade install video for new users:
-
 Develop modifications for Red Dead Redemption 2 in your favorite .NET language such as C#! Get it over at http://ragepluginhook.net/Downloads.aspx
What is RAGE Plugin Hook
RAGE Plugin Hook, as the name suggests, hooks into RAGE engine (Rockstar Advanced Game Engine) based games and allows developers to write plugins for the games in C#, VB.NET or any other .NET language.
That was the original idea behind the name. We started working on RAGE Plugin Hook before GTA V was released, and the original internal hook was made for Max Payne 3 as it was the closest thing we had to GTA V to prepare.
But when GTA V came out, the engine had changed quite a lot, and more importantly, GTA V was 64-bit, while Max Payne 3 was 32-bit. And at the time, we decided to scrap the Max Payne 3 part, and focus on just GTA V, with the hopes that in the future, we’d be able to support multiple games as originally intended.
Well, that time has now come, and a preliminary version of RAGE Plugin Hook is now available for Red Dead Redemption 2.
We also have some stuff to announce about Max Payne 3 at some point in the future 😉
Using RAGE Plugin Hook for non-developers
To use RAGE Plugin Hook. Extract the contents of the downloaded .zip directly into your game folder.
Plugins are installed into the “C#Plugins” folder.
Then launch RAGEPluginHook.exe. On the first run, you can choose whether to load all plugins, specific plugins, or none.
Once the game has fully loaded with RAGE Plugin Hook, you can press F5 (by default) to open the console. Here you can type various commands, like SetTimeOfDay, SetWeather, TeleportToPosition, TeleportToWaypoint, etc. Use the LoadPlugin command to load plugins.
NOTE: If you plan on using the console or developing, we recommend running the game in borderless mode!
NOTE: There’s currently an issue where the game will crash if you attempt to load a save.
Developer Information
If you’re not a developer, you can stop reading now, unless you’re interested in technical and development stuff.
It’s been a lot of work making support for multiple games for RAGE Plugin Hook, and we actually started working on multi game support before Red Dead Redemption 2 was even announced for the PC.
It’s not been a “from scratch” kind of thing. We’ve had a massive API and backend that’s been so far tailored to GTA V, and it’s taken time to make this release possible, as unlike when making a piece of software like RPH from scratch for one new game, we’ve had to comment out and modify a lot of the backend code just to get it running for a game it wasn’t originally intended for.
As such, the initial release is a simple native invocation hook (script hook, if you will), but with a few extras, like the vector classes, MathHelper class, etc. and a temporary API class called TempApi which contains a bunch of properties and methods to make things a little easier, until we can get the proper API up and running. There may also be certain console commands that don’t work at all, or error out for now.
The following types are available in the preliminary API:
Rage.TempApi
Rage.Attributes.PluginAttribute
Rage.GameFiber
Rage.Debug
Rage.Model
Rage.MathHelper
Rage.WeatherTypeIndex
Rage.WeaponHash
Rage.Vector2
Rage.Vector3
Rage.Quaternion
Rage.Rotator
-
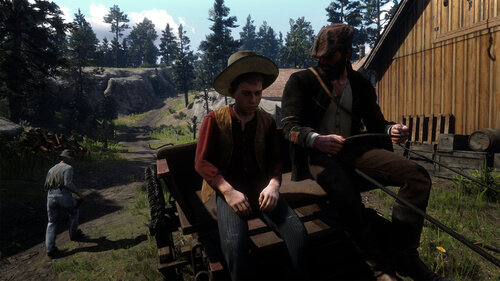
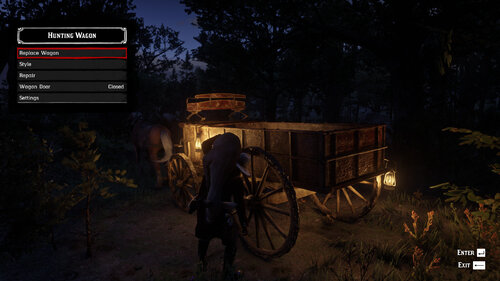 Hunting Wagon V1.1
Requires Script Hook RDR2
CONTROLS
Hold down the "Stow" prompt when close to the hunting wagon (around the back) when holding a pelt/animal (default key E & X/Square on controller). You can only do this on the hunting wagon that spawns at your camp. It doesn't work on other wagons.
Hold Z on keyboard or LS/L3 on pad when near the wagon or player camp fire to open the Hunting Wagon menu.
MENU FEATURES
Camp fire menu - Menu prompt shows on portable camp fire and the one in camp you can craft at.
Call for Wagon - Spawns the wagon on a nearby road at your current location.
Send to Camp - When you no longer need the wagon and want it back at your camp. Stuff stored in the wagon will be lost.
Wagon is at camp - Menu prompt shows when near the Hunting Wagon.
Replace Wagon - Change the wagon to a different type. Only wagons with doors are supported at this time.
Style - Change lanterns, set wagon style for supported wagons. Style is saved to the wagon.
Repair - Fix and set wagon to full health.
Door - Open and close wagon back door.
Settings
Long Whistle for Wagon - Hold down the whistle (default H/Dpad up) for longer than usual to spawn wagon at a nearby road (Same as Call for Wagon).
Reset All Saved Settings - Resets wagon styles & settings to default.
Settings are saved to \Documents\Rockstar Games\Red Dead Redemption 2\hunting_wagon.ini
KNOWN ISSUES
The stuff you store in the hunting wagon doesn't save yet. So when you reload game or die you will lose stuff stored in the wagon.
No throw animation.
The physics of the pelts/animals might mess with wagon and glitch out. Big birds especially.
INSTALLATION
Install the latest Script Hook RDR2 copy both dinput8.dll & ScriptHookRDR2.dll and place them into the root of your the Red Dead Redemption 2 install folder.
Install Hunting Wagon by extracting hunting_wagon.asi and placing it into the root of your Red Dead Redemption 2 install folder.
CREDITS
Alexander Blade - Script Hook RDR2
zorg93 - Script research
unknownmodder/alloc8or - Script/Native research
jedijosh920 - Native research
EvilB - Code & Native research
Slinky - Testing
- 16,176 Downloads
- 108381 Views
- 197.03 kB File Size
- 23 Comments
 Updated
 -
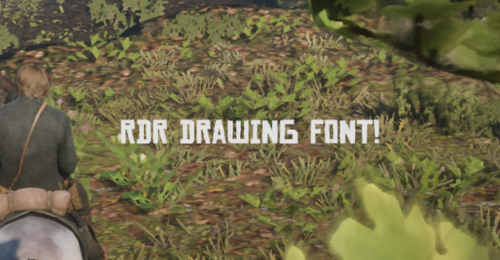 A useless tool for Developers who want to draw text with changing fonts, justification, and wrap for their mods
/* Instructions to apply for your mods for Beginner */
1. Determine your Visual Studio Toolset Version (Project -> Properties -> Platform Toolset)
2. Place the library (MeongDraw.v14x based on your platform toolset and the header (Meong.h) somewhere in your mod's folder
3. Open a source file, prefer precompiled header source (usually pch.cpp)
4. Write on top of your selected source file and write "#pragma comment(lib, "path_to_where_you_put_the_lib")"
5. Include Meong.h somewhere in your source file or a precompiled-header (this one's the .h/.hpp file)
6. In your ScriptMain (the function you registered when calling scriptRegister), put meong::initialize(); OR meong::mulai_atau_saya_culik(); before calling main(), you can use either one it doesn't matter
7. Now you can just call meong::set_text_justification or meong::set_text_font or meong::set_text_wrap before drawing your Text.
/* FAQ */
Q: Help, I use v140 and i don't have the file for it
A: Unfortunately, you'll gonna need to look at Optimization (Project -> C++ -> Optimization -> Optimization -> Disabled (/Od)
Q: The answer above still doesn't work
A: Then you'll need to get a newer Visual Studio version
Miyu, 2k19, Keep calm and keep loving memek & kontol gede
-
 All cores completely drained upon death while not on a mission
Damage received: 400%
Damage delivered: 120%
Health regeneration: 5%
More to come!
Installation
Download RAGE Plugin Hook for RDR2 Extract the contents of RPH into your game directory, where RDR2.exe is Extract the contents of the mod into the game directory (C#Plugins should be in the same directory as RDR2.exe) Launch RDR2 Run RAGEPluginHook.exe from the game directory
If the mod loaded successfully, you will see it notified in the top left corner of the game.
You can hit F2 to toggle the mod on and off.
Unfortunately, RAGE Plugin Hook is not (YET) compatible with other script hooks.
In order for the hook to work, make sure you have overlays such as FRAPS and RivaTuner disabled.
Updating
To update the mod, overwrite the HardcoreDiff.dll in C#Plugins.
To update the RAGE Plugin Hook, choose the update option next to the download button on the website and drag the contents into your game directory.
Planned Features
Health and Stamina Cores deplete faster Lowered maximum ammo No bullet trails Ammo drops must be looted from bodies, instead of simply walking over them
[source]
-
 Mod by pir2, not by me!
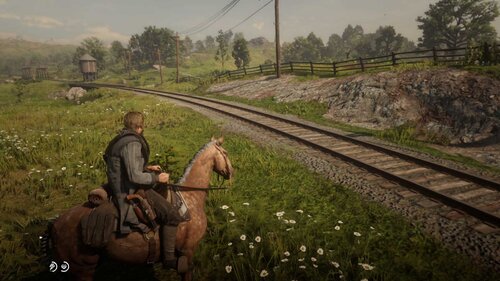
In real life you won't steal a horse by error. SAdly in Rdr2 you got no key to say mount my horse. Now you do.
Once on your horse set it as your main horse by pressing T (key can be modified in option file).
You will never mount anything but that horse by pressing T (E keeps on working as in vanilla game)
To change this mod options just edit the c#Plugins\MyHorseKey.opt file (with a text editor, notepad for example) within your read dead redemption 2 main folder (typically C:\Program Files\Rockstar Games\Red Dead Redemption 2)
-
 Horse TP mod by pir2, not by me! (Originally from: https://www.rdr2mod.com/horse-tp-mod/) Please PM me if you are the original author so we can get the author changed to you!
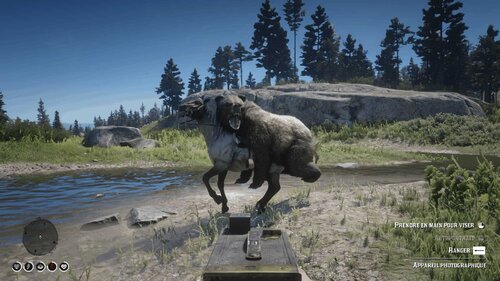
With TPhorse you will be able to teleport any living entity onto your horse. Once you have designated a horse as your tp horse, just aim at an entity and press the "tp key" (default T, can be changed in the mod option file) to teleport that entity at the back of your tp horse (no need to be on your tp horse for this to work).
This mod requires the rageHookPlugin avaliable here : https://ragepluginhook.net/Downloads.aspx?Hook=1
To change this mod options just edit the c#Plugins\HorseTP.opt file
within your read dead redemption 2 main folder (typically C:\Program
Files\Rockstar Games\Red Dead Redemption 2)
Check the video:
-
 Simple mod that allows you to change both the player and ai
Weapon Modifier Melee Modifer Player Health Regen
independently, and easily toggle it on and off with a simple hotkey.
Makes the guns feel more powerful and makes shootouts more fun and challenging. If you have a hard mission or want to go back to default, just hit the hotkey and its back to vanilla.
Mod is open source as well.
github
Requires
Community ScriptHookRDR2.NET
Default Key: F10
Will display the status and the current values on toggle.
Change values in the ini then toggle it on and off to update the values.
Place the
DifficultyScaler.dll
DifficultyScaler.ini
Rockstar Games Version:
In the scripts folder (Program Files\Rockstar Games\Red Dead Redemption 2\scripts)
Steam Version
In the scripts folder in the same directory as "RDR2.exe".
If you do not have any scripts already you will need to create a folder named "scripts" (lowercase)
Video Example of me getting shot like a dog
- 870 Downloads
- 21246 Views
- 4.03 kB File Size
- 1 Comments
 Updated
 -
 Props to LMS over at Mod RDR Discord for helping look into ways to manipulate the first person camera.
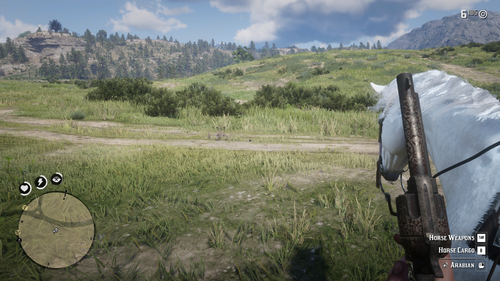
I created this simple mod because I like to travel in third person while on my horse, but prefer first person on foot. I'm lazy and don't like to have to press the view toggle button every time I change states. I know there is a camera setting in the game that allows you to set your preferred view while on horseback, but it is limited to only the closest third person view.
Instructions:
Requires ScriptHookRDR2DotNet and its dependencies: https://www.mod-rdr.com/files/file/17-community-scripthookrdr2-net/
Place RedDead2HorseCameraSwap.dll in your "path to Red Dead Redemption 2"/scripts directory.
If the "scripts" directory does not exist, create it.
If you're curious, here are the entire contents of the mod so you can do it yourself if you prefer.
using System; using RDR2; using RDR2.Native; namespace RedDead2HorseCameraSwap { public class Main : Script { public Main() { Interval = 1; Tick += onTick; } private void onTick( object sender, EventArgs e ) { var player = Game.Player.Character; if ( player.IsOnFoot ) { //# _FORCE_FIRST_PERSON_CAM_THIS_FRAME: https://www.mod-rdr.com/nativedb/index/cam/_0x90da5ba5c2635416/ Function.Call( Hash._0x90DA5BA5C2635416 ); } } } }
- 412 Downloads
- 13258 Views
- 2.46 kB File Size
- 2 Comments
 Updated
 -
 This file is an educational resource for mod development!
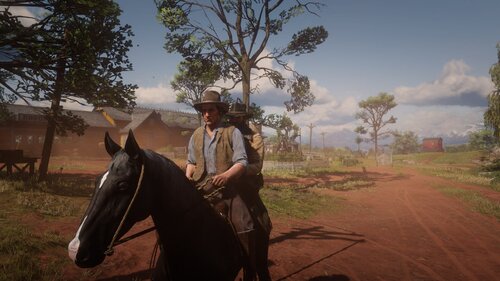
NPC Taxi allows you to jump on any NPC's horse or wagon and enjoy the ride from a slightly different perspective. This file contains the finished project for our tutorial. Feel free to expand it in any way you like!
The tutorial can be found here:
-
 This file is an educational resource for mod development!
NPC Taxi allows you to jump on any NPC's horse or wagon and enjoy the ride from a slightly different perspective. This file contains the empty start project for our tutorial. Feel free to use it as a template for new mods.
The tutorial can be found here:
-
 Mod by DrNemo!
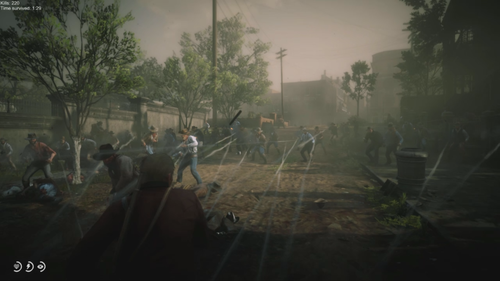
This mod will wrap you to the Saint Denis cemetery and spawn a set amount of peds and make them fight you. Once an enemy is killed,
a new enemy is spawned so that the number of enemies going after you is constant. You can customize the number of enemies present at once
in the configuration file. The only way out is by dying. Once you die you will be presented with time of your attempt and number of enemies
you killed. This information will also be stored in TheyKeepComing.log. Share your highest time survived with some impressive kill count!
CONFIGURATION
Configuration is stored in TheyKeepComing.ini.
[NEW] Debug mode: You can change "Debug" value to "1" in the ini file to gain access to:
1) Pressing F2 will save your current position to the TheyKeepComing.log
2) Pressing F3 while the horde is active will stop the horde.
ScriptHook debug mode:
"Runtime asi script reloading:
In order to use this feature you must create empty file called "ScriptHookRDR2.dev"
in you game's main dir. While being ingame press CTRL + R, beep sound will tell
you that all loaded scripts are fully unloaded and you can replace your *.asi,
press CTRL + R again to load the scripts, triple beep will indicate that
everything is loaded."
So in ScriptHook debug mode you can use CTRL + R twice to reload the script (and the configuration).
[NEW] You can customize your staring position and 2 positions for enemies to spawn (alternating). Please follow the format provided in the
INI file.
You can customize a number of enemies (MaxEnemies) that are present at once. Values can be between 10 and 512. Lower value means better
performance and less chance for the game to crash.
Keybinds can also be customized. Please refer to https://docs.microsoft.com/en-us/windows/win32/inputdev/virtual-key-codes for key values.
USAGE (default keybinds)
Press F3 and you will be teleported the Saint Denis cemetery. If you are already there, pressing it will start the attack.
The attack will come from the west gate.
Before you start an attack you can prepare yourself by spawning explosives, objects and mounted weapons using Spawner Menu.
Spawner Menu is activated by pressing X. Pressing X multiple times will cycle through menus. To select an item from the menu
press 1 - 9. You will be put into placing mode. While in placing mode you can move around to find a good spot for the item.
You can press Q to rotate the object clockwise (counter clockwise while holding SHIFT). To confirm the plcacement press E.
Selecting "> DEL LAST SPAWNED" in Explosives menu will remove last spawned object.
To remove all spawned objects you will need to reload save game.
DISCLAIMER
This mod is provided as-is and it will likely crash your game at some point. Please don't save the game after using this mod
and disable autosave. After done playing with the mod please load the savegame.
Tested with NativeTrainer installed. If it doesn't work for you or you have constant crashes please lower the amount
of enemies in the configuration file or remove other scrips than ScriptHook by AB, NativeTrainer and TheyKeepComing.
[NEW] Now the mod will also set ped/vehicle multiplier to 0 while it's running, so remove the mod when you're done playing.
Please don't redistribute this mod on its own but rather provide links to the original source. Thank you!
Author: Dr. Nemo
Special thanks for Alexander Blade for his amazing ScriptHook and for source code of NativeTrainer!
-
 Mod created by HCL, not by me!
This mod simply allow you to fly. Only work with keyboard but not gamepad now. I am not a native English speaker so sorry for my language.
Requirement
ScripthookDRD2 by Alexander Blade (Not the one on Nexus): http://www.dev-c.com/rdr2/scripthookrdr2/
Community ScripthookRDR2.NET: https://www.nexusmods.com/reddeadredemption2/mods/70
All other programs required by the above two programs.
Installation
Put the "HCL_Superpower_01.cs" into the /scripts/ folder in the RDR2 installed folder (if you have successfully installed the "Community ScripthookRDR2.NET" you should have this folder, if not, you can create one.).
Control
Z: Activate/deactivate fly mod.
W: Fly forward when fly mod is activated.
Space: Fly up when fly mod is activated.
Alt: Fly down when fly mod is activated. (This is the default radar key, of course you need to either change the radar key for the game or change the key binding of this mod.)
How to change key binding:
Simply open the file with a notepad and make the change. For example, if you want to chang the activate/deactivate key to "X", just find and change all "Keys.Z" into "Keys.X". If you want to change the fly down key to "Control", just find and chang all "e.Alt" to "e.Control".
-
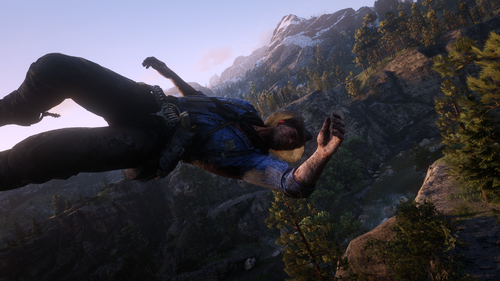
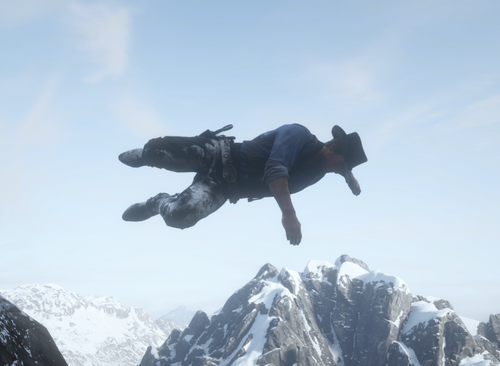 This script is as simple as it sounds, it allows you to ragdoll your character.
Alexander Blade's ScriptHook needed: http://www.dev-c.com/rdr2/scripthookrdr2/
To go into ragdoll, press and hold K. You will stay in ragdoll until you release the key.
If you find any issues, please let me know. I'm relatively new to scripting 🙂
PLEASE DON'T RE-UPLOAD ANYWHERE ELSE

.thumb.jpg.5b8458d020408e6928c97df7c880f0d7.jpg)