


379 files
-
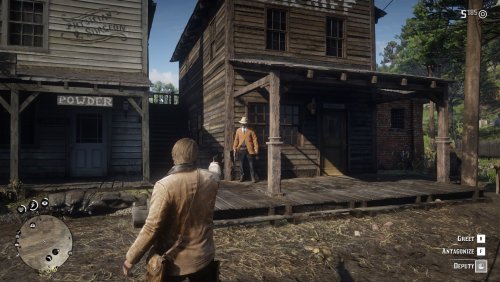
 Shoot it out with bandits, hunt down outlaws and walk the streets with a star. RDR First Response (RDRFR) is an all new experience we've created specifically tailored for Red Dead Redemption which ties in seamlessly with the game, turning you into the law.
This first version of RDRFR puts the power of the law into your hands for the first time since Rockstar's flagship title arrived on PC. Working in conjunction with our Patreon supporters and testers, we've built a number of core features into the mod for you to enjoy with the ability to arrest suspects, go on duty and request backup in a manner similar to LSPDFR for GTA V.
Being tailor made towards RDR, though, there's a couple of key differences in RDRFR. One of the new concepts we've introduced is for providing 'missions' or 'investigations' to the player. Instead of pretending that police radios existed in the 20th Century, you'll now find that civilians within the world will summon your help the old fashioned way - in person, calling out loudly for the assistance of the law. Similarly, there are other noticeable deviations throughout especially as it relates to arresting suspects and the interaction options available. Instead of having separate key presses or buttons, we've tried to keep things as integrated with the game as possible: most of the features and actions in RDRFR are accessed or performed through the game's contextual prompts.
Part of the First Response Mods family.
RDRFR Feature Guide
More information about the features available in RDRFR.
View the RDRFR Feature Guide Installation Help & FAQ
An online guide and tutorial video for getting started with RDRFR.
RDRFR FAQ RDRFR Installation Guide
Want to discuss RDRFR? Check out the RDRFR Forums Section here: https://www.mod-rdr.com/forums/forum/6-rdr-first-response/
-
 This mod removes all limits from Photo Mode in RDR 2, meaning you can move your camera anywhere in the world without distance restrictions.
Installation
Put all files in your game root folder. When the game launches, you should hear a few beeping sounds, indicating that the files got loaded.
You can now move the camera around freely in photo mode with absolutely no limits. Nothing more, nothing less.
Please don't redistribute or upload elsewhere. Link here instead so that you get the most up to date version!
-
 Version 1.0
Requires: Community Script Hook RDR2 .NET V2
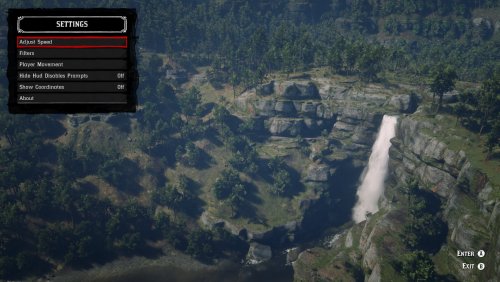
Description: A simple script to slow the game down whilst playing and vice versa.
Usage: 1) Install Community Script Hook RDR2 .NET V2
2) Place all files in the zip into Red Read Redemption 2/Scripts
Default keybind is 'Y', default timescale of the mod is 0.40.
Keybind and TimeScale can be changed in Config.xml, as well as:
F3 lets you change the timescale. Enter a floating point (e.g 0.2, 0.3, 0.80)
F4 lets you change the bind. Refer to (Microsoft Key Code) for keycodes. 'Y' works, as does '89', which is also Y.
SSM.zip
-
 Requires Alex Blade's ScriptHook: http://dev-c.com/rdr2/scripthookrdr2/
By default this mod will make all NPCs half size but you can customise the included ini file if you would like to make Author massive or all the NPCs if you would like to.
Changelog:
v1.0
Initial release
v1.1
Added configuration support. (Can change the player size and the NPC size separately)
v1.2
Added an option to enable/disable the mod in the configuration file
Basic error handling so the script doesn't cause an exception if the configuration file is missing
Maybe slightly more efficient
v1.2.1
Hotfix regarding configuration file issue
v1.3
Added ability to customise individual ped sizes depending on gender or if the ped is an animal (Horses, dogs, etc)
PedScaleMale=0.5f
PedScaleFemale=0.5f
PedScaleAnimals=0.5f
Source code (Horribly written):
https://gitlab.com/Notex/MiniNPCs
-
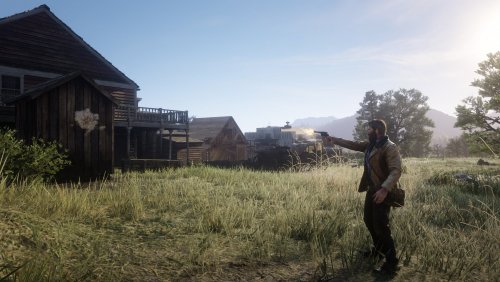
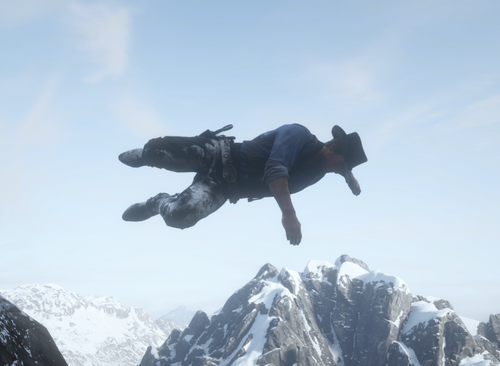 This script is as simple as it sounds, it allows you to ragdoll your character.
Alexander Blade's ScriptHook needed: http://www.dev-c.com/rdr2/scripthookrdr2/
To go into ragdoll, press and hold K. You will stay in ragdoll until you release the key.
If you find any issues, please let me know. I'm relatively new to scripting 🙂
PLEASE DON'T RE-UPLOAD ANYWHERE ELSE
-
.thumb.png.4ccd7539e751b67b120c2cc0459a6739.png) Rent a hot air balloon at the Valentine Theatre Tent, Saint Denis Docks or Blackwater Build Site.
Rent a hot air balloon at the Valentine Theatre Tent, Saint Denis Docks or Blackwater Build Site.
- Costs $5
- HOLD Y key while close to activate
- The Balloon will disappear if you are too far, sleep or fast travel
- The wind will move the balloon while airborne
*Balloon Controls* (controller input)
- Get in with Y
- Deactivate control with Y (you will drop straight down) (you will get knocked down if you are going too fast, possibly fall out)
- Get out with X (after you deactivate control and reach the ground) (not compatible with 'Stash That Wagon')
- RT for more height
- Momentum, gravity and wind are factors for a realistic ballooning experience
*Wind Controls* (keyboard input) (only works once you rent the balloon)
NUM8 = N
NUM9 = NE
NUM6 = E
NUM3 = SE
NUM2 = S
NUM1 = SW
NUM4 = W
NUM7 = NW
NUM5 = More wind/clear skies
*Use antimicro.exe to map keys to your gamepad. See pic. This will make the trees dance when you move around and you'll have to use the mouse when using your map. I don't use it personally. Thinking about a left handed keyboard or a USB NUM pad. (https://antimicro.en.softonic.com/)*
- 1,482 Downloads
- 19024 Views
- 52.99 kB File Size
- 3 Comments
 Updated
 -
 Develop modifications for Red Dead Redemption 2 in your favorite .NET language such as C#! Get it over at http://ragepluginhook.net/Downloads.aspx
What is RAGE Plugin Hook
RAGE Plugin Hook, as the name suggests, hooks into RAGE engine (Rockstar Advanced Game Engine) based games and allows developers to write plugins for the games in C#, VB.NET or any other .NET language.
That was the original idea behind the name. We started working on RAGE Plugin Hook before GTA V was released, and the original internal hook was made for Max Payne 3 as it was the closest thing we had to GTA V to prepare.
But when GTA V came out, the engine had changed quite a lot, and more importantly, GTA V was 64-bit, while Max Payne 3 was 32-bit. And at the time, we decided to scrap the Max Payne 3 part, and focus on just GTA V, with the hopes that in the future, we’d be able to support multiple games as originally intended.
Well, that time has now come, and a preliminary version of RAGE Plugin Hook is now available for Red Dead Redemption 2.
We also have some stuff to announce about Max Payne 3 at some point in the future 😉
Using RAGE Plugin Hook for non-developers
To use RAGE Plugin Hook. Extract the contents of the downloaded .zip directly into your game folder.
Plugins are installed into the “C#Plugins” folder.
Then launch RAGEPluginHook.exe. On the first run, you can choose whether to load all plugins, specific plugins, or none.
Once the game has fully loaded with RAGE Plugin Hook, you can press F5 (by default) to open the console. Here you can type various commands, like SetTimeOfDay, SetWeather, TeleportToPosition, TeleportToWaypoint, etc. Use the LoadPlugin command to load plugins.
NOTE: If you plan on using the console or developing, we recommend running the game in borderless mode!
NOTE: There’s currently an issue where the game will crash if you attempt to load a save.
Developer Information
If you’re not a developer, you can stop reading now, unless you’re interested in technical and development stuff.
It’s been a lot of work making support for multiple games for RAGE Plugin Hook, and we actually started working on multi game support before Red Dead Redemption 2 was even announced for the PC.
It’s not been a “from scratch” kind of thing. We’ve had a massive API and backend that’s been so far tailored to GTA V, and it’s taken time to make this release possible, as unlike when making a piece of software like RPH from scratch for one new game, we’ve had to comment out and modify a lot of the backend code just to get it running for a game it wasn’t originally intended for.
As such, the initial release is a simple native invocation hook (script hook, if you will), but with a few extras, like the vector classes, MathHelper class, etc. and a temporary API class called TempApi which contains a bunch of properties and methods to make things a little easier, until we can get the proper API up and running. There may also be certain console commands that don’t work at all, or error out for now.
The following types are available in the preliminary API:
Rage.TempApi
Rage.Attributes.PluginAttribute
Rage.GameFiber
Rage.Debug
Rage.Model
Rage.MathHelper
Rage.WeatherTypeIndex
Rage.WeaponHash
Rage.Vector2
Rage.Vector3
Rage.Quaternion
Rage.Rotator
-
 Pimp My Horse is a mod for Red Dead Redemption II that lets you personalize your horse with many different components as well as save and load your creations.
If upgrading from a previous version, always use the new pimpmyhorse.ini file.
Features
Change all components for your horse from saddles to stirrups Save your horse's current outfit Quickly load saved outfits Reset all your components Some convenience functions such as bonding with your horse, changing its gender, making it invincible etc.
Controls
Press F3 to open/close the menu (key can be changed in settings):
Up/Down to navigate the menu vertically. Left/Right to change item options. Enter to select. Backspace to go back.
Installation
All you need to do is drag the files into your game root folder - the one where RDR 2 is installed.
Pimp My Horse is loaded from the same folder and shares many of the same files as Lenny's Simple Trainer but works without it. When the game launches, you should hear a few beeping sounds, indicating that the mod is loaded. RDR Online is not supported for modding. Don't attempt to play Online with this mod. Remove all files from your game folder before playing Online.
Configuration
Open the pimpmyhorse.ini file (found in your game folder) in a text editor to configure the mod where you can:
Change the names of categories. Name your favourite clothing items to make finding them again easier. Manually edit/manage your saved outfits (although you can do this in the menu).
We are working on a Wiki page to document all of the clothing items.
To load any changes to the pimpmyhorse.ini file, use the "Reload Settings" feature in the menu.
Please don't upload or redistribute this mod, link here instead so that everyone has the most up to date version.
Thanks to @Sniper296 for the logo!
-
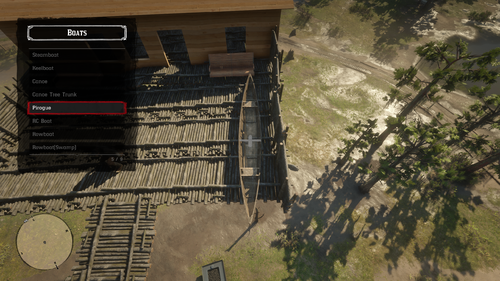 Extremely customizable trainer for Read Dead Redemption 2. It includes an edit mode where you can add, move, and delete options in game.
Edit mode notes
To add a new Submenu, go to the bottom of the list and select Add, then type the name of the submenu (this is not the same as the title, title will be what you type in text).
The submenu will then be created once you press the exit and save button.
Controls (Keyboard)
F3 to open menu Numpad 2/8 to go up and down Numpad 5 to select option Numpad 4/6 to adjust number Numpad 7 to enter edit mode Numpad 7 to exit edit mode and save Numpad 9 to exit edit mode without saving Insert to add option in edit mode Numpad * to edit option in edit mode Delete to delete option in edit mode Shift to activate bind boost W to accelerate in boat fly mode S to decelerate in boat fly mode Up/down to turn up/down in boat fly mode A/D to turn left/right in boat fly mode Q/R to control yaw in boat fly mode
Controls (Xbox controller)
RB + D-Pad down to open menu D-Pad up/down to go up and down A to select option LB/RB to adjust number X to enter edit mode X to exit edit mode and save B to exit edit mode without saving Y to add option in edit mode RB to edit option in edit mode LB to delete option in edit mode LB to activate bind boost A to accelerate in boat fly mode X to decelerate in boat fly mode LS to go turn up/down/left/right in boat fly mode Yaw is not bound to anything by default but you can change it in Settings -> Controls -> Controller
Controls (PS4 Controller)
R1 + D-Pad down to open menu D-Pad up/down to go up and down X to select option L1/R1 to adjust number Square to enter edit mode Square to exit edit mode and save Circle to exit edit mode without saving Triangle to add option in edit mode R1 to edit option in edit mode L1 to delete option in edit mode L1 to activate bind boost X to accelerate in boat fly mode Square to decelerate in boat fly mode L3 to go turn up/down/left/right in boat fly mode Yaw is not bound to anything by default but you can change it in Settings -> Controls -> Controller
Installation
Install Scripthook RDR2 from Alexander Blade if you don't already have it
Drag all of the files into your RDR 2 installation directory
Editing controls
All menu controls (both controller and keyboard) can be changed in the settings menu
- 8,392 Downloads
- 119501 Views
- 676.49 kB File Size
- 64 Comments
 Updated
 -
 Mod created by HCL, not by me!
This mod simply allow you to fly. Only work with keyboard but not gamepad now. I am not a native English speaker so sorry for my language.
Requirement
ScripthookDRD2 by Alexander Blade (Not the one on Nexus): http://www.dev-c.com/rdr2/scripthookrdr2/
Community ScripthookRDR2.NET: https://www.nexusmods.com/reddeadredemption2/mods/70
All other programs required by the above two programs.
Installation
Put the "HCL_Superpower_01.cs" into the /scripts/ folder in the RDR2 installed folder (if you have successfully installed the "Community ScripthookRDR2.NET" you should have this folder, if not, you can create one.).
Control
Z: Activate/deactivate fly mod.
W: Fly forward when fly mod is activated.
Space: Fly up when fly mod is activated.
Alt: Fly down when fly mod is activated. (This is the default radar key, of course you need to either change the radar key for the game or change the key binding of this mod.)
How to change key binding:
Simply open the file with a notepad and make the change. For example, if you want to chang the activate/deactivate key to "X", just find and change all "Keys.Z" into "Keys.X". If you want to change the fly down key to "Control", just find and chang all "e.Alt" to "e.Control".
-
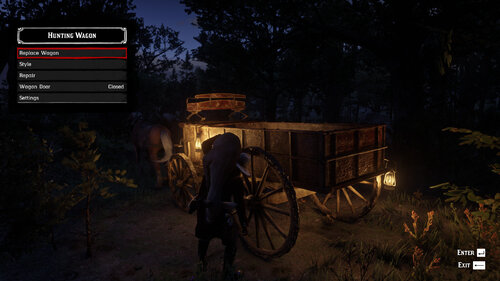 Hunting Wagon V1.1
Requires Script Hook RDR2
CONTROLS
Hold down the "Stow" prompt when close to the hunting wagon (around the back) when holding a pelt/animal (default key E & X/Square on controller). You can only do this on the hunting wagon that spawns at your camp. It doesn't work on other wagons.
Hold Z on keyboard or LS/L3 on pad when near the wagon or player camp fire to open the Hunting Wagon menu.
MENU FEATURES
Camp fire menu - Menu prompt shows on portable camp fire and the one in camp you can craft at.
Call for Wagon - Spawns the wagon on a nearby road at your current location.
Send to Camp - When you no longer need the wagon and want it back at your camp. Stuff stored in the wagon will be lost.
Wagon is at camp - Menu prompt shows when near the Hunting Wagon.
Replace Wagon - Change the wagon to a different type. Only wagons with doors are supported at this time.
Style - Change lanterns, set wagon style for supported wagons. Style is saved to the wagon.
Repair - Fix and set wagon to full health.
Door - Open and close wagon back door.
Settings
Long Whistle for Wagon - Hold down the whistle (default H/Dpad up) for longer than usual to spawn wagon at a nearby road (Same as Call for Wagon).
Reset All Saved Settings - Resets wagon styles & settings to default.
Settings are saved to \Documents\Rockstar Games\Red Dead Redemption 2\hunting_wagon.ini
KNOWN ISSUES
The stuff you store in the hunting wagon doesn't save yet. So when you reload game or die you will lose stuff stored in the wagon.
No throw animation.
The physics of the pelts/animals might mess with wagon and glitch out. Big birds especially.
INSTALLATION
Install the latest Script Hook RDR2 copy both dinput8.dll & ScriptHookRDR2.dll and place them into the root of your the Red Dead Redemption 2 install folder.
Install Hunting Wagon by extracting hunting_wagon.asi and placing it into the root of your Red Dead Redemption 2 install folder.
CREDITS
Alexander Blade - Script Hook RDR2
zorg93 - Script research
unknownmodder/alloc8or - Script/Native research
jedijosh920 - Native research
EvilB - Code & Native research
Slinky - Testing
- 16,181 Downloads
- 108416 Views
- 197.03 kB File Size
- 23 Comments
 Updated
 -
 This mod is a teamwork of @fitfondue and @HughJanus.
The beta version of Ped Damage Overhaul 2.0 has been released! It contains new features and major adjustments (described in the changelog), so we'd appreciate your feedback on any bugs and performance issues you encounter. When reporting performance issues, please post your system specs if you can!
Part of this beta are the "optional features" (which require LML to work). Those are separated in two files. One is responsible for longer reactions after dismemberment (not compatible with euphoria mods), the other increases the chances of arterial bleeding (e.g. for neck shots).
OVERVIEW
This mod tries to make gun fights more diverse, dynamic and interesting and keep them that way throughout the game.
You will find NPCs stumbling when trying to run with hurt legs, getting the wind knocked out of them when getting shot, squirming on the ground when fatally injured, moaning in pools of their own blood until they meet their end, clutching their wounds and stumbling around when hit, etc.
IMPORTANT KEYS (for toggling effects)
These are the standard keys, they can be modified via the ini file (as can everything else this mod adds to the game):
F9 - Toggling the mod on/off (the mod is enabled by default). F8 - Toggling "Kill Wounded Mode" on/off (is disabled by default). This mod adds a feature called "Dying States" which makes NPCs go down when injured and still stay alive for some time (until they bleed out). If "Kill Wounded Mode" is activated, NPCs will die instead of entering the "Dying States". F7 - Toggling "Longer Bleedouts Mode" on/off (is disabled by default). Per default this mod makes NPCs in "Dying States" bleed out within a maximum of 25 seconds (to not interfere with spawning waves of enemies during missions, which are only triggered when the first wave is dealt with). If "Longer Bleedouts Mode" is activated, NPCs will take longer to bleed out (more realistic, but also hindering during some missions). F2 - Toggling "Friendly Fire" on/off (is disabled by default). "Friendly Fire" currently only works for the Dutch Van Der Linde gang.
FEATURES
Here is a quick overview of the most important features:
First off, almost all of the features and their characteristics are based on chance, so the behaviors won't be the same every time you encounter them - which should ensure more diverse fights and keep things interesting for longer than vanilla does... that was the idea, at least 🙂
Almost every feature can be enabled, disabled or tweaked in the ini (more information further down the page), so this is not only a mod, but also enables you to create your own experience.
This mod only alters behaviors and attributes of human NPCs - animals or anything else remain untouched.
Light version:
NPCs will react to where they are being shot (leg shots will make them stumble when trying to run, hand shots will disarm them, torso shots will stagger them, etc.). When NPC's health decreases below a certain threshold, they fall over and don't get back up. Then they go through different stages of dying, each with its own randomized behavior. Eventually NPCs will die of blood loss. NPCs will sometimes (based on chance) audibly react when in hopeless situation (panicking, begging, cursing, etc.). There is a bleeding feature, which makes NPCs lose health after they have been fatally injured. It operates bassed on chance, so NPCs don't all bleed out in the same amount of time. NPCs burn alive for longer when set on fire. There is a chance of NPCs surviving a fire (although they won't be able to do much afterwards). NPCs have a chance of staying on the ground for a random amount of time when shot (based on their health) - so you can now knock the breath out of your opponents. For all included behaviors the movement and pain sounds have been adjusted (and also randomized) to hopefully make your experience more interesting.
Standard version:
The same features as in the light version apply as well as the following additions: NPC health and player damage tweaked to offer a more satisfying experience (no more bullet sponges). NPC damage tweaked to offer more challenge to the player (since NPCs don't eat bullets for breakfast anymore). You can now feel the difference between weapons, their condition and ammo types in combat (shooting with a properly maintained, powerful weapon with special ammo now feels like it should). NPCs are less accurate shots and their accuracy declines along with their health. Arm and leg shots do less damage to NPCs. All NPCs can be disarmed (yes, even lawmen). Hogtying disarms NPCs, so if they manage to get loose, they can't shoot you - they might draw a hidden knife, though.
Overhaul version:
The same features as in the standard version apply as well as the following additions: Core Drain (health, stamina, dead eye) has been moderately increased - now hunting and buying food become necessary options. Cores will be fully drained after death. Additional 25% of money lost after death.
We hope that you have as much fun with this mod as we have creating and improving it!
INSTALLATION
Download Alexander Blade's ScriptHook: http://dev-c.com/rdr2/scripthookrdr2/ Extract Dinput8.dll and ScriptHookRDR2.dll into the main directory of RDR 2 (where the .exe file is). If you want PDO's additional features, download Lenny's Mod Loader. If not, ignore steps 4, 5 and 8. https://www.rdr2mods.com/downloads/rdr2/tools/76-lennys-mod-loader-rdr/ Extract the folder Mod Manager into the main directory of RDR 2 (the actual Mod Manager folder, not just its contents). Then go into the Mod Loader folder and extract only its contents into the main directory as well (not the actual folder, just its contents). In the Mod Manager folder, run the ModManager.UI.exe file to make sure Lenny's Mod Loader is properly installed in the RDR 2 directory. Download your preferred version of Ped Damage Overhaul, then open the zip and choose whether you prefer Light, Standard or Overhaul configurations (see mod description to understand the differences). Extract the contents of the chosen folder into the main directory. If you're using Lenny's Mod Loader, any files pertaining to it will be automatically placed in the correct folder. If you're using Lenny's Mod Loader, run ModManager.UI.exe to see if the optional files are showing as installed. If they are, you're good to go. Start the game and have fun! While in game, you can press F9 to check if the mod was loaded correctly (F9 once to disable, then F9 again to re-enable the mod).
TWEAKING
In general, every parameter in the ini has a description (including information on how to disable the feature). Feel free to play around.
There are already a lot of features enabled and tweaked for out-of-the-box use, yet there are some features left untouched which can be enabled in the ini. That said, if you just want to disable one or more features, set their respective values to 0 (or whatever value the description suggests).
Examples:
To turn off the bleeding feature: set BleedWhenDying to 0 To turn off the disarming when hogtying NPCs: set HogtyingDisarms to 0 To turn off the dying state features: set DyingStateChance to 0
If you want to disable a feature which is based on chance, just set the chance value to 0.
Examples:
To turn off the knocking the wind out of your opponents: set KnockbackChance to 0 To turn off the possibility of NPCs surviving fire: set FireSurvivalChance to 0 To turn off the chance of stumbling when shot in the leg: set StumbleChanceOneLeg and StumbleChanceBothLegs to 0
There are also many other features that can be activated in the ini - here are some examples:
LassoDisarms -> makes catching someone with your lasso disarm them (no hogtying necessary) NPCWeaponModifier (and many other damage modifiers) -> makes NPCs do more or less damage, depending on what you set it to BleedWhenShot -> enables a bleeding feature which triggers when an NPC gets shot (so not the usual "bleed out when under x health" but consistent bleeding which is applied after the first hit of a bullet - the bleeding chance and deducted health points can be set separately)
The ini is full of values for those wanting to experiment a little.
One word of warning to tweakers: If the NPCHealth is set too high, headshots might not be lethal anymore, unless they hit the actual brain of the NPC (so a shot in the jaw would do more damage than other body parts, but would not be an instant kill). Actual "brain-shots" are always one-shot-kills, no matter the health.
KNOWN "ISSUES" (they are not real issues)
The disarming feature can be exploited to slow down new waves of lawmen. The same is true for the dying state feature. If there are too many lawmen dying or fleeing around the player, new waves won't spawn in until the lawmen die or get enough distance (this feature can be turned of in the ini file, if that is a deal breaker to you). When disarming is enabled, the dropped weapons may appear partly invisible. This is only optical, though, they can be picked up and used as usual.
The source code of Ped Damage Overhaul can be found here:
https://github.com/HJHughJanus/PedDamageOverhaulRDR2
If you are looking to enhance your experience by using an Euphoria Mod, please take a look at the work of @AnymYo.
C.E.R.R. is tweaked for cineastic reactions and designed to work with PDO:
-
.thumb.png.cc32062f3cdcf019708021e78c886334.png) # RDR2-Tie-Your-Lasso - Hangman Edition 3.1.0
# RDR2-Tie-Your-Lasso - Hangman Edition 3.1.0
This mod allows you to hitch your lasso, along with the peds tied to it, to the surface your are standing on.
### Installation:
- Download and install AB's ScripthookRDR2
- Make sure you have an asi loader, it usually comes along with Scripthook.
- Remove previous versions of the mod, if you have any installed.
- Copy TieYourLasso.asi to the game's main installation folder.
### How to use:
- Use your lasso just as usual.
- Press the key ("Look Back" key) when on foot to hitch the lasso to the ground.
- After you hogtie a npc, get close to him and then you can attach him to the ground (without lassoing it). You're also able to give him a little push.
- It's also possible to attach the ped you carry to the ground.
- After attaching a ped to the ground, you can wind the rope by standing near it and pressing E or unwinding it by pressing R.
- Hang peds by hogting them and stand under a bridge or a tree. Then press V. Try to keep the player's front area clear because there the rope will be hitched so you can control it.
- Hang peds from gallows: pick up an hogtied ped and get under the gallows' beam. Use the Tie Noose prompt to noose the ped properly.
Then approach the lever and pull it. Supported gallows: Valentine, Strawberry, Rhodes, Blackwater and Saint Denis.
-
 Cinematic Grading
Color grading, correction and enhancing.
Featured:
Removed excessive Vignette. Color temperature adjusted, reduced blue tint. Chroma boost, Luma as original.
Install Reshade (Vulkan)
Copy mauman.ini to main folder
~\Rockstar Games\Red Dead Redemption 2
Replace lut.png
~\Rockstar Games\Red Dead Redemption 2\reshade-shaders\Textures
-
.thumb.png.c2d473bfbddd5f01c361323c0ed93dc4.png) This mod skips the legal menu and the main menu and puts you directly into story mode. Since this mod tells the game to replace certain files, Red Dead Online is disabled when you install this mod to prevent the risk of being banned due to modified game files. Any attempt to connect to Red Dead Online will redirect you to story mode. Attempting to open the online menu in the pause menu will cause you to get softlocked.
This mod skips the legal menu and the main menu and puts you directly into story mode. Since this mod tells the game to replace certain files, Red Dead Online is disabled when you install this mod to prevent the risk of being banned due to modified game files. Any attempt to connect to Red Dead Online will redirect you to story mode. Attempting to open the online menu in the pause menu will cause you to get softlocked.
NOTE: When the loading bar disappears, you will be on a black screen for a few seconds. The game is waiting for social club to sign you in. Story mode will start loading when you sign in.
Installation:
1. Download the zip file from the downloads page.
2. Extract the x64 folder in the zip file.
3. Put the x64 folder in your game directory.
4. The file explorer will say that there is a x64 folder in the game directory and if you want to merge the folder.
5. Click yes.
6. Done!
NOTE: The rockstar launcher may show a scary warning saying that there are modified files and that you may get banned for using online services with the modified files. Don't worry, this mod blocks you from going into online mode.
Uninstallation:
1. Go to your game directory.
2. Open the x64 folder
3. Delete the main_and_legal_menu_skip_data folder.
4. Open the data folder
5. Delete the startup.meta file.
6. Done!
Components:
These files can be found in x64/main_and_legal_menu_skip_data in the game directory.
legal_screen_patch.ymt - This skips the legal screen. Delete this file if you want to disable this. main_menu_patch.ymt - This skips the main menu and enables protections that prevent you from going online. Delete this file if you want to disable this.
Disclaimer:
I am not responsible if you get banned online for using this mod with protections that prevent you from going online being disabled in any way.
- 40,630 Downloads
- 242027 Views
- 2.26 kB File Size
- 10 Comments
 WesternGamer in MiscUpdated
 -
 Since it seems that a lot of people still want this and no one bothers to make it, here is a simple mod which removes the hitmarker when shooting. Drag the file into your game folder and enjoy. Please note that you need to have an ASI loader for this mod to work.
I have not tested this mod much (< 5 minutes), so if something else breaks, please let me know.
Disable any reticle color change
In the .ini you can set "DisableReticleChanges" to true to disable any reticle color changes.
Please don't upload or redistribute this mod, link here instead so that everyone has the most up to date version.
-
 Red Dead Freecam v1.4 by Evil Blunt & Three-Socks. (Script Hook RDR 2)
NOTE: If using older versions of freecam ie 1.3 or below you will need to delete the rdr2_freecam.ini in C:\Users\"username"\Documents\Rockstar Games\Red Dead Redemption 2 or replace with the new one in the zip file.
-Changelog-
v1.4
-Added Time Options (Set the time of day, force to be day or night all time, freeze the clock, sync clock with your systems time).
-Added Weather Options (Change weather, change time cycle modifiers with strength, add snow coverage).
-Reworked speed settings, choose to go from 10% to 200% of the default speed and use a multiplier of 1 to 10 on the speed up and slow down button input speeds.
-Fixed interiors not loading when passing through walls (Only works while player is moving with camera).
-Added player set invisible/collision on a loop, player should no longer be visible when move with camera is active (if player is being set visible then there must be a mod conflicting or game is forcing it).
-Changed menu layout, Camera Settings instead of adjust speed and a Misc option etc.
-Added Speed multiplier for FOV.
-Added Option to keep settings active if exiting freecam and going back into freecam (Keeps weather/time/filters etc).
-Added Save Camera Coordinates with FOV to easily go back to areas or cameras fovs you want.
-Removed rotation limit on Roll Camera.
v1.3
-Added filters.
-Added option for player to either goto ground or exit at cameras coordinates on exit of freecam.
-Added hud disables prompts and controls should not conflict with other trainers.
-Changed keyboard keys for FOV to use the scroll on the mouse instead of the Arrow keys.
-Changed keyboard keys for Height to use the Mouse left/right click to lower and raise camera.
-Changed keyboard keys for Reset Camera to use the Mouse Wheel Click.
-Fixed Anti-Aliasing issue.
v1.2.1
-Changed activate/deactivate keys for freecam as E was conflicting with the mounts/vehicles on keyboard as E is enter/exit mount (if on a mount/vehicle when activated on keyboard the player would jump of the mount causing the mount to be invisible on exit of freecam).
e
-Fixed player randomly dying on exiting freecam.
-Set Player/Mount/Vehicle to move above camera instead of directly on cameras position (wont see the reigns/chains if on a mount or vehicle now, also stops NPC’s/Vehicles from disappearing if passing camera through them)
-Fixed typo in settings.
v1.2
-Updated to work on Script Hook RDR 2 by Alexander blade will be only for that hook from now on.
-Added option to hide hud.
-Added show widescreen borders.
-Added setting to disable player moving with camera.
-Added ini support save speed setting to ini (creates default ini on first load in C:\Users\"username"\Documents\Rockstar Games\Red Dead Redemption 2).
-Added show camera coordinates.
-Added in Frontend Button display.
-Added menu to adjust settings.
-Added adjust speed settings.
v1.1
-Fixed character not going invisible sometimes not being set with cameras coordinate properly.
-Decreased overhaul speeds and all speeds matching on all axis.
-Added change FOV (Field of View).
-Added Roll Camera.
v1.0
-Initial Release
This Script is for use with Script Hook RDR 2 - http://www.dev-c.com/rdr2/scripthookrdr2/
Install:
C:\Program Files\Rockstar Games\Red Dead Redemption 2\
-Controls-
Controller: XBOX / PSX
Activate/Deactivate = X + LB / Square + L1
Exit = B / Circle
Move Camera = Left Stick
Rotate Camera = Right Stick
Lower/Raise Camera = Left Trigger/Right Trigger
Slow Down = LB / L1
Speed Up = RB / R1
Change FOV = DPAD Up/Down
Roll Camera = DPAD Left/Right
Reset Camera = Right Stick Click
Widescreen Borders = Left Stick Click
Hide Hud = Y / Triangle
Settings = Back Button / Select Button
Filters = Hold X + DPAD Left/Right / Hold Square + DPAD Left/Right
Cycle Saved Cameras = Hold X + Hold A + DPAD Left/Right / Hold Square + Hold X + DPAD Left/Right
Keyboard & Mouse:
Activate/Deactivate = Spacebar + Q
Exit = Backspace
Move Camera = W,A,S,D
Rotate Camera = Mouse
Lower/Raise Camera = Mouse Right/Left Click
Slow Down = Q
Speed Up = E
Change FOV = Mouse Wheel
Roll Camera = Arrow Key Left/Right
Reset Camera = Mouse Wheel Click
Widescreen Borders = Z
Hide Hud = Left Shift
Settings = Tab
Filters = Hold Spacebar + Arrow Key Left/Right
Cycle Saved Cameras = Hold Spacebar + Hold Enter + Arrow Key Left/Right
- 4,159 Downloads
- 42029 Views
- 434.49 kB File Size
- 13 Comments
 Updated
 -
 Yet another very simple mod removing the bullet trail when firing weapons. Drag the file into your game folder and enjoy. Please note that you need to have an ASI loader for this mod to work.
I have not tested this mod much (< 5 minutes), so if something else breaks, please let me know.
Please don't upload or redistribute this mod, link here instead so that everyone has the most up to date version.
-
 THE MOD
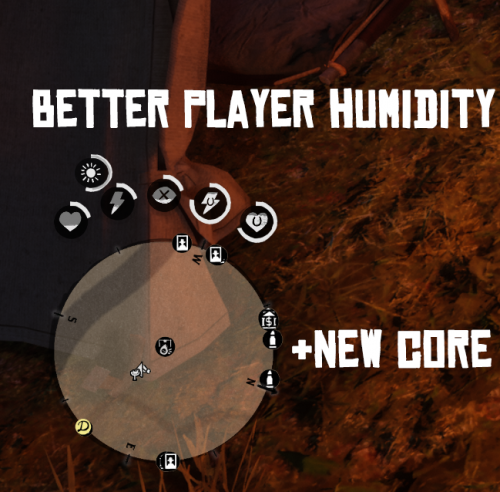
In the vanilla game rain doesn't have an impact on Arthur, but now with this mod everything will change! The mod adds a new core that represents how wet your clothes are, so that rain/snow/water are a threat and not a minor inconvenience.
HOW DOES IT WORK
-The outline represents how much protection against wetness you have, the more clothes the longer the outline bar is (a coat is the strongest against being wet)
-The sign in the middle (either a sun or a snowflake) represent the current weather conditions
-The color of the sign indicates how accurate your current clothing is against the current weather conditions (for example a red sun means that your current clothing is to hot for current
-The outline of the core drops when: 1. it is raining 2. it is snowing 3. you are in water
-To regain the outline you have to: 1. go inside 2. warm yourself by the fire 3. if it isn't raining/snowing dry your clothes by the fire
-By warming yourself by the fire you can fortify the core so that wetness doesn't affect you for the next couple minutes
-If the outline bar drops to zero all your cores will drain at an accelerated rate, if both your health core and wet core will drop to zero, you will suffer hypothermia (your vision will be blurred)
if you are dressed to hot for current weather (the sun will be red) your cores drain too. - this feature was removed since it didn't fit the mod and also didn't work
-And yes I know that a hot and cold mechanic is in the game, hence this mod doesn't care about temperature but the weather conditions (and water).
NEW -the rate at which the wet core is drained is dependent on your clothes (the more clothes the slower it drains)
NEW -stronger weather drains your wet core faster
KNOWN ISSUES
The core doesn't scale with other radar settings and with the weapon wheel, also I recommend playing on static core icons.
THE FUTURE
I plan on adding animations to core fortification and weather core changes.
Suggestions are welcome!
CHANGELOG
1.3.0 - removed the too hot effects and made so that clothes add more resistance
1.2.0 - .ini file customization and new water properties
1.1.0 - major bug fixes
1.0.0 - launch
-
 Yet another very simple mod removing the main screen effect when using dead eye. Drag the file into your game folder and enjoy. Please note that you need to have an ASI loader for this mod to work.
I have not tested this mod much (< 5 minutes), so if something else breaks, please let me know.
Please don't upload or redistribute this mod, link here instead so that everyone has the most up to date version.
-
 RDR2-Contracts
This mod adds new, auto generated, contract missions for you to play.
Over 19 different mission scenarios with hundreds of possbile variations, difficuly levels and locations!
Make the best of your weapons and skills and earn money by accepting contracts and assassinating targets around the game's world.
Features
Over 19 different mission scenarios with different difficuly levels. Dozens of different locations each mission can take place in the game's world. UI for reviewing and managing your contracts. Bonuses for hanging your targets using TieYourLasso mod! (minimum version 3.2.0) Bonuses for harder and far away missions. Some targets are wealthier than others, some are outlaws. Keep and eye for opportunities to make extra profit! Game's missions are always in priority - you don't have to worry about conflicts with the mod's added missions. Some contract targets will affect your honor. Installation:
Download and install AB's ScripthookRDR2: http://www.dev-c.com/rdr2/scripthookrdr2/ Make sure you have an asi loader, it usually comes along with Scripthook. Remove previous versions of the mod, if you have any installed. Copy Contracts.asi and Contracts.dat to the game's main installation folder. If you're interested in TieYourLasso bonuses, download and install it as well. How to play:
Head towards the nearest major town (Valentine, St Denis, Strawberry, Blackwater, Annesburg, Tumbleweed and so on). Keep an eye for peds offering you contracts. Interact with the ped to accept it. Head over to the mission's location and track down your target. Assassinate it. Escape the area if you're wanted. Go to a post office and collect your payment! If you don't like a mission, want to review your active missions, you are able manage your accepted contracts with the GUI: set up a camp or simply rest in place to open up the mod's menu. Note: you can only have one active mission per town at a time. Notes:
If you found a bug and want to report it, please attach your Contracts.dat and Contracts.log files. Missions will be locked if their start location is too close to your's when you accept them, or if the game was loaded in their area.
Special thanks to:
LMS and Konstantinos96b - for all the help with researching!
-
 Makes weapons holster / unholster 50%, 25% or 10% faster. You can increase or decrease the speed by editing these lines in weapontasks.ymt file:
Line 91 - when standing or on a horse
Line 95 - when crouched in cover
Line 101 - when standing in cover
Line 104 - when crouching
Requires Lennys Mod Loader. For installation put the Faster Holstering Unholstering folder inside lml folder.
- 10,667 Downloads
- 52727 Views
- 8.38 kB File Size
 Updated
 -
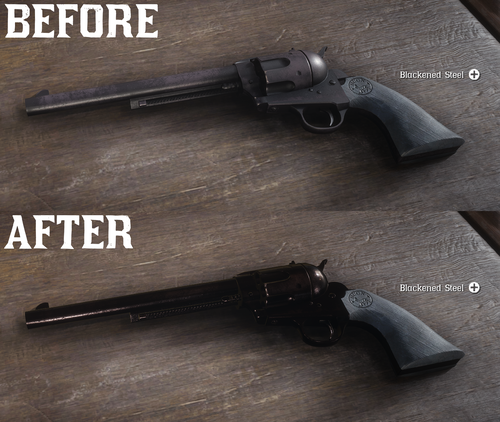 All base gun metals are modified to look more reflective and realistic.
This is a .ymt file so you need the LATEST Lenny's Mod Loader.
INSTALL:
Extract and drop the 'Shiny Guns' folder into RDR2/lml directory
It should be Red Dead Redemption 2\lml\Shiny_Guns
This is work in progress. The end goal is to make the materials look as good and realistic as possible.
-
 Experience true spaghetti western with this euphoria physics overhaul mod that recreates RDR 1's physics from the ground up and adds a bunch of new additions.
Ever since GTA 5 was released, the euphoria physics have been a major downgrade compared to games like MP3, GTA IV and RDR 1. RDR 2's euphoria physics have improved a ton, but it still feels very repetitive and rather boring.
(If you want to download older versions of W.E.R.O, you can get them in my discord server)
FEATURES:
• No Air Restriction when flying super fast during ragdoll & RDR 1 like falling gravity
• Every weapon and ammo type will affect differently on how the NPC will react (WEAPONS.YMT REQUIRED)
• RDR 1 Falling Reactions. Falling behaviors are fluid and flexible, allowing more variety
• RDR 1 like gunshot reactions. NPCs no longer stumble to the same direction and they spin when shot in the shoulder area. They also react dynamically and gunshot reactions are fluid
• RDR 1 Rolling Reactions. No more rigid movements!
• Advanced InjuredOnGround behaviour. The NPC will reach for the exact wound where they have been shot on instead of reaching for the stomach all the time
• More improved and diversified legshot reactions. NPC's will stumble or fall depending on the bullet/weapon (WEAPONS.YMT REQUIRED)
• Improved On Fire behaviors. NPCs stumble in agonizing pain
• Every single shotgun affects differently on how the NPC will react and the NPCs now spin more violently (WEAPONS.YMT REQUIRED)
• Improved behaviors when bailing out of a wagon
• RDR 1 like knockout reactions
• Improved the NPC reactions caused by arrows and added different behaviors to other arrow types (WEAPONS.YMT REQUIRED)
• Alternative versions! Want the deaths feeling more realistic? Want realism mixed with fun? I got you! Versions such as Instant Drop On Headshot and Fall To Knees On Death (or both combined) will give you exactly that!
• Improved explosion behaviors & distance of flight when near an explosion
Compatible with: Ped Damage Overhaul, Red Dead Offline, WhyEm's DLC, 1899 Firearms and All Shots Cause Bleedouts & basically any mod at this point (excluding mods that use physicstasks.ymt). WILL REQUIRE VERSION.DLL (Lenny's Asi Loader) AND W.E.R.O - AUTOMATIC COMPATIBILITY PATCH, if you have a mod conflicting with W.E.R.O's weapons.ymt file.
A massive thanks to LMS, Bolmin & Senexis for letting me use some of their Red Dead Offline files! Without them, i wouldn't be able to implement different reactions to every weapon and ammo type into this mod
Massive thanks to the following mod authors for letting me add compatibility to their mod/agreeing on a merge:
WickedHorseMan
WhyEm
Maverick
Also huge thanks to AnymYo for a lot of the discoveries made so that I can bring you the most advanced mod to date. A lot of struggle went through making and continuing to make this mod to fit your preferences and to give you more options, so if you like my mod, definitely consider endorsing and perhaps providing feedback and letting me know what you like the most about W.E.R.O. Thanks for downloading! This mod wouldn't be possible without you guys and AnymYo for helping me crack the file and unlock it's full potential! The amount of support you show to this mod definitely means a lot to me and pushes me to continue this project! Thanks again
If you want to, you can:
Join my DISCORD server to stay up to date with latest early update previews and more
Download my wero mod for GTA 5 as well: https://bit.ly/2QZNO6V
For realism, I recommend using the latest Ped Damage Overhaul mod that has added support for euphoria mods and i also recommend using All Shots Cause Bleedouts mod (or any other blood mod like BloodLust by WhyEm or Center Mass by walrus159). Make sure that the EuphoriaModInstalled value is set to 1 in PDO so you can have the best experience possible
and much much more that gives the game a more satisfying feel when killing enemies or falling and rolling
How to install this mod into your game
Just drag and drop the WERO folder in your LML folder. IF the mod doesn't work, make sure you have the latest ScriptHook, ASI Loader by Lenny and a properly installed LML. Make sure you don't have any other mods that have the physicstasks.ymt file.
REQUIRED: LENNY'S MOD LOADER & SCRIPT HOOK
Hope you enjoy this mod!
Thanks to all my Patreon supporters for participating in making this mod better and better:
Jack Fisher
Myles Brown
Catfish
Ole Kristian Tveit
AidenNapalm
Sloot.
Julien Lecleire
UAEXAE
Prodigii
Abizhey
Joe Ray
Roy Luo
NotBatman
joel Davey
Madoks Filek
Pokker-Gamer
El Morty
martin gustafsson
Fer Bueno
Ta'Quan Anthony
Miguel Lefebvre-Sabourin
Rex._.
Tim Tran
Jason Schaefer
Tristan Darden-Lawrence
Braylan
Stephen Killam
Abizhey
Like what I do?
Consider supporting me on Patreon!
- 69,032 Downloads
- 269602 Views
- 6.02 MB File Size
- 30 Comments
 VolaticWolf in MiscUpdated
 -
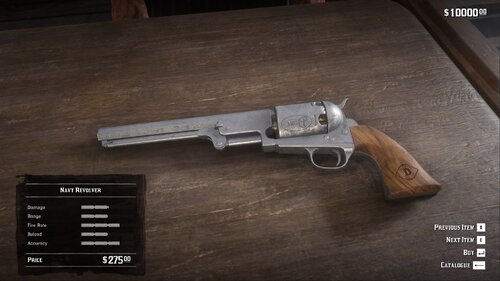 This mod adds the navy revolver to singleplayer. You can fully customize it at the gunsmith and even purchase it in Valentine and Saint Denis. This is the first release, so please let me know if anything is broken. Also please consult the known issues below.
Installation
Download with Mod Manager from here or drag and drop the extracted folder into your lml folder so that you have a structure like "rdr2\lml\navy_revolver_sp". Please make sure to have Lenny's Simple Trainer or Outfit Changer installed to load all multiplayer components! Otherwise the revolver will not show up.
Known Issues
The camera at the gunsmith does not always pan correctly for certain options such as barrel length.
Most clothing items at the store will lose their icon (you can still view and purchase them). A fix for this is in development and requires an LML update.
Support development & early access
Interested in following more development news and testing early releases? Join our Patreon!


.thumb.jpg.5b8458d020408e6928c97df7c880f0d7.jpg)

