


379 files
-
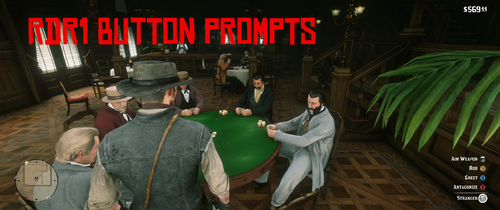 Replaces nearly all in-game button prompts with the exact same textures from RDR1 (ripped from the game files).
Incompatible with any mods that modify gamepad_icons_pc.ytd, namely by own PlayStation Button Icons Replacement
-
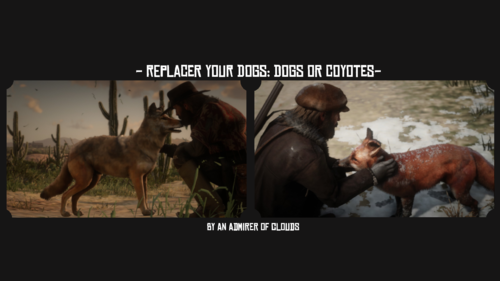 Replace Your Dog
By An Admirer Of Clouds Installation:
Download the files you want, those being the two main files.
Open them in your preferred ZIP or RAR program, I use WinRar. Choose between either replacing all dogs, or if you want to be specific choose by breed.
Move the LML folder('s) to your RDR2 Directory Launch Game and Enjoy!
Information:
This mod changes the dogs of RDR2 into a coyote or fox, the reasons of this are that these two animals have the least buggy animations for dogs. I am attempting to figure out a way to add animations to models, until then this is the best that I know.
Credits:
Sgt. Joe for the Idea of making a fox replacement.
Me for putting the idea into effect.- 635 Downloads
- 14978 Views
- 520.42 kB File Size
- 4 Comments
 Updated
 -
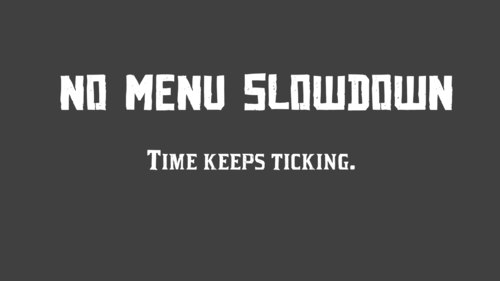 Prevents time slowing down when the log, weapon wheel, or the satchel is open. It is like vStar925's No Weapon Wheel Slowdown 1.0.0 mod but it does not require Cheat Engine. The only difference between this mod and his, is that the background overlay shows up when the menus are open and that this mod affects 2 more menus. The source code can be found here.
Mirrors:
Github Nexus Mods
License:
MIT License
Copyright (c) 2021 WesternGamer
Permission is hereby granted, free of charge, to any person obtaining a copy
of this software and associated documentation files (the "Software"), to deal
in the Software without restriction, including without limitation the rights
to use, copy, modify, merge, publish, distribute, sublicense, and/or sell
copies of the Software, and to permit persons to whom the Software is
furnished to do so, subject to the following conditions:
The above copyright notice and this permission notice shall be included in all
copies or substantial portions of the Software.
THE SOFTWARE IS PROVIDED "AS IS", WITHOUT WARRANTY OF ANY KIND, EXPRESS OR
IMPLIED, INCLUDING BUT NOT LIMITED TO THE WARRANTIES OF MERCHANTABILITY,
FITNESS FOR A PARTICULAR PURPOSE AND NONINFRINGEMENT. IN NO EVENT SHALL THE
AUTHORS OR COPYRIGHT HOLDERS BE LIABLE FOR ANY CLAIM, DAMAGES OR OTHER
LIABILITY, WHETHER IN AN ACTION OF CONTRACT, TORT OR OTHERWISE, ARISING FROM,
OUT OF OR IN CONNECTION WITH THE SOFTWARE OR THE USE OR OTHER DEALINGS IN THE
SOFTWARE.
- 784 Downloads
- 8860 Views
- 90 kB File Size
- 1 Comments
 Updated
 -
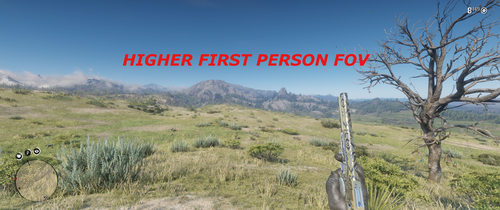 Increases the on-foot field of view while in first person. The version included in the download ups the FOV up to 112 at 21:9 aspect ratio and 97 at 16:9.
I may release more pre-modified versions in the future, but for now, I have included a quick .txt file in the download with instructions on how to modify it yourself.
Note: This only changes the walking FOV. Aiming and aiming-down-sights are unaffected. I know how to change these but at the moment, this is all that is changed.
-
 How it works:
This is basically Neodymium's GTA5 Texture toolkit but only with the components to create a texture file (.ytd). This means that you can't export the files from "ytd" files but you can do that with OpenIV. You can't also load "ytd" files. This program also uses the RedM "ytd" file converter from the RedM client to convert the files to the "ytd" format that RDR2 recognizes. This is NOT included with the program. There are existing ways to make RDR2 Ytd files but this tool makes it more easy and not as tedious.
How to Use:
After opening the program, click File>New. Now you can import files by clicking Edit>Import. NOTE: The program only accepts DDS files explicitly. This means if the file ends in .dds but wont open in the program, the file is not in DDS format even if it ends in .dds. If you need to delete a unwanted image, select the image you want to delete then click Edit>Delete. When you are ready to create a new "ytd" file, click File>Save. Select the folder to put the "ytd" file in. Two "ytd" files will be created. The"ytd" file that has "_nya" in it, is the file that can be used in RDR2. You can delete the other file. The "ytd" file that has "_nya" in it, can now be renamed to whatever you want and can now be used in Lenny's Mod Loader.
How to install:
Before installing, please read the Requirements section to see what you will need before installation.
NOTE: If the files are not downloadable e.g. false positive on virus scan, then download from GitHub mirror under the mirrors section.
Portable install:
NOTE: Only downloadable on GitHub because virus scans always get a false positive on this tool. Go to mirrors and click on GitHub to go to the download page on GitHub.
This is for short term use only.
1. Download RDR2 Texture Toolkit Portable then extract the files to a folder.
2. Run the exe file.
3. Follow setup instructions.
4. Done!
Package install (deprecated 😞
This is for long term use and will actually install the program.
NOTE: This will not work if you are on a version of Windows 10 earlier than version 2004.
1. Download RDR2 Texture Toolkit then extract the files to a folder.
2. Click on the .cer file. Then follow the instructions on screen. This is to allow you to install the program.
3. Click on the .msixbundle file.
4. Click install. If it does not allow you to install, repeat step 2, but select Local Machine in the prompt. If all fails, use the portable version.
5. Run the program.
6. Follow setup instructions.
7. Done!
How to update the tool:
These instructions will tell you how to update the tool.
1. Download the latest version of RDR2 Texture Toolkit then extract the files to a folder.
2. Click on the .msixbundle file.
3. Click update. If it does not allow you to update, click on the .cer file. Then follow the instructions on screen. This is due to the .cer file being expired.
4. Done!
Mirrors:
If you cannot download the tool or need the portable version, here is the list of mirrors available
Github Nexus Mods
How to Report a bug/issue:
If you find a bug/issue, please report it Here. Do not report it as comments as these kinds of reports can be hard to find when there are many comments.
Credits to:
Neodymium for his code on GitHub and the original GTA5 Texture ToolKit. CitizenFX for the conversion tool or this program would not exist. Converter is NOT included with the tool.
Links:
Source Code GitHub Profile
Requirements:
RedM by CitizenFX: Required to for this tool to work.
Permissions:
Credits and distribution permission
Other user's assets All the assets in this file belong to the author, or are from free-to-use modder's resources.
Upload permission You can upload this tool to other sites but you must credit me as the creator of the file.
Modification permission You are allowed to modify my tool and release bug fixes or improve on the features so long as you credit me as the original creator.
Conversion permission You can convert this file to work with other RAGE engine games as long as you credit me as the creator of the tool.
Asset use permission You are allowed to use the assets in this tool without permission as long as you credit me.
Asset use permission in mods/files that are being sold You are allowed but discouraged to use assets from this file in any mods/files that are being sold, for money, on Steam Workshop or other platforms.
License:
MIT License
Copyright (c) 2021 WesternGamer
Permission is hereby granted, free of charge, to any person obtaining a copy
of this software and associated documentation files (the "Software"), to deal
in the Software without restriction, including without limitation the rights
to use, copy, modify, merge, publish, distribute, sublicense, and/or sell
copies of the Software, and to permit persons to whom the Software is
furnished to do so, subject to the following conditions:
The above copyright notice and this permission notice shall be included in all
copies or substantial portions of the Software.
THE SOFTWARE IS PROVIDED "AS IS", WITHOUT WARRANTY OF ANY KIND, EXPRESS OR
IMPLIED, INCLUDING BUT NOT LIMITED TO THE WARRANTIES OF MERCHANTABILITY,
FITNESS FOR A PARTICULAR PURPOSE AND NONINFRINGEMENT. IN NO EVENT SHALL THE
AUTHORS OR COPYRIGHT HOLDERS BE LIABLE FOR ANY CLAIM, DAMAGES OR OTHER
LIABILITY, WHETHER IN AN ACTION OF CONTRACT, TORT OR OTHERWISE, ARISING FROM,
OUT OF OR IN CONNECTION WITH THE SOFTWARE OR THE USE OR OTHER DEALINGS IN THE
SOFTWARE.
- 3,051 Downloads
- 41048 Views
- 4.74 MB File Size
- 1 Comments
Updated -
 I recreated Widow's Patch(rdrevolver) with the map editor
You will need lml to load the map and Red Dead Beta - Out of Bounds to remove invincible barriers
I had to make the city south of mexico, since north of new austin i didn't find any flat terrain to make the city
I left some phone/electric pole and a "bridge" that will take you to the city, if you want to teleport there the coordinates are:
x-1602.153 y-5061.419 z-82.013
RD Beta: Red Dead Beta - Out of Bounds at Red Dead Redemption 2 Nexus - Mods and community (nexusmods.com)
LML:
-
-
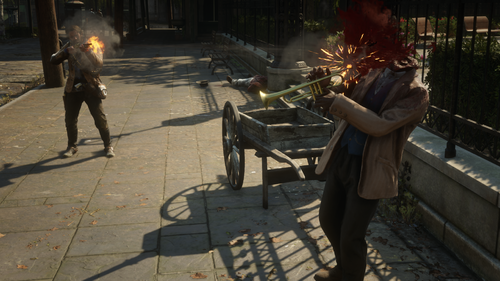
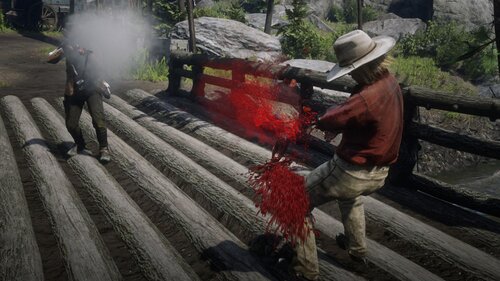 There are 290 peds in the vanilla game that can't be dismembered,mostly from random encounters and side quests,resulting in incosnistent gameplay.This mod enables dismemberment for all of these peds,no longer will you have to guess if the shotgun will take the head off or not.
-->How to Install
Place the "Dismember Everyone" folder into your lml folder.
Delete the files of the previous version from the stream folder if you have them.
-->Requirements
Script Hook,Lenny's Mod Loader
version.dll asi loader if you're using Ambient Gangs Dismemberment so you don't have rdr1 Bill with invisible pants
-->Known issues:
Dismemberment on a few charaters(included on a list) and camp members(there is a workaround but with trade offs) is buggy with detached neckgore,floating hand and foot mutilation fragments and can't be solved right now because they would need their ped fragment files edited which is not possible with the current tools avalable.
Because I didn't test all outfit variations on all of the 290 peds,if you notice some with outfit glitches that are not on listed let me know,but with the trade off that dismemberment becomes buggy.
You can easily disable the buggy characters by either removing their yft file if it has model glitches or the ymt file if you can't stand buggy dismemberment.
-->Optional dismemberment correction for camp members and others
Now you can enjoy some proper dismemberment on Micah with my optional file for camp members that corrects the dismemberment bugs but results in most of their outfit variations having bugs like wierd arms,bugged clothes etc,a list of broken outfits is included.
You need Ped Damage Overhaul to use Friedly Fire and Rampage(or your trainer of choice) to spawn them and change their outfits and set their health to 100 in the ped database(or in spawner settings check health scale 100)
Also you can choose which camp member you want,you don't really need all of them if you only want a specific one.
-->Ambient Gang Dismemberment
Enables dismemberment for the rdr1 versions of Dutch,Bill and Javier from his mod
-->Undead Nightmare II Dismemberment
Enables dismemberment for the undead peds used by his mod,replace his files with the ones provided when promted,ignore the readme included there as it is outdated.
-->Optional dismemberment for corpses
In case you're using other zombie mods,like the option found in minigames from Rampage
Before you ask,No this will not work on kids,even with the killable script,they already have all gore effects enabled in their files in the vanilla game but are blocked by something else
Special thanks to SergeantJoe for his Ymt Unhasher.
Credit to Blackjack Colver Voltaire and Dick Hertz for giving me the permission to add compatibility for Ambient Gang and Undead Nightmare II.
Changelog:
v2.1
-Changed the installation of the main and optional files to be compatible with LML's ModManager,delete the files of the previous version from the stream folder
-moved the Bathing Ladies yft to optionals as it causes one outfit to be glitched
-added yft file for Meredith to optionals as her outfit bug is funny
-fixed Lenny's yft having wrong name
-added dismemberment for the new rdr1 leader models from Ambient Gang 7.0,removed the previous broken version(somehow the text format became wrong resulting in them being invisible)
v2.0
-Changed how the mod works,it no longer uses metapeds.ymt so compatibility with other mods is improved significantly,instead it uses renamed yft files from metapeds_fragments.rpf,so now you can easily disable the buggy characters by either removing their yft file if it has model glitches or the ymt file if you can't stand buggy dismemberment.
-fixed Eagle Flies's arms
-fixed Meredith's tits clipping :D
-fixed German Mother's hair
-added those to the buggy dismemberment list
v1.2 The Undead Update
-added optional dismemberment for corpses,works especially well with undead/zombie mods
-added dismemberment for the undead peds used by Undead Nightmare II
v1.1
-fixed CS_TinyHermit's model bugs
-fixed CS_CaveHermit's outfit clipping bug
-added them to the buggy dismemberment list
-added CS_Magnifico to the buggy dismemberment list
-added Ambient Gang Compatibility
-
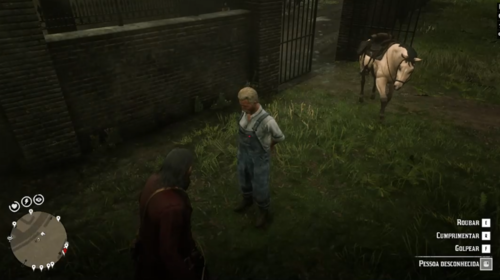 Add some functions and commands in order to make the interactions with the npc cooler.
Requirements:
ScriptHookV - https://www.dev-c.com/rdr2/scripthookrdr2/
ScriptHookDotNet - https://www.nexusmods.com/reddeadredemption2/mods/70
Place the file Client.cs in your game's scripts folder
All controls can be changed in the Client.cs file
Controls and their functions:
HandCuff Npc: K
Npc ir para o jogador: J
HandUp: L
Release npc: F1
Instructions:
While aiming at your target, press the key of the action you want it to do
-
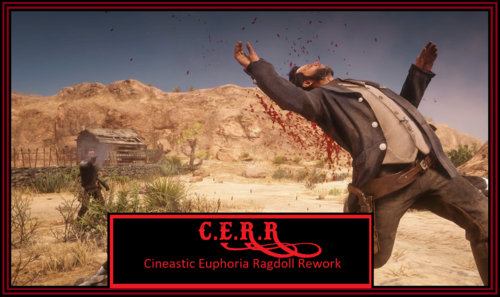 Hello everyone!
Prolog
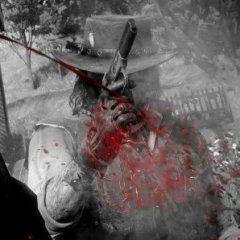
This Mod is bringing back some cineastic and diversified euphoria ragdoll shot reactions which R* did not consider necessary to implement since they think that the euphoria engine is a feature that "costs more time and money and players dont notice it"...
A really sad attitude and absolutely wrong in every way!!!!
The fact that youtubers these days making successfully videos about
ragdoll showcases from a game which was released 2010, speaks for itself...
When the most people talking about realism in Euphoria driven games, most of them actually mean "authentic" motions. And that was what Rockstar Games aimed for in GTA4, Red dead Redemption (2010) and MaxPayne 3. It wasnt realistic in a way that NPCs immediately fell lifeless to the ground after you shot them, but the motions the NPC was performing were really authentic, believable and movie-like for each genre the game was set in. Since GTA5 this feature is missed.
Cineastic Euphoria Ragdoll Rework (C.E.R.R)
This mod is inspired by the great and "evergreen" Red Dead Redemption from 2010 and other classic western movies!
Unfortunately its really hard to recreate this great shooting
experience from RDR1 by just watching videos and playing the game, thats
why I started studying the euphoria behaviours and parameters to create
something that maybe go in the "right direction" and would reach a kind
of the old R* standards of Euphoria ragdoll physics...
This mod is bringing you new and diversified gunshot reactions, for each weapon and also ammo type (revolver, pistol, shotgun, bow and so on)
NPCs behaving differently when shot depending on each weapon, ammo and hit zone!
I also implemented a range of random varieties to certain shot behaviors.
Some of the features:
- The reactions are inspired by the original Red Dead Redemption (2010) and classic western movies (Tombstone, A Fistful of Dollars, The Good, the Bad and the Ugly, and so on)
- All modded Euphoria tasks have been rebuilt from the ground up to match the motions
- All own created reactions containing those classic and "alive" looking authentic euphoria features like they were before GTA5 was released
- NPCs reacting longer to shots without collapsing
- Different hit zones with significant reactions (legs, neck, head, stomach, arms, torso)
- Almost each weapon and its ammo type has its own reactions (Normal ammo, express, splitpoint, different arrows, slug, fire ammo)
- NPCs start writhing in flames instead of simply falling down when you shoot them with a fire arrow
- NPCs stay active and more life like on the ground
- A Lowered stiffness to create more "fluid" motions to match that "satisfying" feeling, people know from GTA4, RDR1 and MP3
- And more!
Feel free to post your feedback in the comments/review section 🙂
I hope you enjoy the mod!
A special thanks goes to SyntheticOutlaw for giving me that great start into this kind of modding!
Please see Installation.txt for installation instructions!
This mod is 100% compatible to Red Dead Offline! -> Its really awesome. If you dont have it yet, I relly recommend to check it out!
This mod is also 100% compatible to PDO! (Go to the .ini and set "EuphoriaModInstalled = 1")
In case you want to make other mods compatible which are also using the weapons.ymt file, you will need to merge all changes from the other weapon.ymt (from the other mod) into the weapons.ymt file from C.E.R.R. There are a lot of euphoria related changes in the weapons.ymt file from C.E.R.R so its less work to use this file as a base. Each section which contains changes, is marked with a comment which contains "C.E.R.R REDONE". I also marked all explicit changes with a comment which contains "CERR" (without dots between the letters to make it easy to find). Ive done this only in the weapon section "Cattleman Revolver Single" but its a repeating pattern for all other weapon sections. Just keep all values marked in the "Cattleman Revolver Single" section also in all other weapon sections to keep the C.E.R.R adjustments properly.
Just download Notepad++ and download the "Compare" and the "XML Tools" plugin.
With these plugins, you can collapse all sections by pressing "ALT+0". This makes it easier to keep track of things.
All changes are done only in:
<CWeaponInfoBlob> -> <Infos> -> <Item type="CAmmoInfo"> and <Item type="CWeaponInfo">
By using the compare function, you can compare both files to see the differences and what to take over. After you did this, just copy the changes of the other mod to the weapons.ymt file from C.E.R.R.
I also warmly welcome any creator to make their mods compatible with C.E.R.R!
Have fun!
Other media:
-
 This is my first mod as you can see,
i hope you like it!
You can leave some feedback in the comments!
Make sure you have Reshade installed!
Link to reshade : https://reshade.me/
- 3,498 Downloads
- 39486 Views
- 9.42 kB File Size
- 1 Comments
 dannyson54 in MiscUpdated
 -
 This mod removes the color filter from Kill Cam,now you can see the kill or the player in all of its glory.
-->How to Install
Place the No Kill Cam Filter folder inside your lml folder.
-->Requirements
Script Hook,Lenny's Mod Loader and Dynamic Kill Cams enabled in your game's camera settings
-->Compatibility
If you are using another mod that edits cameras.ymt use that instead and open it with notepad ++,search for <UNK_MEMBER_0x55AAD59B> and replace the entire line with <UNK_MEMBER_0x55AAD59B/>
-->Note
Keep in mind this will not remove the filter of deadeye if used during the kill cam,you can activate Clear Dead Eye option in Rampage to get rid of it,it also has a toggle for getting kill cams on every kill.
Also honor doesn't change if the camera focuses on the player or the kill,that's just a myth,it just changes the color of the filter in the vanilla game.
Changelog
v1.1
-found and fixed missing id from a line,probably the file was corrupted on extraction with OpenIV,I hope this solves the crashes some of you were getting with the main installation
-changed compatibility installation
-
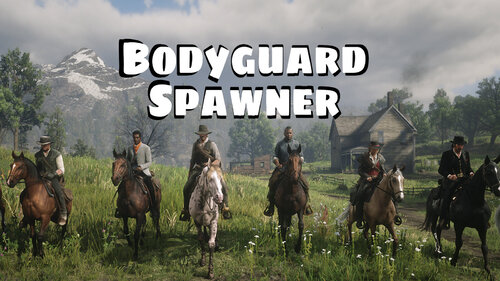 I know most trainers let you spawn bodyguards, I've made this feature for my AMJMTransport mod and just turned into a standalone mod in case someone wants it.
Also, it has some features other spawners might not, like a revive mechanic or saving your bodyguards when you exit the game.
Use the hotkey to bring up the spawn menu at any time, 'Home' key by default.
Features:
- Spawn up to seven bodyguards, with customizable weapons and outfits.
- Spawnable Van Der Linde gang members.
- Revive mechanic: when they run out of health they won't immediately die, you have a short time to help them up.
Crouch next to them for the 'Help' prompt to cime up.
- They'll be saved when you exit the game.
- Hotkeys:
- '0' : attack target
- left alt: everyone stay / follow
- Extra options in the ini file: Max bodyguard health, no instant death from headshots (turned on by default), no revive mechanic and custom menu key.
Known issues:
- The revive mechanic is incompatible with some mods that change NPC health. You can turn it off in the ini if you're experiencing issues.
You need Script Hook from Alexander Blade:
https://www.dev-c.com/rdr2/scripthookrdr2/
-
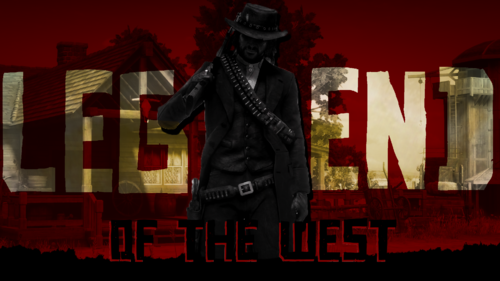 This Outfit gives John his Legend of the West Outfit from Red Dead Redemption 1 back. i got a little help from Eki AKA Redemptify on that. it also has a Leather Variant thx to MOR7UM. This Mod aims to be as accurate as possible to the Orignal One from Red Dead 1. Replaced Items are in the install.txt file along with the installation guide 😉. ENJOY!
- 6,804 Downloads
- 104882 Views
- 17.66 MB File Size
- 2 Comments
 Updated
 -
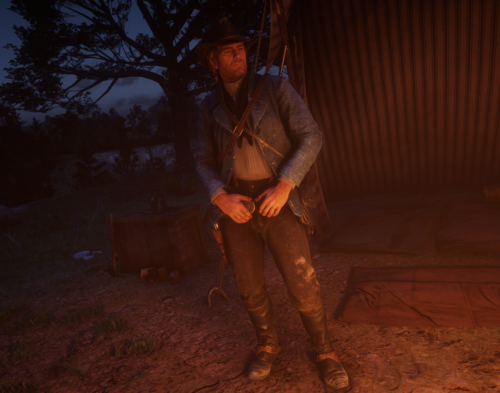 Retextured Arthur's Gunslinger coat to a denim jacket
REQUIRES LML AND SCRIPTHOOK
https://www.rdr2mods.com/downloads/rdr2/tools/76-lennys-mod-loader-rdr/ https://www.dev-c.com/rdr2/scripthookrdr2/
i hope you like it!
MOD CREDITS:Arthur Redone:https://www.nexusmods.com/reddeadredemption2/mods/701
Installation:
just drag the files to your stream folder that can be accessed through lml folder in your game files
- 1,263 Downloads
- 28996 Views
- 9.27 MB File Size
- 1 Comments
 Updated
 -
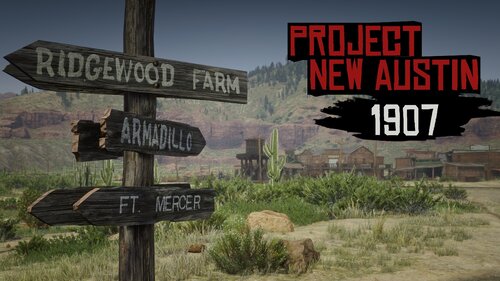
Brings back those classic RDR1 locations and adds new life to those already in the game, making a more believable 1907 version of the map. Also includes that gritty, spaghetti western New Austin color scheme from the first game. All locations are complete with peds, increased rider density, and RDR1 accurate layouts with as much detail as possible.
Bolmin70 for his ped loader and bank interior script
Follow him on Patreon: https://www.patreon.com/bolmin
VideoTech for helping with the Armadillo YMAPS, and for allowing me to use a couple ARP files
SgtJoe for disabling the Cholera random events
AClassySliceOfToast for his Hennigan's Stead Camp and Manzanita Post Station
Blackjack Colver Voltaire for adding law to Armadillo
Removes the dark orange tint in New Austin and adds a few changes to the weather cycle
Note: The color scheme is tied to the weather effects (High pressure, Clouds, and Sleet). When fast traveling to New Austin or riding in on foot the weather will change seamlessly. Teleporting to New Austin with a trainer usually won't give the weather enough time to change. Ex. Teleporting from Ambarino to San Denis and it continues to snow.
Each new location has RDR1 accurate props/layouts, made from scratch using RDR2 assets only.
(Some photos were taken in older versions, a lot has been changed/added since then. See the full album here)
Drag both the "lml" folders and the "NA" folder into your main directory
AMJM Transport by Crossed99 https://www.nexusmods.com/reddeadredemption2/mods/896
Banking: The Old American Art by Bolmin70 https://www.nexusmods.com/reddeadredemption2/mods/228
Stagecoach Robberies by Shtivi https://www.nexusmods.com/reddeadredemption2/mods/869 Ambient Gang by Blackjacks420n https://www.nexusmods.com/reddeadredemption2/mods/822
.thumb.png.49fe3392d86ca36263fb0850a716b79d.png)