379 files
-
 Shoot it out with bandits, hunt down outlaws and walk the streets with a star. RDR First Response (RDRFR) is an all new experience we've created specifically tailored for Red Dead Redemption which ties in seamlessly with the game, turning you into the law.
This first version of RDRFR puts the power of the law into your hands for the first time since Rockstar's flagship title arrived on PC. Working in conjunction with our Patreon supporters and testers, we've built a number of core features into the mod for you to enjoy with the ability to arrest suspects, go on duty and request backup in a manner similar to LSPDFR for GTA V.
Being tailor made towards RDR, though, there's a couple of key differences in RDRFR. One of the new concepts we've introduced is for providing 'missions' or 'investigations' to the player. Instead of pretending that police radios existed in the 20th Century, you'll now find that civilians within the world will summon your help the old fashioned way - in person, calling out loudly for the assistance of the law. Similarly, there are other noticeable deviations throughout especially as it relates to arresting suspects and the interaction options available. Instead of having separate key presses or buttons, we've tried to keep things as integrated with the game as possible: most of the features and actions in RDRFR are accessed or performed through the game's contextual prompts.
Part of the First Response Mods family.
RDRFR Feature Guide
More information about the features available in RDRFR.
View the RDRFR Feature Guide Installation Help & FAQ
An online guide and tutorial video for getting started with RDRFR.
RDRFR FAQ RDRFR Installation Guide
Want to discuss RDRFR? Check out the RDRFR Forums Section here: https://www.mod-rdr.com/forums/forum/6-rdr-first-response/
-
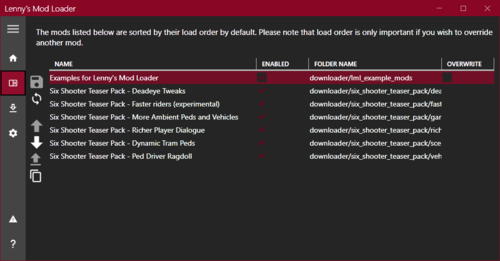 The general idea of Lenny's Mod Loader is to provide an easy way to modify the game. In its current state for RDR 2 it will allow you to replace any file in the game, whether they are streaming files such as models or data files, font files etc. It also includes full UI support akin to the GTA V version.
The three screenshots show replaced assets, replaced font and an altered meta file to change the police response in Valentine to Saint Denis police. These are all provided in an example download, see "Examples" further down below for more information.
Installation
1.) Copy all files from "ModLoader" into your RDR 2 game root folder so that files such as vfs.asi are in the same folder as your RDR2.exe.
2.) The Mod Manager folder can be anywhere and does not need to be inside the game folder.
3.) New mods go into lml folder or use the button "Download with Mod Manager" on the mod website if it is supported (see installation video for an example).
Beta 11 highlights - Data file merge and manifest support
A few new exciting features are part of this update. First, support for overriding files used very early during game load has been improved significantly. While I hope that this does not cause any side-effects, please let me know if mods that worked well previously no longer function correctly. For instance, it was not possible in previous versions to override the skydome textures to change the moon. Thanks to @VideoTech for testing.
Second, data file loading allows you to separate your changes to certain files, such as assets_* or metapeds into individual files so that you no longer have to modify the existing one (effectively merging them). This should make it a lot easier to create mods such as custom peds since you can contain most changes to separate files. Please note that this does not magically work for all games files but only those where the internal game parser supports additions (so no catalog for instance). In addition, custom manifest files for peds and maps are supported now. The ped support has been tested extensively, but map support will only really become useful once CodeX can generate these files for you. An example for these features is provided in the download courtesy of BHmaster.
Beta 9 highlights
Very much a maintenance update, this version hopefully fixes the random DRM integrity crashes. Thanks a lot to @calledme.kev who spent tens of hours testing various builds to find the issue! It also adds a lot of caching for collection calls that rely on read-only data, so LML should be a little less demanding.
Beta 8 highlights
This version adds a few new features such as allowing you to override the _manifest.ymf and _cache.ych files found in RPFs. Support to replace hashed files has also improved and now includes ymaps among other file types. The streaming folder now loads pso files, such as ymap, as text files, too. Most data files that are forced to be loaded as pso by the game have been patched to support being loaded as text files, such as cameras.ymt or the archetype definitions. Due to heavy refactoring to improve startup performance, previous builds are still made available. See changelog for more details.
Ymap & Ytyp support (beta 7)
This version introduces experimental support for ymap and ytyp. Two very simple examples are included that move some of the blue barrels around Valentine (check behind the saloon) via a different ymap and that make the lights inside the Saloon much brighter (ytyp - thanks to Modifiver). For ymap modifications, if you unload the imap via script and modify the file on disk, the changes will be applied on reload so no need to restart the game.
Bk2 support (beta 7)
Bink files were technically already supported in previous versions but caused some problems. In the current version they still behave somewhat differently in that they need to have two '.' in their file name as the extension '.bk2' is part of the actual file name. So name your file "movie.bk2.bk2" to make sure it gets replaced correctly. An example for replace would be "replace\movies_0\movies\filename.bk2.bk2".
Settings file (beta 7)
A settings file has been added that is to be placed in the game's root folder and called lml.ini. It is mostly geared towards developers and allows for more verbose logging output (or less..) making it easier to identify files you want to replace. If you set the log level to 0 you can see most of the game's requests to load files and it should be much easier to correctly identify the path you want to replace. Please note that many files are only loaded via hash and not via their name. You can also choose to disable the streaming and replace folders if you do not use them for added performance.
Ymt support (beta 5)
The biggest new feature in this update is the support for ymt file editing even if the source file contains unknown hashes. In order to replace a file, export the ymt to xml with OpenIV and then either use replacement via install.xml or the replace folder to replace the original file. Since you are replacing the ymt file, make sure that your file also has the ymt extension even though it contains xml. For the replace folder method you also need to match the file name. Now you can edit the file in plaintext and the game will treat it as a ymt with all names fixed up when loading. See the included examples for more information.
If you do end up finding a file where you feel that it is not properly fixed up by LML (for instance when exporting the file directly from OpenIV without any changes breaks the game), please let me know. The only file I know of that will currently cause problems is weapons.ymt, but this is not due to LML but because of an export bug in OpenIV which cuts off certain weapon flags. The High-Roller revolver example has these flags manually restored and hence works fine, but this is not the case when exported directly from OpenIV. I have notified the team and trust that they will fix this export problem in the future. Until then you will have to manually inspect the ymt, gather the flags and restore them manually in the xml for weapons if you plan to use them. Please note that this requires advanced knowledge of game structures.
Ymt Examples
This download comes with extensive examples courtesy of @Modifiver that modify various aspects of the game. Check them out in the included examples folder and copy them to your lml folder to try them out!
Upgrading from earlier LML versions without install.xml support (beta 2 and earlier)
This version of Lenny's Mod Loader introduces install.xml files to instruct LML on how to load your mods. Thus, mods can be separated in folders and no longer require nested folder structures. This is a proven concept from our GTA V version and has now been ported over. You can still use the replace and stream folder under your lml folder. Please note, however, that the Mod Manager UI will only pick up mods that use the new install.xml system so it is recommended to convert your mods to the new system. Only mods using install.xml support Download with Mod Manager. Consult the examples below to learn how to use the new system.
Examples
You can find more examples by @Modifiver here:
https://www.rdr2mods.com/downloads/rdr2/mods/80-modifivers-six-shooter-teaser-pack/
More examples with detailed documentation on the new install.xml system can be found here:
https://www.rdr2mods.com/downloads/rdr2/mods/77-examples-for-lennys-mod-loader/
Verify your file got replaced
If you feel that your file is not being replaced properly, have a look at the log file and see if you can find any entry related to it. Perhaps the path was not correct and hence it did not work. Search for "replaced" for files in replace and "adding" for files in stream.
Support
Since this is the first release for RDR I expect there to be quite a few problems and certain files might not work as expected. If you have trouble replacing specific files, please do not hesitate to comment here or reach out and include your modified file and file structure so I can have a look.
Installation Video
Please find a detailed installation video including a guide through our examples here (thanks to @Gan Ceann)
Detailed explanation of stream vs replace (older versions)
In the lml folder you can find two subfolders, one called "replace" and one called "stream". Both can be used for the same thing but replace is ultimately more powerful, but also more advanced. The stream folder you might recognize from Map Editor or Rampage Trainer and just loads streaming files directly.
Stream
As mentioned, similar to other tools available this merely loads streaming files into the game when the game is loading. For instance, model or texture files would go in there and will replace the existing assets in the game. If you do not know the name of an asset, but only its hash, simply name it 0xhash.ext (e.g. 0x9E54B506.ytd for w_melee_machete01+hi.ytd) and it will still be recognized and replace the asset correctly.
This is the most convenient way to quickly replace streaming files as you do not have to worry about where in the game files they are located but only their name.
Replace
This folder creates a virtual mapping of the entire game file structure and hence allows you to replace any game file, granted you know its full location. This is similar to the paths you can see in OpenIV when navigating RPFs, but not exactly the same. If you want to change the dispatch.meta file for instance, you will need to modify it in update.rpf, as the one in common.rpf is superseded by that. To do that, you would create the following structure: "replace\update\common\data\dispatch.meta". This is exactly the path you would use in OpenIV (without the .rpf ending for update). Now, whenever the game wants to access this file, it will load yours instead. It is that simple!
If you want to replace the font file font_lib_efigs.gfx in scaleform_frontend.rpf for instance, you would create the following structure: "replace\update\x64\patch\data\cdimages\scaleform_frontend\font_lib_efigs.gfx".
Word of caution: File paths do not always match their RPF names unfortunately, hence this is a bit more advanced but also allows greater control. Say you want to replace player_zero_coat_001_open.ydd which is present in both packs_1.rpf (original) and dlc.rpf (from patchpack001, an update to the file). Files DLCs follow a slightly different pathing scheme. The full path to this file would be "replace\dlc_patchPack001\x64\packs\base\models\component_models\player_zero_coat_001_open.ydd". As you can see, it does not match the file path directly, which is also why for many files using the stream folder is just simpler. This is because the game maps some files differently and when you open the dlc.rpf (in patchpack001) and its setup2.xml you will see why: the device name is dlc_patchPack001 which is the "root" of all files inside this archive. Thus the path starts at "dlc_patchPack001" and then follows the RPF structure until you arrive at "replace\dlc_patchPack001\x64\packs\base\models\component_models\player_zero_coat_001_open.ydd". Not that complicated, but certainly not as easy as the streaming folder and something to look out for.
Acknowledgements
Thanks to NTA for his work on fwEvents, hooking, fiDevice and sysAllocator
Thanks to listener for his work on fiDevice and advice over the years (hope you are well!)
Thanks to the OpenIV team for OpenIV
Thanks to dexyfex for CodeWalker
Thanks to Gan Ceann, Will and GameRoll for testing as well as Jewels, GuiCORLEONEx794, jack.sharif and Modifiver for providing example assets
-
 A simple ASI Loader for Red Dead Redemption 2 to easily load your custom code into the game.
Files are loaded after Arxan has finished its decryption stage so you can search for your favorite patterns right away!
Installation
Put version.dll in your game root folder. When the game launches, you should hear a few beeping sounds indicating that it got loaded.
Not supported for RDR Online. Remove the ASI Loader file (version.dll) before playing Online.
Native fixes (build 1436)
Game build 1436 on July 13 2021 removed a few natives used mostly for text rendering making any mod using those crash. The ASI Loader update 0.2 fixes that by re-implementing the following natives with their original hashes. You still need a script hook!
DISPLAY_TEXT
SET_TEXT_COLOR
SET_TEXT_CENTRE
SET_TEXT_SCALE
SET_TEXT_DROPSHADOW
TASK_EVERYONE_LEAVE_VEHICLE
Let me know if any of those do not work as expected. Thanks to fingaweg for their help.
Uploaded for www.mod-rdr.com, please do not upload it anywhere else.
-
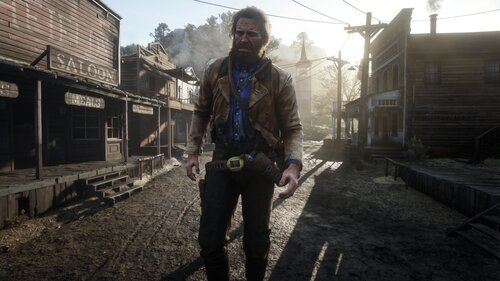 Lenny's Simple Trainer is a mod for Red Dead Redemption II that lets you do a bunch of awesome things in RDR 2, including clear your current wanted level, give yourself money, and much more. If you've ever wanted to play as a wolf, soar in the skies as an eagle or have a personal bodyguard, then this is the mod for you.
If upgrading from a previous version, always use the new lst.ini file.
Features
Play as any character model and easily switch between your favourites. Teleport to anywhere on the map, including your current waypoint. Nudge yourself forward through locked doors and walls. Change & pause the time of day. Change & freeze the weather. Give yourself any weapon in the game! Clear your wanted level. Never wanted setting. Toggle godmode on or off. Give yourself unlimited amounts of money! Change the game's timecycle speed. Quickly spawn a new horse to use. Spawn any wagon, coach, vehicle, etc. in the game. Speed up and slow down the game's time scale (slow motion!) Spawn an unlimited number of bodyguards! Command your bodyguards to attack people all at once. Make any ped enter or leave your vehicle (you can fill entire wagons!) Exploding, incendiary and super explosive ammo! Super Godmode - protects against ragdoll too. All settings can now be reloaded while in-game. Scaling options - play as tiny or giant characters! Call in a deadly flying eagle to rain death from above! Play hundreds of player actions and scenarios like swinging pickaxes! Choose gender when spawning horses! Change player gender when playing as an animal Option to disable the sniper in New Austin Always get perfect pelts when skinning Make your horse invincible, enable unlimited stamina and change horse gender on the fly Enable unlimited stamina and dead eye for the player Drop your current weapon Freeze weather and time Set formations for your bodyguards Make your bodyguards lasso people! Configure bodyguard control keys Instantly reveal the whole game map Instantly bond with your horse Change weapon damage Enable unlimited items Make bodyguards invincible (god mode) and explosion proof (super god mode) Make bodyguards hold their position Increase honor, decrease honor, set to min and max Freeze spawned peds in place Keep your changed model and outfits when replaying story missions (experimental - does not work for all missions and outfits yet)! Bond with gang horses Spawn legendary animals Select outfit for newly spawned peds Load multiplayer only weapons, such as the Navy Revolver (Set LoadMPWeapons to true in the ini, please note that this can cause severe side effects due to how we hack in the weapons) Select outfit for bodyguards New! Change amount of money to receive New! MP models work again (big thanks to deterministic_bubble)!
Controls
F5: PRESS to open or close the Trainer Menu.
F11: PRESS to teleport to waypoint.
F12: Log your current position (and some other info) to the logfile. Also works on peds/entites you target.
NumPad 0: HOLD and PRESS Left/Right/Up/Down/PgUp/PgDn to nudge the player, forward, up, left, backwards, etc. Go through doors with this.
Menu controls:
Up/Down to navigate the menu vertically. Left/Right to change item options. Enter to select an option. Backspace to return to the previous page.
Bodyguard controls:
Hold and Release F9 to make your bodyguards regroup with you. Hold F9 to dismiss all of your bodyguards. Aim at a Ped and Press 1 to make all bodyguards attack them. Aim at a Ped and Press 2 to make the closest bodyguard attack them. Aim at a Ped and Press 3 to make the closest bodyguard lasso them. Aim at a Ped and Press 4 to make them enter your vehicle. Press 5 to make your bodyguards hold their current position.
Eagle gunship controls:
Aim at a Ped and Press F8 to make the eagle attack them.
Installation
All you need to do is drag the files into your game root folder - the one where RDR 2 is installed.
When the game launches, you should hear a few beeping sounds, indicating that the trainer is loaded.
Do not attempt to play Online with this trainer. Remove all files from your game folder before playing Online.
Do not save your game as a changed character model. We recommend that you disable autosaves before using this trainer.
Configuration
Character models, bodyguard models, weapon models, settings and teleport positions can be customized in the lst.ini file while the game is running:
For a list of character models check: https://www.mod-rdr.com/wiki/list-of-rdr2-ped-models/ For a list of weapon models check: https://www.mod-rdr.com/wiki/list-of-rdr2-weapon-models/ For a list of teleport coordinates: https://www.mod-rdr.com/wiki/list-of-rdr2-teleports/ For a list of vehicle models check: https://www.mod-rdr.com/wiki/list-of-rdr2-vehicle-models/ For a list of player actions check: https://www.mod-rdr.com/wiki/list-of-rdr2-scenarios/
Troubleshooting
If you are having trouble running Lenny's Simple Trainer, please check the log file. If you see "System.OutOfMemoryException: STATUS_NO_MEMORY: Failed to allocate memory", please download this fix to your game root directory: www.mod-rdr.com/EasyHookPatch.zip
If you do not get a logfile, please launch the game as administrator and make sure the folder is writable!
Please don't upload or redistribute this mod, link here instead so that everyone has the most up to date version.
-
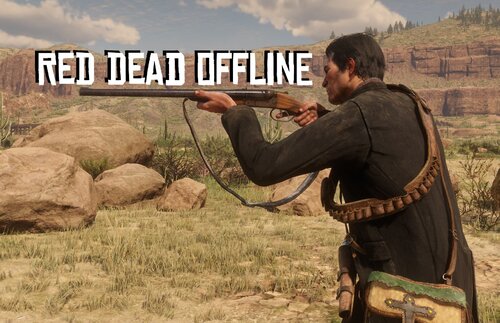 Update 1.3: Blood Money out now!
This mod brings all the good stuff from Red Dead Online to singleplayer and allows you to access it via the various vendors in the game. You can of course still use a trainer to access these items, but we have spent a lot of time to make everything fit in with singleplayer naturally so we believe this is the best way to experience this mod. The special weapons from MP are unlocked from the start, but only available at select merchants to fit in nicely with story progression. There are a few minor issues with a few items, which you can learn more about in the Known Issues section further below.
We hope you enjoy the first version of our mod, we certainly had lots of fun making it! There are plans to update this mod in the future to expand it and address a few issues, so stay tuned! A very special thanks to @Senexis and @bolmin who are the true creators and masterminds behind this modification, I am just uploading it. No xml tags were harmed during development (we promise!).
Item Locations
The added weapons can be found available for purchase in the following location:
NEW! Full Blood Money update compatibility NEW! All Multiplayer weapons are now available Left Rings, Right Rings, Gun Belt Accessories: Trappers (Accessories tab) Unique Half Chaps, Spurs, Ponchos, Gun Belts and Holsters: Trappers (Chaps, Ponchos, Weapon Accessories, Accessories tabs) All 42 Legendary Animal hoods: Trappers (Legendary Animals tab) Half Chaps, Spurs, Ponchos, Gun Belts and Holsters: Tailors and General Stores that sell clothing (Ponchos, Weapon Accessories, Accessories pages) Saddles, Saddle Bags, and Horns: Stables (Equipment) Manes and Tails: Stables (Appearance) Navy Revolver: Gunsmiths at Saint Denis Elephant Rifle: Gunsmiths at Saint Denis Lowry's Revolver: Fences Reinforced Lasso: Gunsmiths Bolas: Gunsmiths and Fences Special Bolas (renamed to the creators Bob, Bolmin and Lenny): Fences .22 Sedative Ammunition: Trappers and the Gunsmith Customize screen for Varmint Rifles Nitro Express Ammunition: Gunsmiths and the Gunsmith Customize screen for Elephant Rifles Animal Reviver: Trappers Tracking Arrow: Trappers Multiplayer Weapon skins, metals and wraps: Gunsmith Customize screens
Installation
Download with Mod Manager from here or drag and drop the extracted folder into your LML folder so that you have a structure like "Red Dead Redemption 2\lml\red_dead_offline". Please make sure to have Lenny's Simple Trainer or Outfit Changer installed to load all multiplayer components! Otherwise many components, such as the navy revolver, will not show up. If you have the Navy Revolver in SP mod installed, make sure to uninstall it completely. This mod supersedes it and having both installed will likely cause issues!
Missing/Locked Guns
If you are experiencing an issue where guns are not unlocked, or are missing, please make sure to try the following:
Update the game:
This mod currently supports game version 1355. If you are on an earlier version, some or all added guns will be locked or missing. Update Lenny's Mod Loader:
The mod currently supports LML version beta 6 and higher. If you are on an earlier version, some parts of the mod may not work. Make sure Navy Revolver in SP is uninstalled:
Like mentioned in the Installation section, this mod is not compatible with it and will cause guns to be hidden. Make sure other mods are compatible:
Any LML-mod that edits the catalog_sp.ymt file without specific compatibility patches is currently not compatible. Make sure Lenny's Simple Trainer or Outfit Changer is installed:
Without either of these, Multiplayer components will not show up, causing multiple items to be missing.
Known Issues
Currently in the mod, there are a couple of known issues that may impact you while playing:
NEW! Off-Hand Holsters will incorrectly display the Off-Hand firearm and will cause glitchy animations. NEW! Certain ponchos will display visual clipping, not all of them are as bad as some are. Some Saddles and Saddle Accessories combinations will cause clipping, "None" options have been added to fix this. When purchasing a Reinforced Lasso, you will be able to purchase them infinitely. You only need to buy it once for it to be unlocked. When purchasing any Bolas, the texture that appears on the right will be a placeholder texture. This can be ignored. In some cases, when purchasing a Burled Grip, it will appear invisible. This only happens on some guns. Bolas might cause weird clipping and/or physics, this can be ignored as it is just a visual bug. Bolas will not be picked up when hogtying people, unlike in Multiplayer where you will get them back. Tracking Arrows will not cause a path to be drawn in Eagle Eye. Weapon variants can't be applied. This is due to them not working properly (i.e. invisible, broken textures, unable to apply correctly). -
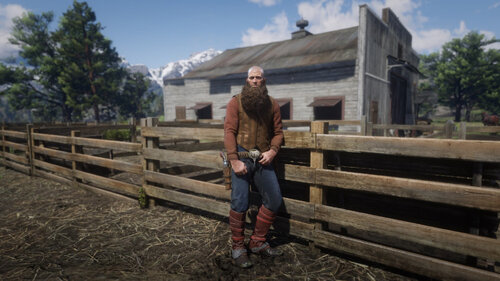 We are proud to release our latest modification for Red Dead Redemption 2: An outfit changer! Featuring all of the more than 1300 single player clothing items (and in version 0.2 all multiplayer components!), Arthur has never looked more unique. A word of caution: The component system in RDR2 is very powerful and even many parts of your skin are components which you might need to toggle to make body parts (re)appear! Please read the readme.txt file for more information on how the system works.
Features
Change clothing items in over 40 categories with over 10000 total variations! Save your current outfit Quickly equip saved outfits Reset all your components Change Ped Skin (see readme) Enable Multiplayer Assets (try changing your model to mp_male or mp_female using our trainer to access them in all your glory) New! Change beard and hair length, untuck shirts and much more! New! Customize menu key
Controls
Press F2 to open/close the Outfit Changer menu:
Up/Down to navigate the menu vertically. Left/Right to change item options. Enter to select. Backspace to go back.
Installation
All you need to do is drag the files into your game root folder - the one where RDR 2 is installed.
The Outfit Changer is loaded from the same folder and shares many of the same files as Lenny's Simple Trainer but works without it. When the game launches, you should hear a few beeping sounds, indicating that the mod is loaded. RDR Online is not supported for modding. Don't attempt to play Online with this mod. Remove all files from your game folder before playing Online.
Configuration
Open the outfitchanger.ini file (found in your game folder) in a text editor to configure the Outfit Changer where you can:
Change the names of categories. Name your favourite clothing items to make finding them again easier. Manually edit/manage your saved outfits (although you can do this in the menu).
We are working on a Wiki page to document all of the clothing items.
To load any changes to the outfitchanger.ini file, use the "Reload Settings" feature in the menu.
Please don't upload or redistribute this mod, link here instead so that everyone has the most up to date version.
Please note that you are not permitted to sell configuration files for this mod. This mod is free and so should be your files!
-
 This mod is a teamwork of @fitfondue and @HughJanus.
The beta version of Ped Damage Overhaul 2.0 has been released! It contains new features and major adjustments (described in the changelog), so we'd appreciate your feedback on any bugs and performance issues you encounter. When reporting performance issues, please post your system specs if you can!
Part of this beta are the "optional features" (which require LML to work). Those are separated in two files. One is responsible for longer reactions after dismemberment (not compatible with euphoria mods), the other increases the chances of arterial bleeding (e.g. for neck shots).
OVERVIEW
This mod tries to make gun fights more diverse, dynamic and interesting and keep them that way throughout the game.
You will find NPCs stumbling when trying to run with hurt legs, getting the wind knocked out of them when getting shot, squirming on the ground when fatally injured, moaning in pools of their own blood until they meet their end, clutching their wounds and stumbling around when hit, etc.
IMPORTANT KEYS (for toggling effects)
These are the standard keys, they can be modified via the ini file (as can everything else this mod adds to the game):
F9 - Toggling the mod on/off (the mod is enabled by default). F8 - Toggling "Kill Wounded Mode" on/off (is disabled by default). This mod adds a feature called "Dying States" which makes NPCs go down when injured and still stay alive for some time (until they bleed out). If "Kill Wounded Mode" is activated, NPCs will die instead of entering the "Dying States". F7 - Toggling "Longer Bleedouts Mode" on/off (is disabled by default). Per default this mod makes NPCs in "Dying States" bleed out within a maximum of 25 seconds (to not interfere with spawning waves of enemies during missions, which are only triggered when the first wave is dealt with). If "Longer Bleedouts Mode" is activated, NPCs will take longer to bleed out (more realistic, but also hindering during some missions). F2 - Toggling "Friendly Fire" on/off (is disabled by default). "Friendly Fire" currently only works for the Dutch Van Der Linde gang.
FEATURES
Here is a quick overview of the most important features:
First off, almost all of the features and their characteristics are based on chance, so the behaviors won't be the same every time you encounter them - which should ensure more diverse fights and keep things interesting for longer than vanilla does... that was the idea, at least 🙂
Almost every feature can be enabled, disabled or tweaked in the ini (more information further down the page), so this is not only a mod, but also enables you to create your own experience.
This mod only alters behaviors and attributes of human NPCs - animals or anything else remain untouched.
Light version:
NPCs will react to where they are being shot (leg shots will make them stumble when trying to run, hand shots will disarm them, torso shots will stagger them, etc.). When NPC's health decreases below a certain threshold, they fall over and don't get back up. Then they go through different stages of dying, each with its own randomized behavior. Eventually NPCs will die of blood loss. NPCs will sometimes (based on chance) audibly react when in hopeless situation (panicking, begging, cursing, etc.). There is a bleeding feature, which makes NPCs lose health after they have been fatally injured. It operates bassed on chance, so NPCs don't all bleed out in the same amount of time. NPCs burn alive for longer when set on fire. There is a chance of NPCs surviving a fire (although they won't be able to do much afterwards). NPCs have a chance of staying on the ground for a random amount of time when shot (based on their health) - so you can now knock the breath out of your opponents. For all included behaviors the movement and pain sounds have been adjusted (and also randomized) to hopefully make your experience more interesting.
Standard version:
The same features as in the light version apply as well as the following additions: NPC health and player damage tweaked to offer a more satisfying experience (no more bullet sponges). NPC damage tweaked to offer more challenge to the player (since NPCs don't eat bullets for breakfast anymore). You can now feel the difference between weapons, their condition and ammo types in combat (shooting with a properly maintained, powerful weapon with special ammo now feels like it should). NPCs are less accurate shots and their accuracy declines along with their health. Arm and leg shots do less damage to NPCs. All NPCs can be disarmed (yes, even lawmen). Hogtying disarms NPCs, so if they manage to get loose, they can't shoot you - they might draw a hidden knife, though.
Overhaul version:
The same features as in the standard version apply as well as the following additions: Core Drain (health, stamina, dead eye) has been moderately increased - now hunting and buying food become necessary options. Cores will be fully drained after death. Additional 25% of money lost after death.
We hope that you have as much fun with this mod as we have creating and improving it!
INSTALLATION
Download Alexander Blade's ScriptHook: http://dev-c.com/rdr2/scripthookrdr2/ Extract Dinput8.dll and ScriptHookRDR2.dll into the main directory of RDR 2 (where the .exe file is). If you want PDO's additional features, download Lenny's Mod Loader. If not, ignore steps 4, 5 and 8. https://www.rdr2mods.com/downloads/rdr2/tools/76-lennys-mod-loader-rdr/ Extract the folder Mod Manager into the main directory of RDR 2 (the actual Mod Manager folder, not just its contents). Then go into the Mod Loader folder and extract only its contents into the main directory as well (not the actual folder, just its contents). In the Mod Manager folder, run the ModManager.UI.exe file to make sure Lenny's Mod Loader is properly installed in the RDR 2 directory. Download your preferred version of Ped Damage Overhaul, then open the zip and choose whether you prefer Light, Standard or Overhaul configurations (see mod description to understand the differences). Extract the contents of the chosen folder into the main directory. If you're using Lenny's Mod Loader, any files pertaining to it will be automatically placed in the correct folder. If you're using Lenny's Mod Loader, run ModManager.UI.exe to see if the optional files are showing as installed. If they are, you're good to go. Start the game and have fun! While in game, you can press F9 to check if the mod was loaded correctly (F9 once to disable, then F9 again to re-enable the mod).
TWEAKING
In general, every parameter in the ini has a description (including information on how to disable the feature). Feel free to play around.
There are already a lot of features enabled and tweaked for out-of-the-box use, yet there are some features left untouched which can be enabled in the ini. That said, if you just want to disable one or more features, set their respective values to 0 (or whatever value the description suggests).
Examples:
To turn off the bleeding feature: set BleedWhenDying to 0 To turn off the disarming when hogtying NPCs: set HogtyingDisarms to 0 To turn off the dying state features: set DyingStateChance to 0
If you want to disable a feature which is based on chance, just set the chance value to 0.
Examples:
To turn off the knocking the wind out of your opponents: set KnockbackChance to 0 To turn off the possibility of NPCs surviving fire: set FireSurvivalChance to 0 To turn off the chance of stumbling when shot in the leg: set StumbleChanceOneLeg and StumbleChanceBothLegs to 0
There are also many other features that can be activated in the ini - here are some examples:
LassoDisarms -> makes catching someone with your lasso disarm them (no hogtying necessary) NPCWeaponModifier (and many other damage modifiers) -> makes NPCs do more or less damage, depending on what you set it to BleedWhenShot -> enables a bleeding feature which triggers when an NPC gets shot (so not the usual "bleed out when under x health" but consistent bleeding which is applied after the first hit of a bullet - the bleeding chance and deducted health points can be set separately)
The ini is full of values for those wanting to experiment a little.
One word of warning to tweakers: If the NPCHealth is set too high, headshots might not be lethal anymore, unless they hit the actual brain of the NPC (so a shot in the jaw would do more damage than other body parts, but would not be an instant kill). Actual "brain-shots" are always one-shot-kills, no matter the health.
KNOWN "ISSUES" (they are not real issues)
The disarming feature can be exploited to slow down new waves of lawmen. The same is true for the dying state feature. If there are too many lawmen dying or fleeing around the player, new waves won't spawn in until the lawmen die or get enough distance (this feature can be turned of in the ini file, if that is a deal breaker to you). When disarming is enabled, the dropped weapons may appear partly invisible. This is only optical, though, they can be picked up and used as usual.
The source code of Ped Damage Overhaul can be found here:
https://github.com/HJHughJanus/PedDamageOverhaulRDR2
If you are looking to enhance your experience by using an Euphoria Mod, please take a look at the work of @AnymYo.
C.E.R.R. is tweaked for cineastic reactions and designed to work with PDO:
-
 FEATURES
Crimes
1. Minor crimes are disabled, lawmen now ignores you commiting minor crimes
2. Wilderness is now completely lawless, you can commit whatever crimes without getting wanted
3. Train robbery is no longer an instant wanted
Bounty Hunter
1. Reduced the chance for dogs to accompany bounty hunters
2. U.S Marshall (level 4) and Pinkerton Agent (level 5/max bounty) will now hunt you down once you incurred enough bounty
Witness
1. Witness Is now limited to 1. Once you stop them, there will be cooldown before another witness appear
2. Disabled witness in the wilderness
AI
1. Lawmen are much more skilled and competent
2. Pinkerton are no longer aimbots
3. Improved Saint Denis and Blackwater Police AI
4. Altered Gang behaviour, each gang now has different combat behaviour
5. NPC will no longer accuse you of following them
Dispatch
1. Respawning rider and wagon is now disabled, killing all lawmen will end pursuit
2. Completely reworked Saint Denis and Blackwater Dispatch. US Marshall (and Pinkertons in Saint Denis) will be dispatched in the final wave
3. Pinkertons now specifically uses elite horses
4. Wapiti Warriors will be dispatched in Ambarino and US Army will be dispatched in Cumberland Forest (Currently can only be seen by forcing wanted using Rampage)
5. Reduced the wanted circle size during initial and stage 1 wanted
Loadout and Health
1. Slightly Increased Lawmen health
2. Dispatched Lawmen carries rifles and shotgun
3. Pinkerton and US Marshall will carry pistol as their sidearms
4. Lawmen guns are always clean
5. NPC's carries different revolvers
6. Saint Denis and Blackwater police carry pistol as their sidearms
Project NA Compability [OPTIONAL]
1. Restores Law and Order to Armadillo
2. Rebalanced Armadillo Law, no respawning riders
TO INSTALL
put crime_law folder into LML Folder. requires Lenny Mod Loader to be installed.
If you wish to use Project NA compatible version, replace the dispatch.meta
Exclusive to rdr2mods.com & nexusmods.com. Any upload not on these sites is STOLEN and may contain viruses, be outdated and should be avoided.
Discord Server
If you have any question, feel free to join the discord server
https://discord.gg/Rhyz9445
Credit
Blackjack Colver Voltaire
GameRoll
Modifiver
Natsu
SgtJoe
-
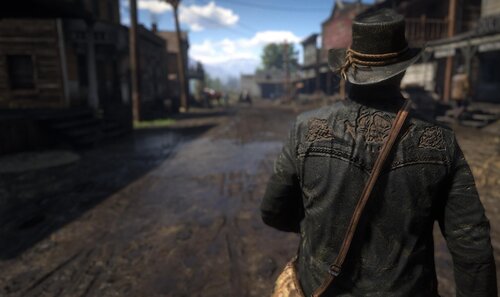 Available for download
Leather Gunslinger Jacket (Special thanks to pintailduck100) Brown on Brown Gunslinger Jacket (Optional) Black Weathered Winter Gunslinger Coat Grizzlies Outlaw Coat Retexture Dark Ram baby The Black on Brown Gunslinger Jacket Lenny's Gunslinger Jacket Revisited
Please note that i do not accept requests; i made these for my playthrough and decided to share them.
Installation
Lenny's Mod Loader
If the mod has a instal.xml in it then extract the mod in your lml folder
otherwise drop all files in the Stream folder; you need to create one if you don't have it already
Here is my humble YouTube channel … consider subscribing 🙂
Lenny's Gunslinger Jacket
Most Old West men who were labeled as being "gunfighters" did not kill nearly as many men in gunfights as the famed LMS.
This Gunslinger adopted his own look; outlaws and Pinkertons trembled when they saw his symbol.
There are some legends that say LMS’s death was staged, and he continued to live his life in the Wild West.
Now both Arthur and John get to wear this signature gunslinger jacket aka Lenny's Gunslinger Jacket.
Installation
Drag and drop a version into your lml folder
Notes:
Also coming soon "Spurs and Such" Some users have reported that Lenny's Gunslinger Jacket is not working for them or keeps disappearing from the wardrobe. We found that this is only effecting users that are not worthy.
-
.thumb.webp.d2447f0e5aa6a803b09a7dc8955144bf.webp) Blood textures replacement that i think fits better with alot more variations of splatters and blood pools,Tarantino style.
Blood textures replacement that i think fits better with alot more variations of splatters and blood pools,Tarantino style.
drop the folder into "Red Dead Redemption 2\lml"
use High Velocity ammo for more blood splatter specially on the walls,because the bullet goes trough
In order to play with Bloodlust wich is very recommended you need to delete "blooddecal" folder from Bloodlust or my mod wont work as intended.
-
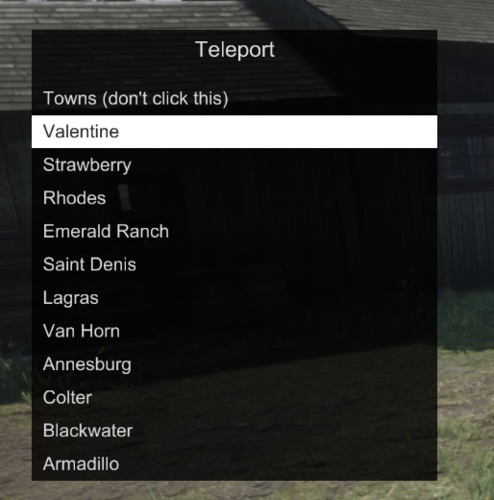 This is my edited Ist.ini file for Lenny's Simple Trainer !
I added everthing i have found here: www.mod-rdr.com/wiki/pages/ and everything what's added from other users there.
Whats inside the file:
- Full Charakters list
- Full Peds list
- Full Weapons list
- Full Horses list
- Full Vehicles list
- Many Teleport Locations (inclusive some "Out Of Map" - you should have at least a fly mod for proper use.)
- Many Actions (like drinking coffee)
Known issues:
- Because of RDR2 updates, the mod can cause unwanted behavior to the game, expect random crashes and or being stuck somehow
- Spawned legendarys will be not recognized as legendarys. You will get perfect pelts/skin only.
Installation:
- Install Lenny's Simple Trainer and everything mentioned there
- Drag the Ist.ini in your Red Dead Redemption 2 root folder
Credits: LMS for Lenny's Simple Trainer,
NetSSH for his actions list
- 87,564 Downloads
- 350984 Views
- 183.42 kB File Size
- 96 Comments
 Aaskereija in MiscUpdated
 -
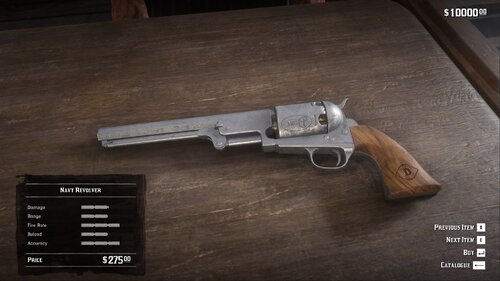 This mod adds the navy revolver to singleplayer. You can fully customize it at the gunsmith and even purchase it in Valentine and Saint Denis. This is the first release, so please let me know if anything is broken. Also please consult the known issues below.
Installation
Download with Mod Manager from here or drag and drop the extracted folder into your lml folder so that you have a structure like "rdr2\lml\navy_revolver_sp". Please make sure to have Lenny's Simple Trainer or Outfit Changer installed to load all multiplayer components! Otherwise the revolver will not show up.
Known Issues
The camera at the gunsmith does not always pan correctly for certain options such as barrel length.
Most clothing items at the store will lose their icon (you can still view and purchase them). A fix for this is in development and requires an LML update.
Support development & early access
Interested in following more development news and testing early releases? Join our Patreon!
-
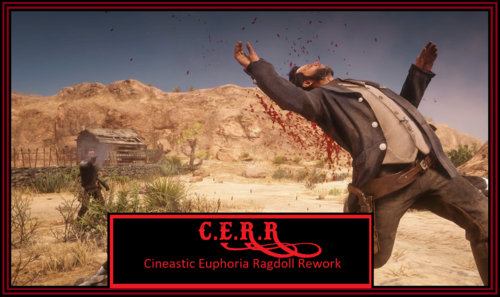 Hello everyone!
Prolog
This Mod is bringing back some cineastic and diversified euphoria ragdoll shot reactions which R* did not consider necessary to implement since they think that the euphoria engine is a feature that "costs more time and money and players dont notice it"...
A really sad attitude and absolutely wrong in every way!!!!
The fact that youtubers these days making successfully videos about
ragdoll showcases from a game which was released 2010, speaks for itself...
When the most people talking about realism in Euphoria driven games, most of them actually mean "authentic" motions. And that was what Rockstar Games aimed for in GTA4, Red dead Redemption (2010) and MaxPayne 3. It wasnt realistic in a way that NPCs immediately fell lifeless to the ground after you shot them, but the motions the NPC was performing were really authentic, believable and movie-like for each genre the game was set in. Since GTA5 this feature is missed.
Cineastic Euphoria Ragdoll Rework (C.E.R.R)
This mod is inspired by the great and "evergreen" Red Dead Redemption from 2010 and other classic western movies!
Unfortunately its really hard to recreate this great shooting
experience from RDR1 by just watching videos and playing the game, thats
why I started studying the euphoria behaviours and parameters to create
something that maybe go in the "right direction" and would reach a kind
of the old R* standards of Euphoria ragdoll physics...
This mod is bringing you new and diversified gunshot reactions, for each weapon and also ammo type (revolver, pistol, shotgun, bow and so on)
NPCs behaving differently when shot depending on each weapon, ammo and hit zone!
I also implemented a range of random varieties to certain shot behaviors.
Some of the features:
- The reactions are inspired by the original Red Dead Redemption (2010) and classic western movies (Tombstone, A Fistful of Dollars, The Good, the Bad and the Ugly, and so on)
- All modded Euphoria tasks have been rebuilt from the ground up to match the motions
- All own created reactions containing those classic and "alive" looking authentic euphoria features like they were before GTA5 was released
- NPCs reacting longer to shots without collapsing
- Different hit zones with significant reactions (legs, neck, head, stomach, arms, torso)
- Almost each weapon and its ammo type has its own reactions (Normal ammo, express, splitpoint, different arrows, slug, fire ammo)
- NPCs start writhing in flames instead of simply falling down when you shoot them with a fire arrow
- NPCs stay active and more life like on the ground
- A Lowered stiffness to create more "fluid" motions to match that "satisfying" feeling, people know from GTA4, RDR1 and MP3
- And more!
Feel free to post your feedback in the comments/review section 🙂
I hope you enjoy the mod!
A special thanks goes to SyntheticOutlaw for giving me that great start into this kind of modding!
Please see Installation.txt for installation instructions!
This mod is 100% compatible to Red Dead Offline! -> Its really awesome. If you dont have it yet, I relly recommend to check it out!
This mod is also 100% compatible to PDO! (Go to the .ini and set "EuphoriaModInstalled = 1")
In case you want to make other mods compatible which are also using the weapons.ymt file, you will need to merge all changes from the other weapon.ymt (from the other mod) into the weapons.ymt file from C.E.R.R. There are a lot of euphoria related changes in the weapons.ymt file from C.E.R.R so its less work to use this file as a base. Each section which contains changes, is marked with a comment which contains "C.E.R.R REDONE". I also marked all explicit changes with a comment which contains "CERR" (without dots between the letters to make it easy to find). Ive done this only in the weapon section "Cattleman Revolver Single" but its a repeating pattern for all other weapon sections. Just keep all values marked in the "Cattleman Revolver Single" section also in all other weapon sections to keep the C.E.R.R adjustments properly.
Just download Notepad++ and download the "Compare" and the "XML Tools" plugin.
With these plugins, you can collapse all sections by pressing "ALT+0". This makes it easier to keep track of things.
All changes are done only in:
<CWeaponInfoBlob> -> <Infos> -> <Item type="CAmmoInfo"> and <Item type="CWeaponInfo">
By using the compare function, you can compare both files to see the differences and what to take over. After you did this, just copy the changes of the other mod to the weapons.ymt file from C.E.R.R.
I also warmly welcome any creator to make their mods compatible with C.E.R.R!
Have fun!
Other media:
-
 This is a file listing that links to the official dev-c.com website for Scripthook RDR 2. To download this file, follow the instructions on the page that you will be directed to.
Script Hook RDR 2 is the library that allows to use RDR2 script native functions in custom *.asi plugins. Note that it doesn't work in RDR Online, script hook closes RDR 2 when player goes in multiplayer, see details in the readme.
This distrib also includes the latest Asi Loader and Native Trainer.
-
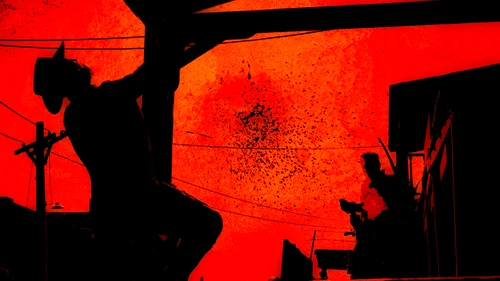 Experience true spaghetti western with this euphoria physics overhaul mod that recreates RDR 1's physics from the ground up and adds a bunch of new additions.
Ever since GTA 5 was released, the euphoria physics have been a major downgrade compared to games like MP3, GTA IV and RDR 1. RDR 2's euphoria physics have improved a ton, but it still feels very repetitive and rather boring.
(If you want to download older versions of W.E.R.O, you can get them in my discord server)
FEATURES:
• No Air Restriction when flying super fast during ragdoll & RDR 1 like falling gravity
• Every weapon and ammo type will affect differently on how the NPC will react (WEAPONS.YMT REQUIRED)
• RDR 1 Falling Reactions. Falling behaviors are fluid and flexible, allowing more variety
• RDR 1 like gunshot reactions. NPCs no longer stumble to the same direction and they spin when shot in the shoulder area. They also react dynamically and gunshot reactions are fluid
• RDR 1 Rolling Reactions. No more rigid movements!
• Advanced InjuredOnGround behaviour. The NPC will reach for the exact wound where they have been shot on instead of reaching for the stomach all the time
• More improved and diversified legshot reactions. NPC's will stumble or fall depending on the bullet/weapon (WEAPONS.YMT REQUIRED)
• Improved On Fire behaviors. NPCs stumble in agonizing pain
• Every single shotgun affects differently on how the NPC will react and the NPCs now spin more violently (WEAPONS.YMT REQUIRED)
• Improved behaviors when bailing out of a wagon
• RDR 1 like knockout reactions
• Improved the NPC reactions caused by arrows and added different behaviors to other arrow types (WEAPONS.YMT REQUIRED)
• Alternative versions! Want the deaths feeling more realistic? Want realism mixed with fun? I got you! Versions such as Instant Drop On Headshot and Fall To Knees On Death (or both combined) will give you exactly that!
• Improved explosion behaviors & distance of flight when near an explosion
Compatible with: Ped Damage Overhaul, Red Dead Offline, WhyEm's DLC, 1899 Firearms and All Shots Cause Bleedouts & basically any mod at this point (excluding mods that use physicstasks.ymt). WILL REQUIRE VERSION.DLL (Lenny's Asi Loader) AND W.E.R.O - AUTOMATIC COMPATIBILITY PATCH, if you have a mod conflicting with W.E.R.O's weapons.ymt file.
A massive thanks to LMS, Bolmin & Senexis for letting me use some of their Red Dead Offline files! Without them, i wouldn't be able to implement different reactions to every weapon and ammo type into this mod
Massive thanks to the following mod authors for letting me add compatibility to their mod/agreeing on a merge:
WickedHorseMan
WhyEm
Maverick
Also huge thanks to AnymYo for a lot of the discoveries made so that I can bring you the most advanced mod to date. A lot of struggle went through making and continuing to make this mod to fit your preferences and to give you more options, so if you like my mod, definitely consider endorsing and perhaps providing feedback and letting me know what you like the most about W.E.R.O. Thanks for downloading! This mod wouldn't be possible without you guys and AnymYo for helping me crack the file and unlock it's full potential! The amount of support you show to this mod definitely means a lot to me and pushes me to continue this project! Thanks again
If you want to, you can:
Join my DISCORD server to stay up to date with latest early update previews and more
Download my wero mod for GTA 5 as well: https://bit.ly/2QZNO6V
For realism, I recommend using the latest Ped Damage Overhaul mod that has added support for euphoria mods and i also recommend using All Shots Cause Bleedouts mod (or any other blood mod like BloodLust by WhyEm or Center Mass by walrus159). Make sure that the EuphoriaModInstalled value is set to 1 in PDO so you can have the best experience possible
and much much more that gives the game a more satisfying feel when killing enemies or falling and rolling
How to install this mod into your game
Just drag and drop the WERO folder in your LML folder. IF the mod doesn't work, make sure you have the latest ScriptHook, ASI Loader by Lenny and a properly installed LML. Make sure you don't have any other mods that have the physicstasks.ymt file.
REQUIRED: LENNY'S MOD LOADER & SCRIPT HOOK
Hope you enjoy this mod!
Thanks to all my Patreon supporters for participating in making this mod better and better:
Jack Fisher
Myles Brown
Catfish
Ole Kristian Tveit
AidenNapalm
Sloot.
Julien Lecleire
UAEXAE
Prodigii
Abizhey
Joe Ray
Roy Luo
NotBatman
joel Davey
Madoks Filek
Pokker-Gamer
El Morty
martin gustafsson
Fer Bueno
Ta'Quan Anthony
Miguel Lefebvre-Sabourin
Rex._.
Tim Tran
Jason Schaefer
Tristan Darden-Lawrence
Braylan
Stephen Killam
Abizhey
Like what I do?
Consider supporting me on Patreon!
- 69,037 Downloads
- 269644 Views
- 6.02 MB File Size
- 30 Comments
 VolaticWolf in MiscUpdated
 -
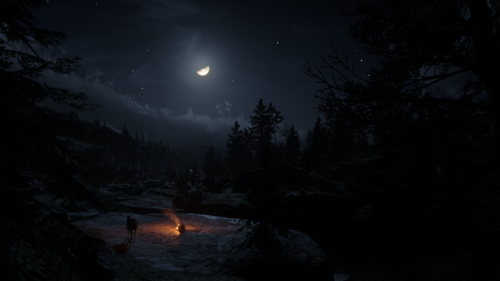 This mod makes the nights darker and more realistic. It also gets rid of the vignette effect.
There are 3 files.
Darker = Very dark (Like the screenshots)
Light = Slightly brighter
Lighter = Even more bright but still much darker than vanilla
Install:
Extract and place the 'dark_nights' folder into 'lml' folder.
Lenny's Mod Loader is required!
-
.thumb.png.cc32062f3cdcf019708021e78c886334.png) # RDR2-Tie-Your-Lasso - Hangman Edition 3.1.0
# RDR2-Tie-Your-Lasso - Hangman Edition 3.1.0
This mod allows you to hitch your lasso, along with the peds tied to it, to the surface your are standing on.
### Installation:
- Download and install AB's ScripthookRDR2
- Make sure you have an asi loader, it usually comes along with Scripthook.
- Remove previous versions of the mod, if you have any installed.
- Copy TieYourLasso.asi to the game's main installation folder.
### How to use:
- Use your lasso just as usual.
- Press the key ("Look Back" key) when on foot to hitch the lasso to the ground.
- After you hogtie a npc, get close to him and then you can attach him to the ground (without lassoing it). You're also able to give him a little push.
- It's also possible to attach the ped you carry to the ground.
- After attaching a ped to the ground, you can wind the rope by standing near it and pressing E or unwinding it by pressing R.
- Hang peds by hogting them and stand under a bridge or a tree. Then press V. Try to keep the player's front area clear because there the rope will be hitched so you can control it.
- Hang peds from gallows: pick up an hogtied ped and get under the gallows' beam. Use the Tie Noose prompt to noose the ped properly.
Then approach the lever and pull it. Supported gallows: Valentine, Strawberry, Rhodes, Blackwater and Saint Denis.
-
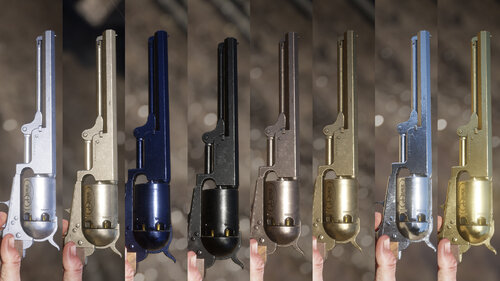 All of RDR2's vanilla gun metals look dull so I decided to rework the material properties and tweak the color tones for all gun metals. Engravings included.
This is a .ymt file so you need the LATEST Lenny's Mod Loader.
INSTALL:
Delete any previous version first!
Extract and drop the 'Shiny Guns' folder into RDR2/lml directory
It should be Red Dead Redemption 2\lml\Gun_Metal_Rework\(ymt and xml files)
-
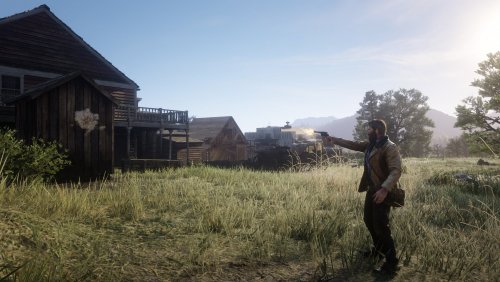 Yet another very simple mod removing the bullet trail when firing weapons. Drag the file into your game folder and enjoy. Please note that you need to have an ASI loader for this mod to work.
I have not tested this mod much (< 5 minutes), so if something else breaks, please let me know.
Please don't upload or redistribute this mod, link here instead so that everyone has the most up to date version.
-
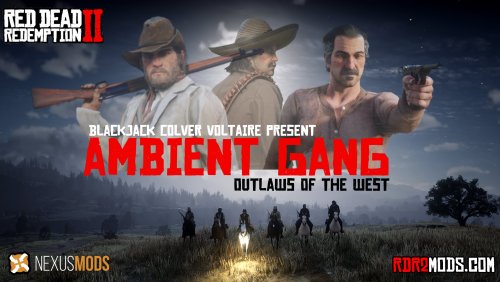 [REQUIRES LENNY MOD LOADER]
Gang Territories:
Lemoyne Raiders - Scarlett Meadows and Bayou NWA, can be seen driving wagon loaded with dynamite or gatling wagon Wapiti Warriors - Ambarino and the West Laramie - Big Valley and Heartlands O'Driscolls - Big Valley and Heartland, rarely appear inside Valentine Saloon. Can be seen driving wagons Del Lobos - New Austin and sometimes in Heartland U.S Army - Cumberland Forest and Grizzlies. Can be seen driving supply wagon or warwagon The Grays - Scarlett Meadows Murfree Broods - Roanoke Ridge Skinner Bros -Tall Trees Bronte Goons - Saint Denis Walton Gang - New Austin, may appear in Armadillo Saloon Bollard Twins - New Austin Williamson Gang - New Austin Treasure Hunters - New Austin Dutch Gang - Tall Trees and Great Plains Night Folks - Rarely across Bayou NWA
RDR Gang Addon:
Added the 5 gangs from the original RDRI Added RDR Bill, Javier and Dutch as new peds, both as NPC and Playable (Playable version has working deadeye and fixed reloading) RDR Bill can be spawned by spawning 'BILL_LEADER' for NPC, 'PC_BILL' for Playable on Rampage custom input RDR Dutch can be spawned by spawning 'DUTCH_LEADER' for NPC, 'PC_DUTCH' for Playable on Rampage custom input RDR Javier can be spawned by spawning 'JAVIER_BANDITO' for NPC, 'PC_JAVIER' for Playable on Rampage custom input Added new outfit variations for RDR Dutch, Bill, and Javier
New Gang Hideout:
Thieves Landing - Populated by Bollard Twins Twin Rocks - Populated by Walton Gang Pikes Basin - Populated by Bollard Twins (Requires Project NA) Removed Del Lobos from Twin Rocks and Thieves Landing (credit to SgtJoe for the script) Pleasance House - Populated by Walton Gang Colter - Populated by Outlaws (This will cause issue with Chapter 1, remove Colter.ymt when starting a new game)
Quality of Life Changes:
Gangs will attack any other gangs that cross their path Special ammo can now be looted from enemy gang and lawmen Increased Del Lobos loot value Added unique names for Laramie Gang, Bronte Goons, Wapiti Warriors, US Marshall, and Saint Denis & Blackwater Police Added Poachers from Online Female riders may rarely spawn Added African-American Gang which was originally mission exclusive NPC Added high-class NPC as Saint Denis stagecoach passengers Added stagecoaches around New Austin Enemy gang will attack you on sight [OPTIONAL] {REDACTED}
Compability:
More Perfect Animals John Marston Animation Overhaul, credit to Dick Hertz
To Install
Copy Ambient Gang - RDR Gang folder to lml
To install Compatible File, simply replace the conflicting file
To install New Gang Hideout, Copy the .ymt files to scenario folder, and copy the .asi script into script folder or the game directory
- 49,592 Downloads
- 178621 Views
- 538.66 kB File Size
- 18 Comments
 Blackjack420 in MiscUpdated
 -
 Description
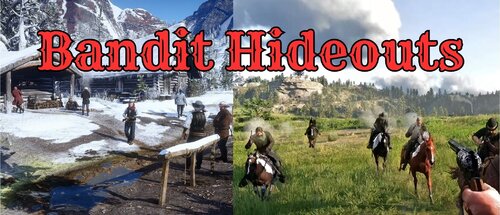
The mod adds 134 new bandit hideouts, 46 ambush points, a bandit posse on horseback that will chase and hunt you,
random roaming bandits on foot, horse, or wagon. Hire up to 9 gunmen at saloons, and fight against zombies.
Players can customize all features through various settings with the included Bandit_Hideouts.ini file.
Bandit Hideouts is a standalone mod it is a highly upgraded version of all the AMJM Transport mod bandit features,
created by crossed99 and Gunter Severloh
////////////////////////////////////////////////////////////////////////////////////////////////////////////////////////////////////////
Warning - Before you install!
For those installing the mod for the first time and want to also play the story/missions.
So you understand what this mod does, it adds 130+ bandit hideouts
and ambush points all over the map, thats everywhere and anywhere except towns (settlements).
That means there are some hideouts that will spawn at story, and mission
locations. There are also ambush points that will spawn bandits that may
interfere with story missions, or while riding to them.
There are also other bandit features like the bandit posse on horseback
that will spawn and attack the player anywhere, anytime.
That means they may come when your in the middle of a story mission, or traveling
with another character from the story during a mission.
If you do play the story and dont like the idea of hideouts, and bandits interfering
during the story and missions.
There is a Bandit_Hideouts.ini file included in the download, it is a configuration file that will
allow you to configure every feature in the mod, this includes being able to disable the mod while ingame,
or disabling certain features, hideouts, and ambush points that could interfere with the story.
As said everything in the mod is configurable, it can be enabled, disabled, or adjusted if it uses numbers.
Do not install the mod if you are not at least in chapter 2 of the story!
Any questions or problems review the articles, or ask on the post tab!
/////////////////////////////////////////////////////////////////////////////////////////////////////////////////////////////////
Features
Bandit Hideouts
The Bandit Hideouts mod adds many new hideouts across the RDR2 map for the player to discover and clear out.
Each hideout ranges in the number of bandits, but you can define in the ini of the mod how many bandits
a hideout will have, what gang will spawn there, and how many reinforcements will come if any,
even if zombies will spawn there instead of bandits.
Hideout Locations Map
The hideout locations map is a high resolution map of the RDR2 world you can download and use it as a reference to
see where all the hideouts, & ambush locations are at in the world.
The legend on the map will tell you what region a hideout or ambush location is in, what gang is at each hideout/ambush
point. All hideouts and ambush points are marked with a colored skull icon to represent a hideout, and an X to represent an ambush location,
both a numbered and listed in the legend accordingly. Icons on the map will indicate their exact locations.
Download
Google Drive: 59.5mb https://drive.google.com/drive/folders/1iLI3Yjmay0uw22f-0MUg0j0__DAEYlGK?usp=sharing
Credits: LittleBigSmoak & Moth-man
Ingame Blips & Icons
Hideout Locations Blip (icon)
A blip (icon) of a house with a skull inside it, will show up at the bottom left corner of your screen
it means a hideout has spawned in and is nearby.
If you pass by a hideout without attacking it, the map blip (icon) will disappear once your out of range of the hideout.
If you attack and clear the hideout then the blip on the map will be removed and your screen until the hideout timer is up.
You can disable this icon if you wish through the included bandit hideouts.ini
Default spawned in hideout map blip
When a hideout spawns in, by default this icon will be showing on the map at the location of the hideout,
the player has 3 other choices of map icons they can use if they want to change it which can be done through the ini
Persistent Blip (icon)
The Persistent blip icon will show on every hideout location on the map whether your near a hideout or not,
if you clear a hideout the blip icon on the map will be removed until the spawn time for that hideout has returned.
The persistent blip icons have their own icon type vs the one on screen. The icon can also be disabled in the ini, and
only the blip icon of a hideout will show on the map when the hideout spawns in.
Types of bandit hideouts
Each bandit hideout can be a house, camp, cabin, abandoned building, cave, mine, fort, ruin, and other places.
Hideouts will spawn bandits in by chance when you're nearby, this means that if set in the Bandit Hideouts.ini
you set the chance to 100 then each time you come close to an area where a hideout would be then bandits
will spawn there for sure, the lower the chance then it becomes random or less.
Cleared hideout message
A small feature by default is if you cleared a hideout a message will show on the screen saying
"You have cleared the hideout!"
you can disable this in the ini if you wish.
Earn money from clearing hideouts!
Yes you read that right, after killing all the bandits in a hideout, you will earn a random
amount of money ranging from $25 - $150
You can customize the amount you want to earn in the ini or set it to 0 to disable it.
Cleared hideout respawn
Once you clear a hideout you can set in the ini the cool down of how long before they respawn again.
If you set the respawn to 1 for example then in one hour from when you cleared the hideout bandits will spawn in again.
Hideout bandit/gang types
Each hideout will be populated with gang members for the area the hideout is in, for example:
Valentine area will have O'Driscoll members or a generic gang. Lemoyne/ Rhodes area will have Lemoyne Raiders, and a generic gang. Annesburg area will have Murfree gang members. Saint Denis area may have either Nightfolk, or a generic gang. Tall Trees area you will see the Skinner brothers gang. New Austin area you will see the Del Lobo gang. Grizzlies West (snow region) area will have a generic gang. Grizzlies East (snow region) area will have a generic gang. Guarma will have the Cuban Army and Nightfolk.
Disable individual Hideouts and Ambush points
This feature allows the player to disable any individual hideout and ambush point in the mod through the included ini
all you need to do is locate the hideout you want to disable through the downloadable map and then change the number from a 1 to a 0.
There is a list for both hideouts and ambush points in the ini.
Custom Gangs in hideouts
Each hideout listed in the ini for the Disable Individual Hideouts list can either be disabled, or changed so it spawns another gang.
The gang types to choose from are the following:
// Gang Type Reference //
Generic gang - 7 Murfree Brood - 8 Lemoyne Raiders - 9 O'Driscoll Boys - 10 Skinner Brothers - 11 Del Lobo gang - 12 Nightfolk -13 Cuban Army -14 Ku Klux Klan - 15 Wapiti Warriors - 16 United States Army - 17 Laramie gang - 18 Micah's gang - 19 Angelo Bronte's Mob - 20 Cornwall Goons - 21 Braithwaites - 22 Gray Family - 23 Foreman Brothers - 24 Bounty Hunters - 25 Pinkertons National Detective Agency - 26 Chelonians - 27 Vampires - 28 Here is an example hideout in the ini that is listed in the Disable Individual Hideouts list:
ENABLE_ABANDONED_FACTORY=1
- With the setting at 1 the hideout spawns its default gang.
- With its setting at 0 the hideout is disabled and wont spawn.
- If the number is changed to a number from either 7-28 seen in the list above, then that hideout will spawn that gang based on the number.
For example if we changed the number to say
ENABLE_ABANDONED_FACTORY=18
then the Laramies gang will spawn at that hideout instead of the default gang.
Here is an article on how this works in more detail with a video demonstration/guide
https://www.nexusmods.com/reddeadredemption2/articles/435
Custom Gangs in Regions
A feature where you can define what gangs will spawn in what regions for hideouts, a list in the ini of all the regions
or areas on the map, each region has a default number, the number represents what gang will spawn in that region.
From the reference in the ini, you can change the number for the region for whatever gang you want to
spawn at the hideouts in those regions. This feature is disabled by default.
Exact or random number of bandits in a hideout
The amount of bandits you can encounter in a hideout will be defined in the Bandit Hideouts.ini
there you can set the minimum and maximum numbers you will encounter, this is for all hideouts.
If you set the number for both min/max the same you will get that exact amount, if you set the number to
exceed the default random min and max then the extra bandits will come as reinforcements.
Bandit Reinforcements
Bandits at hideouts can call in reinforcements, they will show up on horses and or on foot.
Reinforcements is set by chance in the ini, the higher the percentage (chance) then reinforcements will show.
Reinforcements also has a setting where you can define how many bandits will come, and if you only wanted
bandits on horses, or foot, or both, you also can disable reinforcements from coming in the ini.
Bandit Spawn Amount
In the included bandit hideouts.ini there is a list called spawn amount, this list will list every hideout/ambush point
and allow you to set a specific number that you want to spawn at a or each individual hideout.
This lets you customize hideouts based on how you want to play.
Each hideout and ambush point has a default or base number of spawn points you can use this article reference
to get the base default number of each hideout: LINK
Knowing the base number of a hideout or ambush point will tell you how many bandits can be spawned there.
For example: If you chose a hideout that had 10 bandits spawn positions that means if you set the spawn amount
to say 5 then only 5 bandits would spawn. If you set the number to say 15 then the extra 5 bandits would spawn
at the reinforcement spawn points.
The would respawn at the reinforcement spawn points because there are only 10 available spawn points
at the hideout. The same applies to ambush points.
Bandits will chase the player
Bandits will chase you if you ride off or run away after attacking their hideout.
Bandit Ambushes
Ambushes are not dynamic they are built the same as hideouts and are at set locations.
Each ambush location can vary between 2-6 bandits that will attack you on foot if you enter an ambush location.
If you run away on foot or on horse the bandits at the ambush location will chase after you either on foot or get on a horse.
Ambush locations are marked on the downloadable map with an X
Enable/Disable individual Ambush Points
This feature introduced in v1.18 gives the player the option to enable or disable an individual ambush location through the included ini,
all you need to do is refer to the map linked for download and decide which ambush location you want to disable for whatever reason,
you open up the ini file, locate the ambush point in the list, and just set the setting accordingly.
Ambushes can also be customized to have a certain amount of bandits spawn using the spawn amount setting.
Bandit Posse on Horseback
As players explore the game world, they will randomly be attacked by bandits on horseback, these encounters can happen at any time.
In the Bandit Hideouts.ini you can define how often (how many ingame hrs) bandits will attack,
and a minimum and maximum number of bandits on horseback that will attack, you can disable this feature in the ini if you want to.
Random Roaming Bandits
Bandits roaming the world, they will spawn in the area you are in and will be bandit/gang members
from that area so if your in Valentine Area then you might see a small group of O'Driscolls wandering around.
These bandits may be on foot, on horseback alone, in a group, or on a wagon, or both.
You can also set in the ini if they attack you on sight or not, and set how often they will spawn.
Hired Gunmen
Players can hire up to 9 gunmen to fight alongside them, to do so just talk to the barkeep in any saloon.
These hired guns will assist the player in combat, making it easier to take on large groups of bandits or zombies.
You can hire up to 9 gunmen at a time. You can hire a random gunmen with their own gear and weapons. You can customize what they wear, and the weapons they carry. Set how much it costs to hire a gunmen. Hired Guns will not fight while in a town (can change this in the ini). Story characters are also available. You can use the 'Rest & Recover' option in the menu that will teleport your hired guns to you in case you got separated, they'll be cleaned and their hats and weapons will be recovered if they lost them.
They automatically go into "sneak and hold fire" mode while you're crouching / sneaking outside of combat. If the "Allow revive" option is enabled, instead of dying they will go down into an injured state and be revived by crouching close to their head until the 'Help' prompt fills up (10 seconds).
Using the 'Wait for signal' command will make them stay and don't do anything until you signal to them by whistling. The 'Ride with me' command will prevent them from spawning in their own horse. If there's another free horse around they'll use that, but if not they'll ride with you on your horse.
Commands menu:
You can also give commands to them through their command menu, Numpad 1-9 keys by default.
Hired Gunmen Voice Lines
When you tell your hired gunmen to stay or follow, Arthur or John will actually say out loud those commands,
and when your crouched and you tell your gunmen to stay Arthur or John will say it in a quiet voice.
This feature can also be enabled and disabled in the ini, and is enabled by default.
The command menu has some extra commands:
Aim at person while the menu is up: Attack target, lasso target. Aim at dead / hogtied person: pick up target. Aim at horse: put carried body on horse. Aim at downed hired gun: help up (it'll take them the same amount of time as for you). Press numpad 0 to make all hired guns stay / follow Zombies
As if bandits weren't enough to deal with, the mod also adds zombies to the game world.
Disabled by default, you can enable them in the Bandit Hideouts.ini
There are some options in the ini to customize them, like the following:
Spawn frequency - this is how much more or less you will see of them. Day/night detection - this is a setting where you can set if the zombies detect you. Zombie health - this is how much a zombie can take before you kill them. Min/max spawn amount - this will be the group size of how many groups of zombies. Min/max number - number of zombies that can spawn during day or night. Min/max spawn time - how often they will spawn in seconds. Zombies burst into flames upon dieing. Zombie lairs - this will change all the bandit hideouts to zombie lairs, so instead of bandits spawning, zombies will.
Customization
All of the features in the mod can be customized by editing the Bandit Hideouts.ini file.
Each setting in the ini has a description on what it does and how to enable/disable it or adjust it.
Open the ini file with notepad to edit it, also run it as administrator if you are being denied access.
Installation
Move the following files:
Bandit_Hideouts.asi Bandit_Hideouts.ini Bandit_Hideouts_CustomPeds.txt to your RDR2 directory which can be found here:
C:\SteamLibrary\steamapps\common\Red Dead Redemption 2
Requirements
Scripthook by Alexander Blade is required to run the mod.
https://www.dev-c.com/rdr2/scripthookrdr2/
If AB Scripthook gives you issues with the mod then try using
ScriptHookRDR2 V2
https://www.nexusmods.com/reddeadredemption2/mods/1472
Credits
Crossed99 for his help and support, and patience in helping me create and update this version of his great mod!
LittleBigSmoak & Moth-man for their help in creating the Bandit Hideouts map showing all the locations
of the hideouts, and sorting them based on color and gang.
Bandit Hideouts Youtube Channel
Gunter Severloh RDR2
Check out the Bandit Hideouts Youtube Channel for gameplay, guides and how to videos on the mod.
-
 Available for Download :
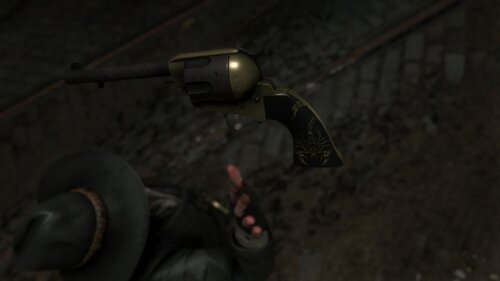
Legendary Grip Alph Grip Carvings V.2 Grip Carvings V.3 Hand of God Grip... you know the one Lenny's Gun Grip Scorpion Gun Grip
i made this as a test and for my playthrough and decided to share.
I do not accept requests or suggestions. in fact I may not even fix bugs.
Installation
Lenny's Mod Loader
If the mod has a instal.xml in it then extract the mod in your lml folder
otherwise drop all files in the Stream folder; you need to create one if you don't have it already
-
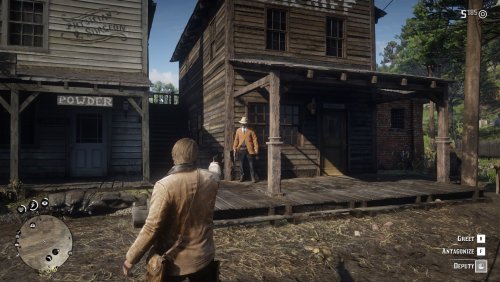 Since it seems that a lot of people still want this and no one bothers to make it, here is a simple mod which removes the hitmarker when shooting. Drag the file into your game folder and enjoy. Please note that you need to have an ASI loader for this mod to work.
I have not tested this mod much (< 5 minutes), so if something else breaks, please let me know.
Disable any reticle color change
In the .ini you can set "DisableReticleChanges" to true to disable any reticle color changes.
Please don't upload or redistribute this mod, link here instead so that everyone has the most up to date version.
-
.thumb.png.c2d473bfbddd5f01c361323c0ed93dc4.png) This mod skips the legal menu and the main menu and puts you directly into story mode. Since this mod tells the game to replace certain files, Red Dead Online is disabled when you install this mod to prevent the risk of being banned due to modified game files. Any attempt to connect to Red Dead Online will redirect you to story mode. Attempting to open the online menu in the pause menu will cause you to get softlocked.
This mod skips the legal menu and the main menu and puts you directly into story mode. Since this mod tells the game to replace certain files, Red Dead Online is disabled when you install this mod to prevent the risk of being banned due to modified game files. Any attempt to connect to Red Dead Online will redirect you to story mode. Attempting to open the online menu in the pause menu will cause you to get softlocked.
NOTE: When the loading bar disappears, you will be on a black screen for a few seconds. The game is waiting for social club to sign you in. Story mode will start loading when you sign in.
Installation:
1. Download the zip file from the downloads page.
2. Extract the x64 folder in the zip file.
3. Put the x64 folder in your game directory.
4. The file explorer will say that there is a x64 folder in the game directory and if you want to merge the folder.
5. Click yes.
6. Done!
NOTE: The rockstar launcher may show a scary warning saying that there are modified files and that you may get banned for using online services with the modified files. Don't worry, this mod blocks you from going into online mode.
Uninstallation:
1. Go to your game directory.
2. Open the x64 folder
3. Delete the main_and_legal_menu_skip_data folder.
4. Open the data folder
5. Delete the startup.meta file.
6. Done!
Components:
These files can be found in x64/main_and_legal_menu_skip_data in the game directory.
legal_screen_patch.ymt - This skips the legal screen. Delete this file if you want to disable this. main_menu_patch.ymt - This skips the main menu and enables protections that prevent you from going online. Delete this file if you want to disable this.
Disclaimer:
I am not responsible if you get banned online for using this mod with protections that prevent you from going online being disabled in any way.
- 40,637 Downloads
- 242225 Views
- 2.26 kB File Size
- 10 Comments
 WesternGamer in MiscUpdated
 -
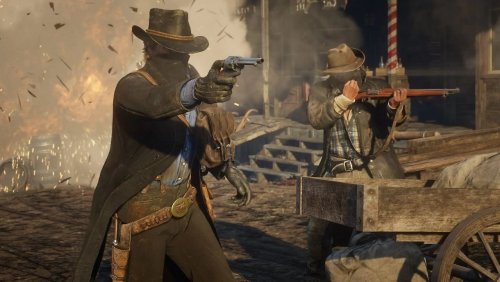 If you've ever pointed a gun at a bank teller in vanilla and then been highly disappointed that nothing happens, this mod is for you.
Now you can force them to open the vault, after which you can silently crack or blow open the safes containing lootable money and gold!
All 5 banks in the game are supported:
- Valentine
- Rhodes
- Armadillo *
- Saint Denis
- Blackwater
* Requires the mod Project New Austin.


